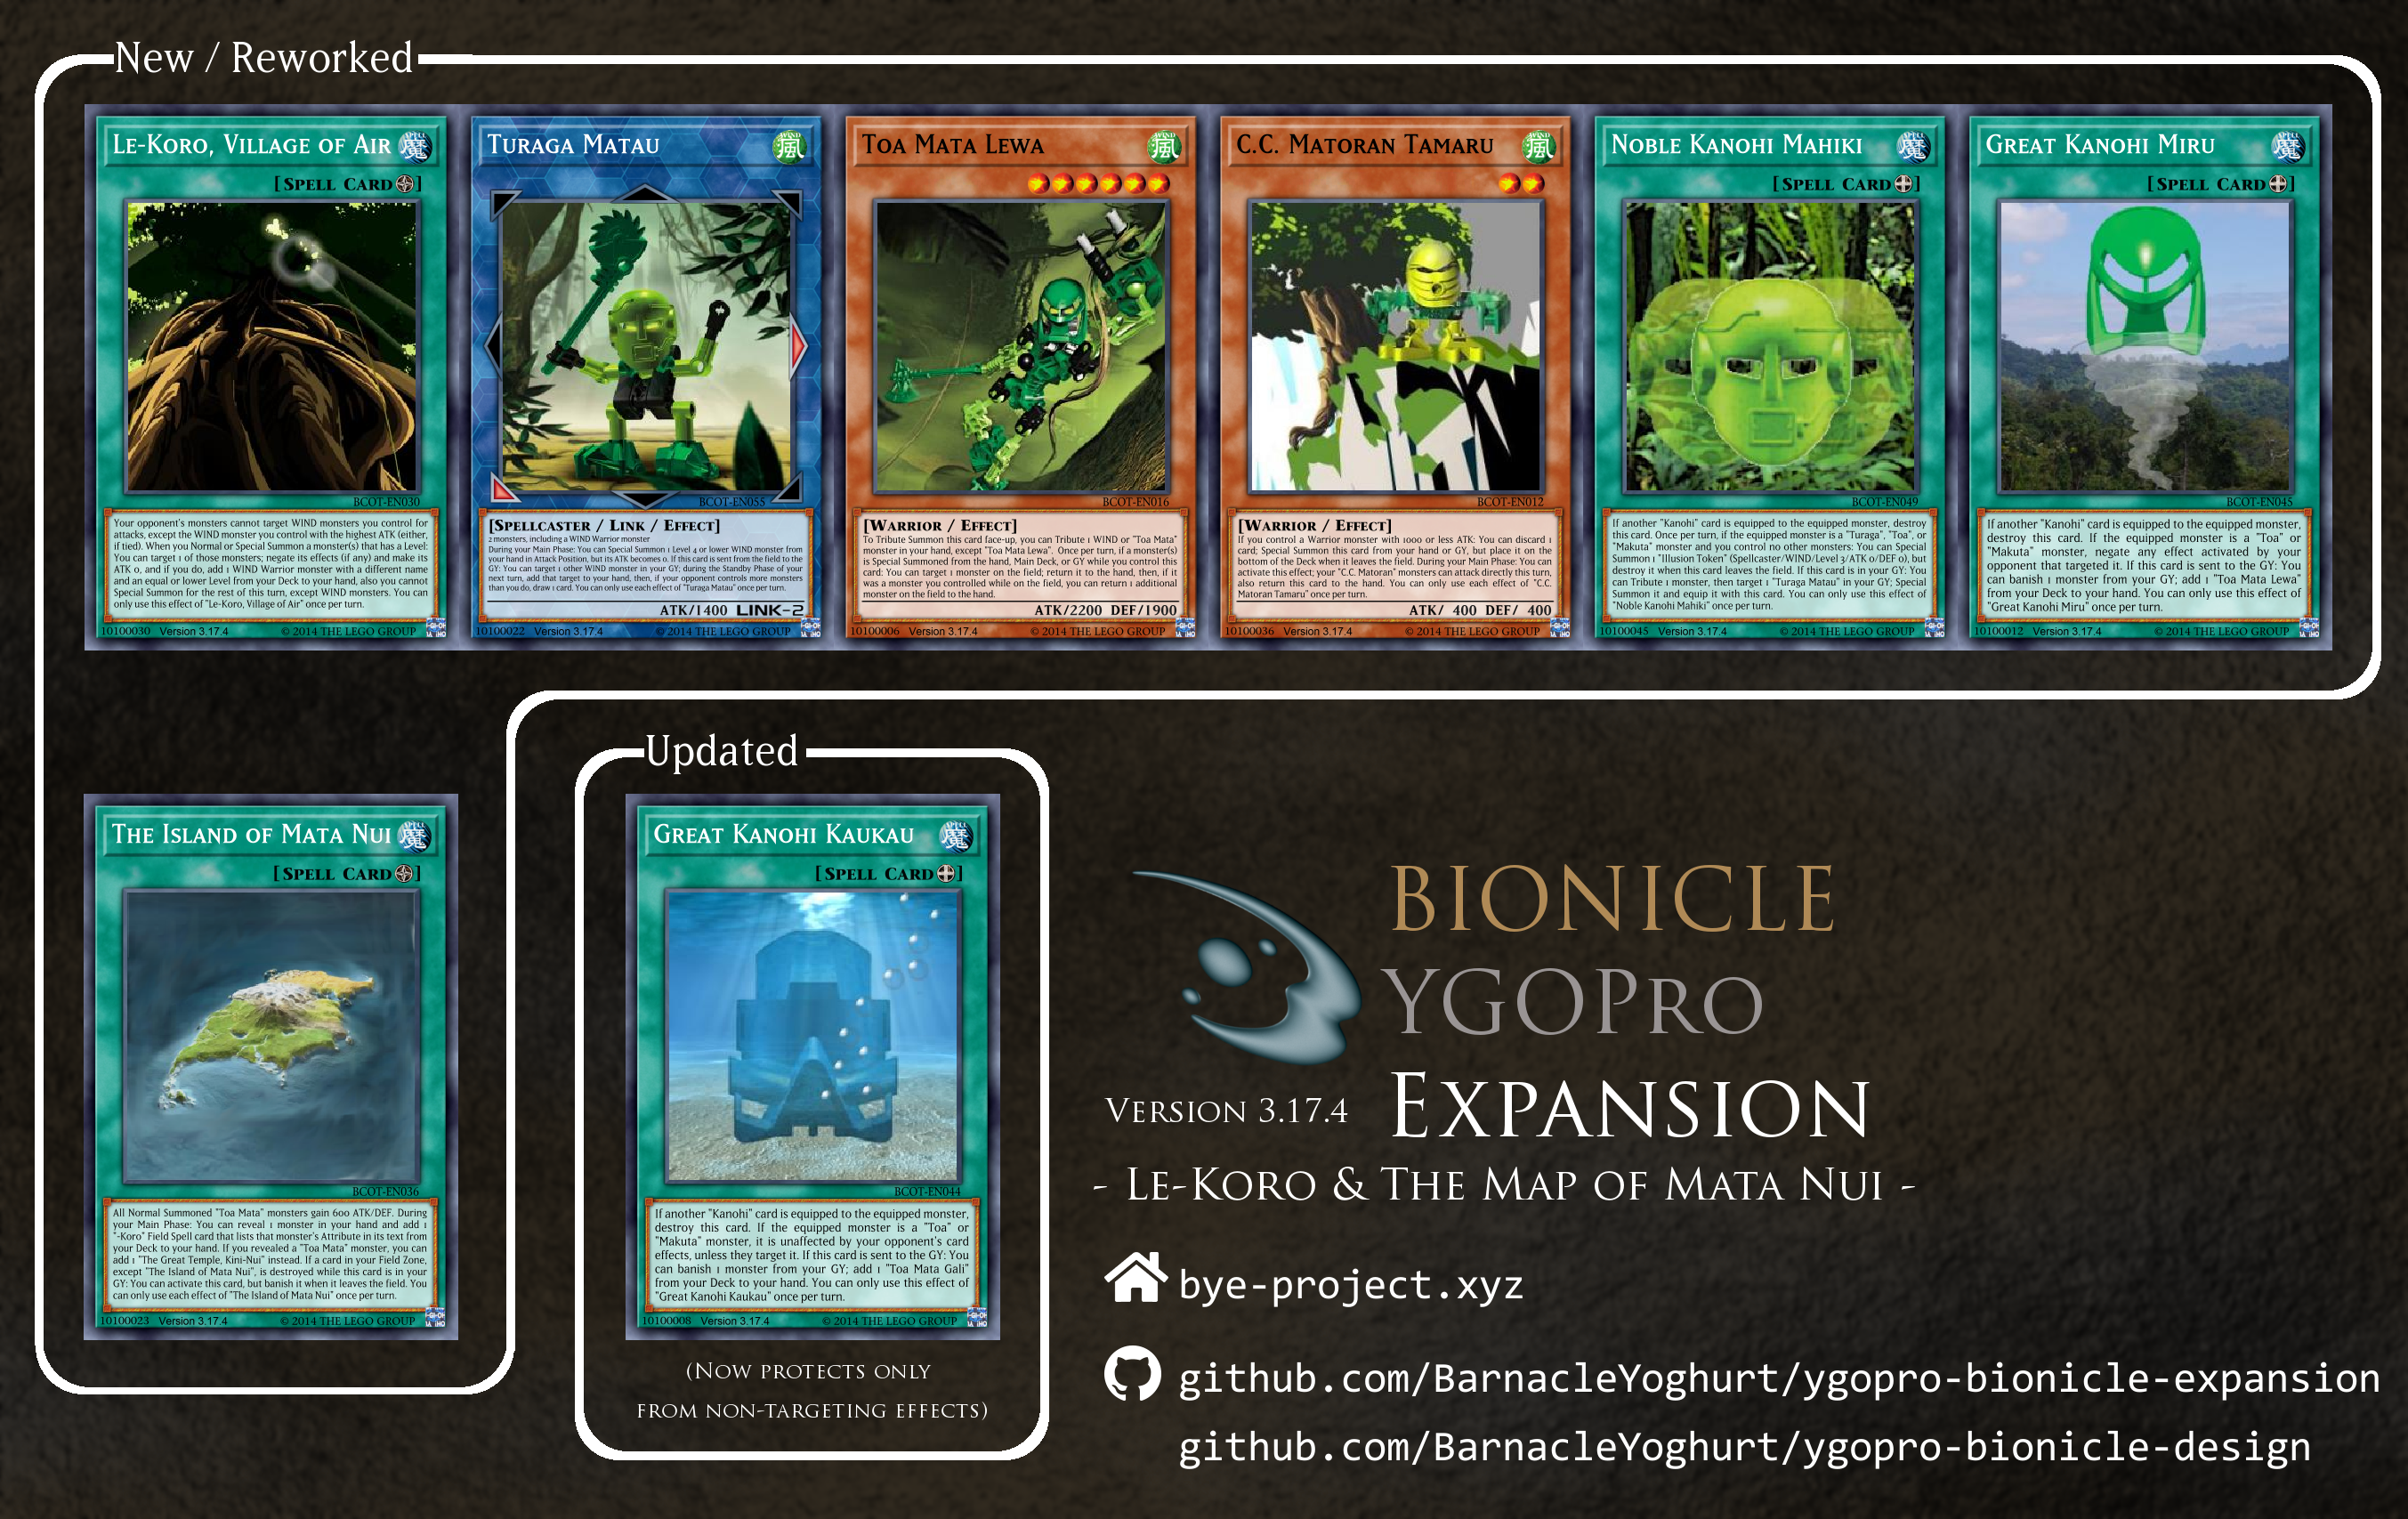
This month’s release is a double feature: On the one hand, we have Le-Koro, the final village to receive its overhaul with a dedicated strategy – all detail on this can be found in the Theme Guide. On the other, we have one additional card that boosts the consistency of all the Koro-focused decks I’ve been putting together for the past few months: The Island of Mata Nui. With all six villages and the island itself now accounted for, I have also written an overall Theme Guide for this archetype of Field Spells, so just check there to see how exactly all of this works.
In the “Updated” section, there’s just one change to the Kanohi Kaukau that I may have mentioned before. Rather than protecting from Spell/Trap effects, it now protects from all non-targeting effects instead.
If another “Kanohi” card is equipped to the equipped monster, destroy this card. If the equipped monster is a “Toa” or “Makuta” monster, it is unaffected by other Spell/Trap effects. If this card is sent to the GY: You can banish 1 monster from your GY; add 1 “Toa Mata Gali” from your Deck to your hand. You can only use this effect of “Great Kanohi Kaukau” once per turn.
Bionicle: Coming of the Toa (v3.14.3)
v3.17.4
Great Kanohi Kaukau
Equip Spell
If another “Kanohi” card becomes equipped to the equipped monster, destroy this card. If the equipped monster is a “Toa” or “Makuta” monster, it is unaffected by your opponent’s card effects, unless they target it. If this card is sent to the GY: You can banish 1 monster from your GY; add 1 “Toa Mata Gali” from your Deck to your hand. You can only use this effect of “Great Kanohi Kaukau” once per turn.
Bionicle: Coming of the Toa (v3.21.6)
This was done in conjunction with the Le-Koro release changing the Miru from something that avoids monster effects to something that avoids targeting effects – now they complement each other just as before, and their respective original ideas (protection from environmental conditions vs avoiding stuff by floating out of range) are, in my opinion, represented better than ever.
Finally, it has occured to me that design notes should probably be more separated from theme guides than they have been so far, so for the first time ever I’ll just do them right here in the release post as a quick list.
This month I had to split the time allotted to this project between more things than usual (Le-Koro, updating the other Koro strategies with Mata Nui, an additional video, and building the card viewer plugin for the site). Therefore I wasn’t able to do quite as much experimenting and fine-tuning as I would have otherwise, and in particular Matau’s delayed floating might see some changes in the future. There’s some usability concerns with the current version (like having no explicit indication of what the target is in EDOPro), and I’m not sure if it wouldn’t be better to have the bonus in case you’re behind on field presence be something like reducing the stats of the opponent’s monsters to lessen the hurdle of a comeback rather than just giving you an extra card.
The Mahiki unfortunately had to lose one of its effects from the old version (making the created Token the only available attack target) to keep the text length within reasonable bounds. Maybe I’ll add it back in as a separate card, but I can’t imagine it being very useful.
Lewa is the second Toa Mata after Kopaka to receive a stat change, in this case from 2500 ATK/1400 DEF to 2200 ATK/1900 DEF. This way, the team is spread over the whole ATK range from 2000 to 2500 without any duplicates, and I think it makes sense for the one with the removal effect to have comparatively low utility as a beatstick. I also briefly considered making him 2300 ATK and putting the 2200 on Gali instead, but being able to easily run over Gameciel seemed more valuable to the Ga-Koro strategy.
And with all that said, see you in the next release! Maybe it’s finally time for the Toa Mata to get their Extra Deck back.
The -Koro strategies are a series of six themes centered around the Field Spells belonging to the archetype of the same name. Each of them combines an Attribute with a specific playstyle and encourages the use of the matching Turaga, as well as Matoran and other Warriors of the correct Attribute. To learn more about the individual strategies, refer to the dedicated Theme Guides linked below.
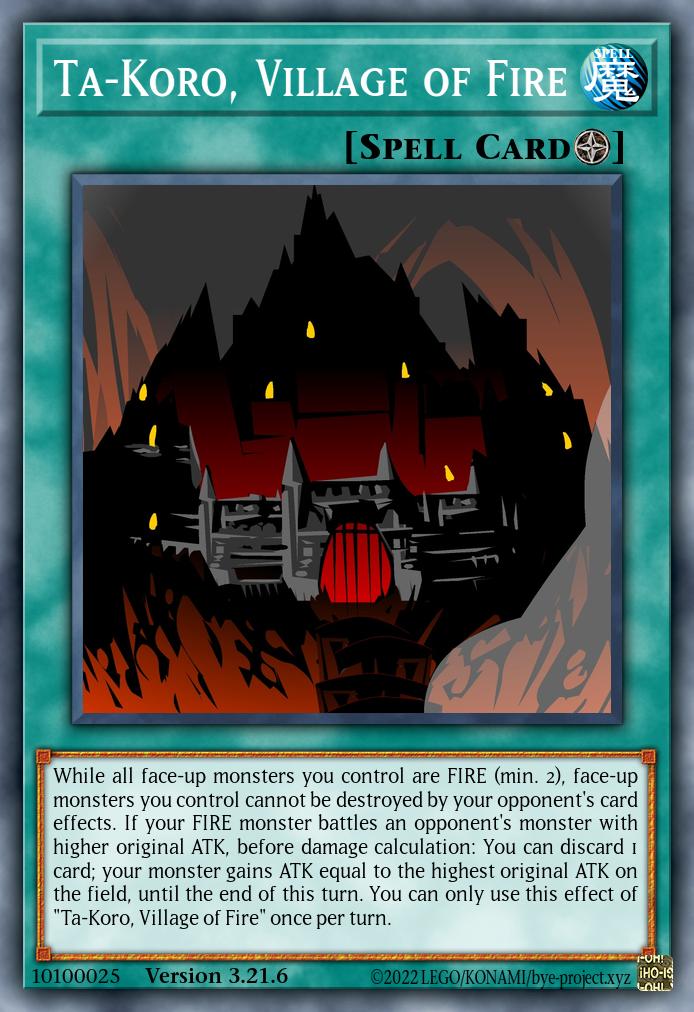
While all face-up monsters you control are FIRE (min. 2), face-up monsters you control cannot be destroyed by your opponent’s card effects. If your FIRE monster battles an opponent’s monster with higher original ATK, before damage calculation: You can discard 1 card; your monster gains ATK equal to the highest original ATK on the field, until the end of this turn. You can only use this effect of “Ta-Koro, Village of Fire” once per turn.
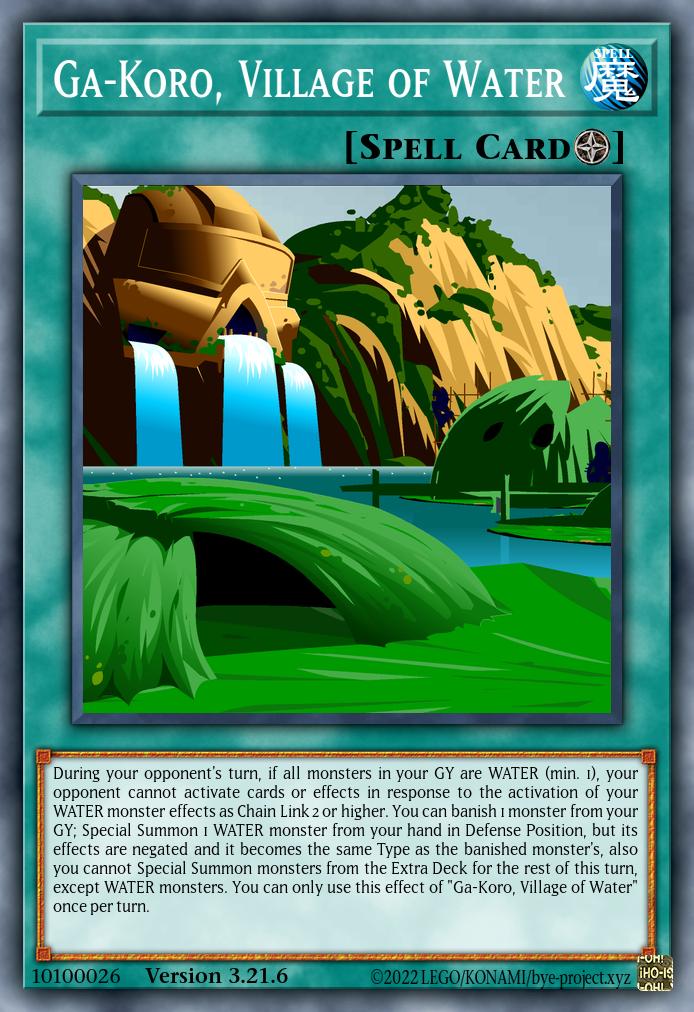
During your opponent’s turn, if all monsters in your GY are WATER (min. 1), your opponent cannot activate cards or effects in response to the activation of your WATER monster effects as Chain Link 2 or higher. You can banish 1 monster from your GY; Special Summon 1 WATER monster from your hand in Defense Position, but its effects are negated and it becomes the same Type as the banished monster’s, also you cannot Special Summon monsters from the Extra Deck for the rest of this turn, except WATER monsters. You can only use this effect of “Ga-Koro, Village of Water” once per turn.
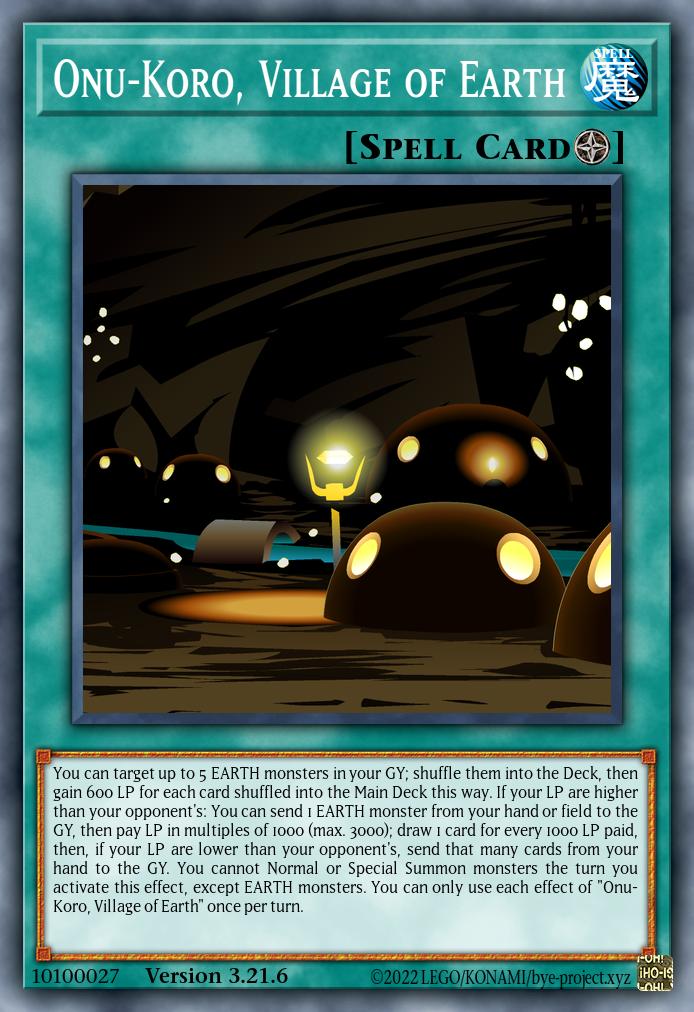
You can target up to 5 EARTH monsters in your GY; shuffle them into the Deck, then gain 600 LP for each card shuffled into the Main Deck this way. If your LP are higher than your opponent’s: You can send 1 EARTH monster from your hand or field to the GY, then pay LP in multiples of 1000 (max. 3000); draw 1 card for every 1000 LP paid, then, if your LP are lower than your opponent’s, send that many cards from your hand to the GY. You cannot Normal or Special Summon monsters the turn you activate this effect, except EARTH monsters. You can only use each effect of “Onu-Koro, Village of Earth” once per turn.
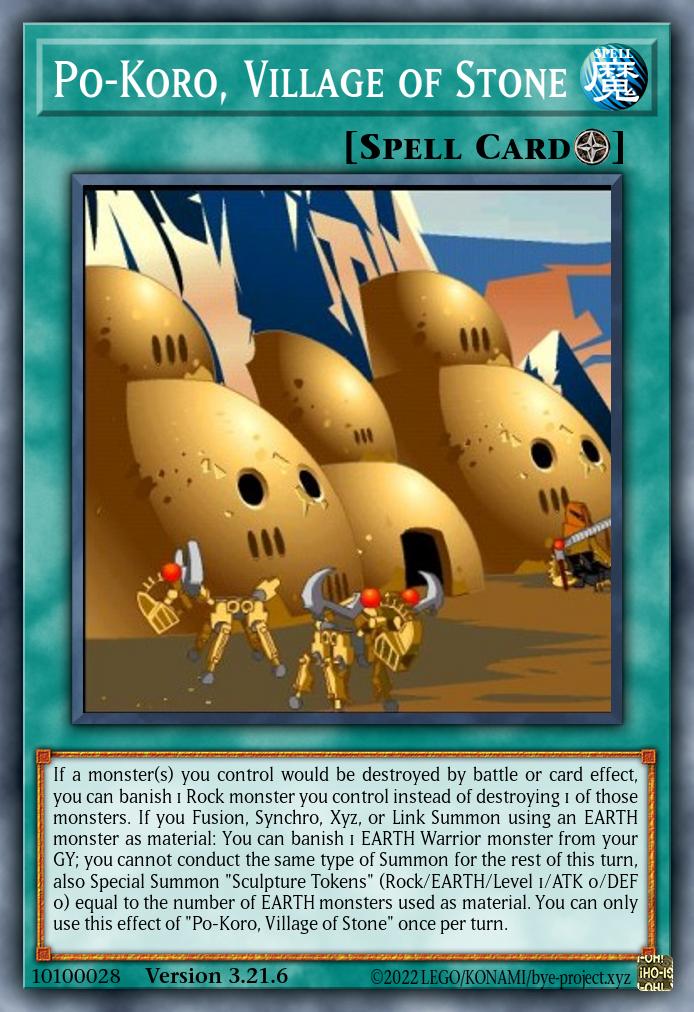
If a monster(s) you control would be destroyed by battle or card effect, you can banish 1 Rock monster you control instead of destroying 1 of those monsters. If you Fusion, Synchro, Xyz, or Link Summon using an EARTH monster as material: You can banish 1 EARTH Warrior monster from your GY; you cannot conduct the same type of Summon for the rest of this turn, also Special Summon “Sculpture Tokens” (Rock/EARTH/Level 1/ATK 0/DEF 0) equal to the number of EARTH monsters used as material. You can only use this effect of “Po-Koro, Village of Stone” once per turn.
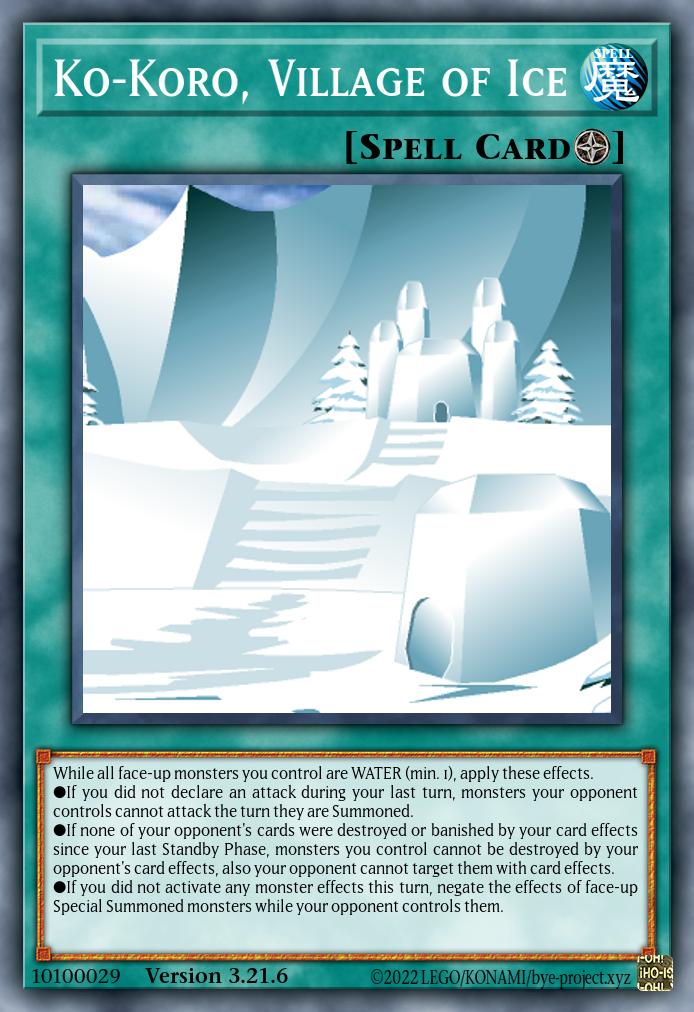
While all face-up monsters you control are WATER (min. 1), apply these effects. ●If you did not declare an attack during your last turn, monsters your opponent controls cannot attack the turn they are Summoned. ●If none of your opponent’s cards were destroyed or banished by your card effects since your last Standby Phase, monsters you control cannot be destroyed by your opponent’s card effects, also your opponent cannot target them with card effects. ●If you did not activate any monster effects this turn, negate the effects of face-up Special Summoned monsters while your opponent controls them.
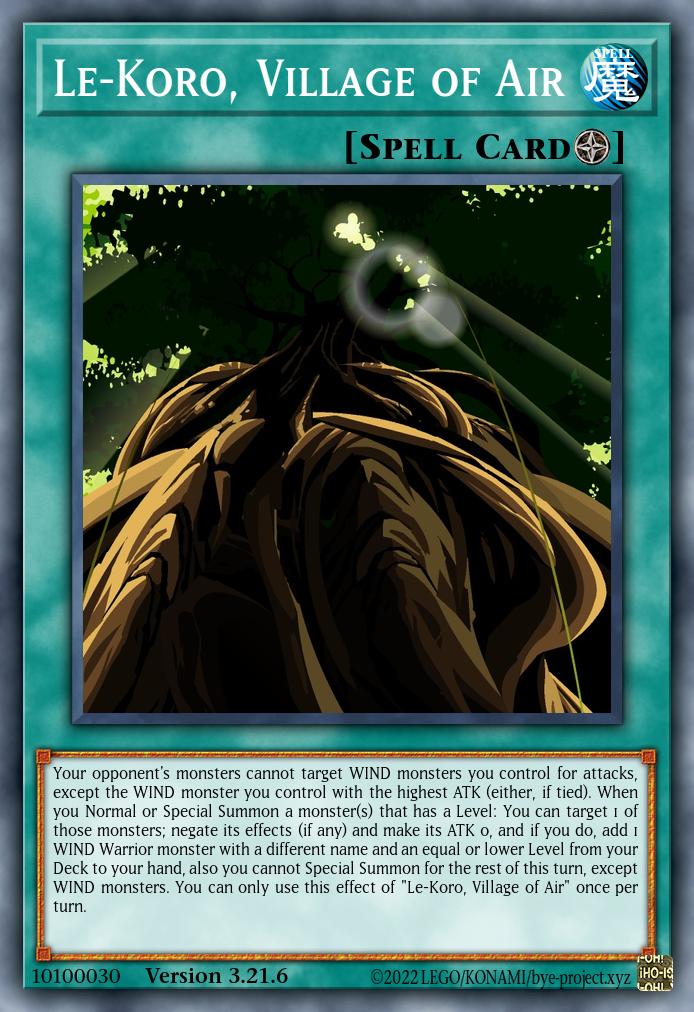
Your opponent’s monsters cannot target WIND monsters you control for attacks, except the WIND monster you control with the highest ATK (either, if tied). When you Normal or Special Summon a monster(s) that has a Level: You can target 1 of those monsters; negate its effects (if any) and make its ATK 0, and if you do, add 1 WIND Warrior monster with a different name and an equal or lower Level from your Deck to your hand, also you cannot Special Summon for the rest of this turn, except WIND monsters. You can only use this effect of “Le-Koro, Village of Air” once per turn.
Bionicle: Coming of the Toa (v3.21.6)
Meanwhile, this page right here will go over some cards contained in the expansion that can be inserted into any of these six strategies to supplement its respective Turaga, assortment of Matoran, and possibly even Toa.
First of all, we have the one of the few support cards that qualify the -Koro Field Spells for the rank of an archetype rather than a simple series or theme.
The Island of Mata Nui
Field Spell
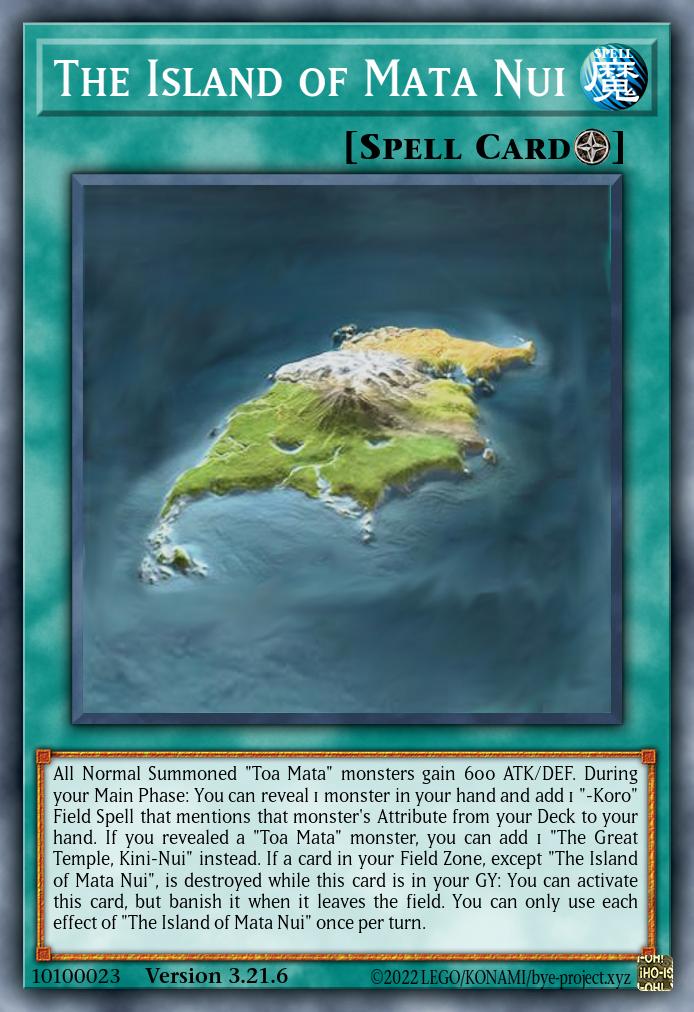
All Normal Summoned “Toa Mata” monsters gain 600 ATK/DEF. During your Main Phase: You can reveal 1 monster in your hand and add 1 “-Koro” Field Spell that mentions that monster’s Attribute from your Deck to your hand. If you revealed a “Toa Mata” monster, you can add 1 “The Great Temple, Kini-Nui” instead. If a card in your Field Zone, except “The Island of Mata Nui”, is destroyed while this card is in your GY: You can activate this card, but banish it when it leaves the field. You can only use each effect of “The Island of Mata Nui” once per turn.
Bionicle: Coming of the Toa (v3.21.6)
The Island of Mata Nui acts as an additional searcher for your Field Spell(s) and returns from the GY to the field should one get destroyed, allowing you to simply add another copy. The condition is having a monster of the matching Attribute in your hand to act as a “guide” to the village, but that should usually be the case in a properly built -Koro deck. The effects that support the Toa Mata with a stat boost and a search for a different card are actually relevant in these strategies too, as we will see with the following cards.
The Great Temple, Kini-Nui
Field Spell
During your Main Phase, you can Normal Summon 1 “Toa Mata” monster in addition to your Normal Summon/Set. (You can only gain this effect once per turn.) If a “Toa” monster(s) is Tributed for the Tribute Summon of a “Toa Mata” monster and sent to your GY: You can target 1 of those monsters; Special Summon it in Defense Position, but banish it when it leaves the field. During the End Phase: You can destroy this card, and if you do, Special Summon 1 Level 1 Rock monster with 0 ATK/DEF from your Deck. You can only use each effect of “The Great Temple, Kini-Nui” once per turn.
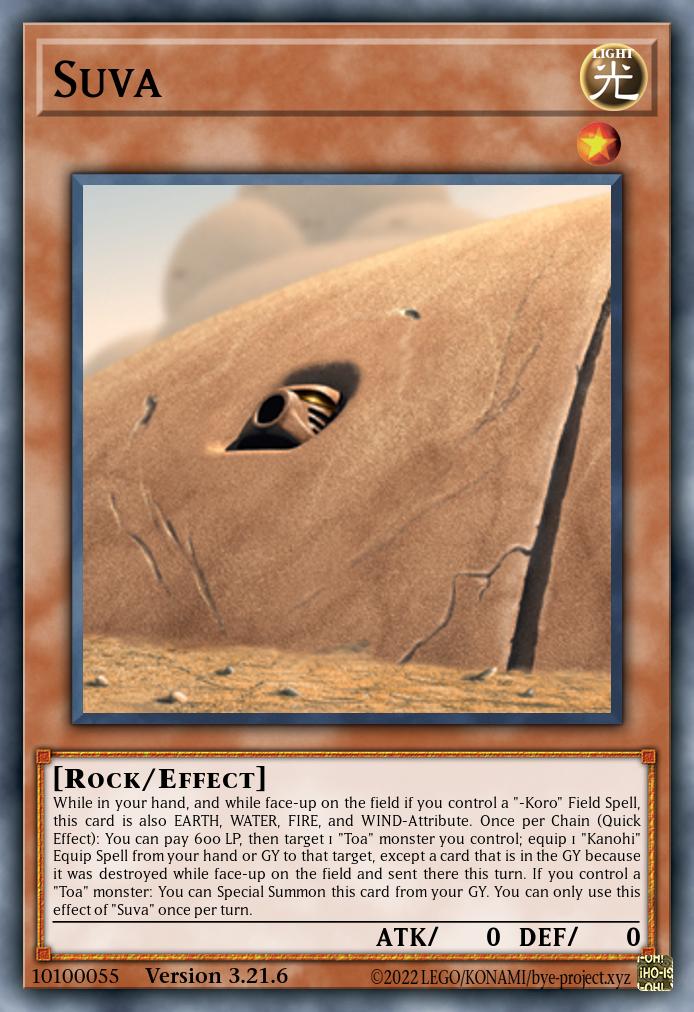
While in your hand, and while face-up on the field if you control a “-Koro” Field Spell, this card is also EARTH, WATER, FIRE, and WIND-Attribute. Once per Chain (Quick Effect): You can pay 600 LP, then target 1 “Toa” monster you control; equip 1 “Kanohi” Equip Spell from your hand or GY to that target, except a card that is in the GY because it was destroyed while face-up on the field and sent there this turn. If you control a “Toa” monster: You can Special Summon this card from your GY. You can only use this effect of “Suva” once per turn.
Bionicle: Coming of the Toa (v3.21.6)
Kini-Nui and Suva, together with the Toa Mata of the respective Attribute and their matching Kanohi, form a little package that can be inserted into any -Koro deck to get an additional main deck boss with relatively low investment. The extra Normal Summon from Kini-Nui means a Toa in your hand can be brought out without hindering your regular plays, while the Suva’s effects to count as almost all Attributes in the hand and revive itself as long as you control a Toa Mata makes it free Tribute fodder. Kini-Nui can also blow itself up in the End Phase to get a Suva from the Deck to the field, which will conveniently trigger Mata Nui in the GY and provide you with a 600 ATK/DEF boost to your Toa. And of course, the Suva gives you access to any Kanohi in the GY while it is on the field, equipping the Toa of your choice with additional useful abilities.
So there is some clear payoff to running these, but you should also keep in mind that these cards do essentially nothing if they happen to be in your hand without a Toa in sight. The Suva gains its multi-attribute effect on the field as well if you control a Koro, which makes it potentially usable as a combo piece, but that’s about it. It may be a good idea to base the degree to which you commit to this Toa Mata package on the ease with which your Deck can make Isolde, as that is the easiest way to ensure you have the Toa in hand and thus everything else live.
Showcase
A Yu-Gi-Oh Trip Across Mata Nui
Also check the individual theme guides linked above for more in-depth testing videos.
In accordance with the frankly inexplicable ordering of Bionicle’s six main elements I mentally insist on, Le-Koro is the final village to receive its updated strategy. As usual, the guiding principle is that of the village itself, and in this case that means “Faith”.
Le-Koro, Village of Air
Field Spell
Your opponent’s monsters cannot target WIND monsters you control for attacks, except the WIND monster you control with the highest ATK (either, if tied). When you Normal or Special Summon a monster(s) that has a Level: You can target 1 of those monsters; negate its effects (if any) and make its ATK 0, and if you do, add 1 WIND Warrior monster with a different name and an equal or lower Level from your Deck to your hand, also you cannot Special Summon for the rest of this turn, except WIND monsters. You can only use this effect of “Le-Koro, Village of Air” once per turn.
Bionicle: Coming of the Toa (v3.21.6)
Now what does Faith mean here and how does it align with the effects listed above? Well, according to the BS01 page, “Faith is trusting your allies, and trusting that all will end well” – a definition whose actual origin I cannot verify because I never got past that annoying loadscreen bug in MNOG2 myself. Regardless, it’s what I went with, and so we have one effect to allow weaker WIND monsters safe existence on the field by trusting in their more powerful allies, and another to search a WIND Warrior by disabling a monster on summon, in the faithful belief that this newly arrived ally will cause all to end well. The first of these comes up occasionally (especially against AIs who have no idea how to deal with it), while the second forms an essential enabler for like half your plays.
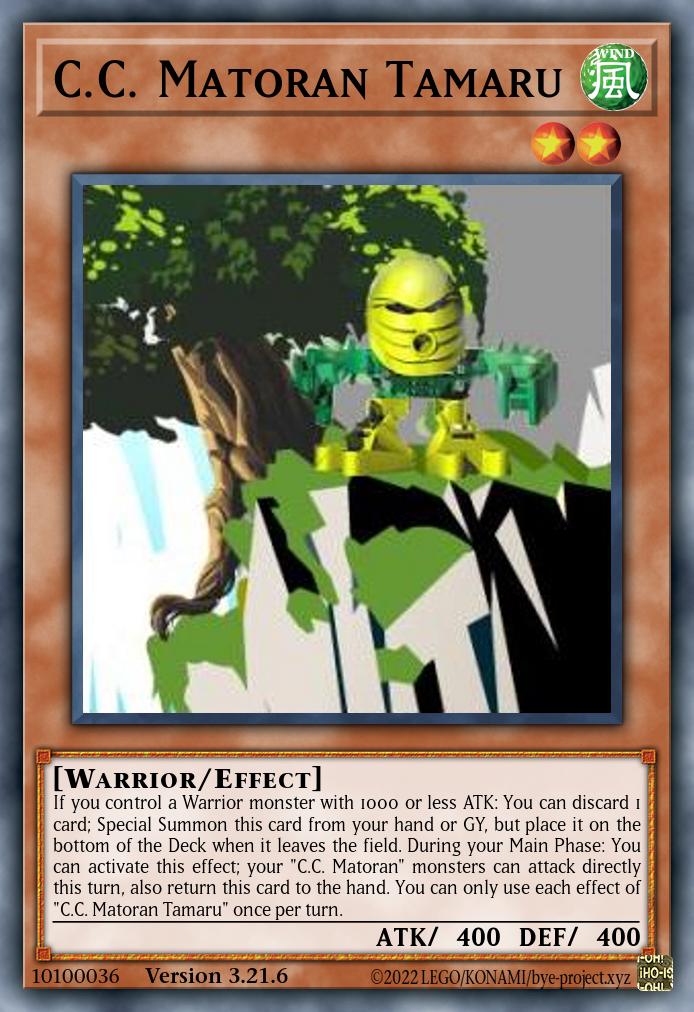
If you have ever filtered the card pool to WIND Warriors specifically (first question: why?), you may now be wondering “what the heck are you even supposed to search with this?”. The obvious answer is “Le-Matoran”, which is the cue to introduce the resident C.C. Matoran as the preferred search target.
If you control a Warrior monster with 1000 or less ATK: You can discard 1 card; Special Summon this card from your hand or GY, but place it on the bottom of the Deck when it leaves the field. During your Main Phase: You can activate this effect; your “C.C. Matoran” monsters can attack directly this turn, also return this card to the hand. You can only use each effect of “C.C. Matoran Tamaru” once per turn.
Bionicle: Coming of the Toa (v3.21.6)
The mathematically inclined among you may notice that the range of 1000 or less also includes the number 0, which conveniently is the exact ATK value any monster will have after being used to trigger Le-Koro’s search. So Summoning any Warrior under Le-Koro gives you a Tamaru ready to summon himself (which is free from the hand – “from your hand or GY” means he can be used to fulfill his own discard requirement, just like e.g. Machina Fortress). As the bottom-dwelling type of Le-Matoran who is not particularly fond of heights, he will return to the bottom of the Deck after being summoned this way, but Le-Koro can just add him back at the next opportunity anyway. The second effect is more for use with other C.C. Matoran and references his contribution in clearing a path for the company on the road to Kini-Nui. This includes a self-bounce that is a bit oddly phrased with “also” so that the whole effect works even if Tamaru is marked for returning to the Deck.
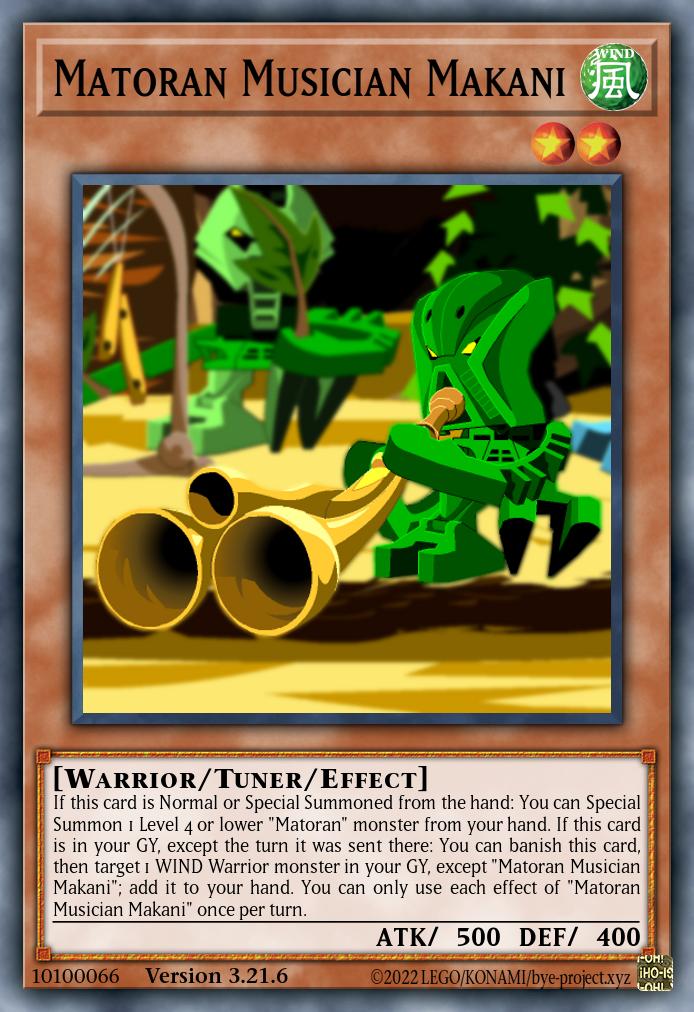
Another point to consider about Le-Koro is that it doesn’t start negating your monster’s effects until its search has resolved, which means any on-summon effects chained to it will still go through. And that’s exactly what the other Le-Matoran take advantage of.
If this card is Normal or Special Summoned from the hand: You can Special Summon 1 Level 4 or lower “Matoran” monster from your hand. If this card is in your GY, except the turn it was sent there: You can banish this card, then target 1 WIND Warrior monster in your GY, except “Matoran Musician Makani”; add it to your hand. You can only use each effect of “Matoran Musician Makani” once per turn.
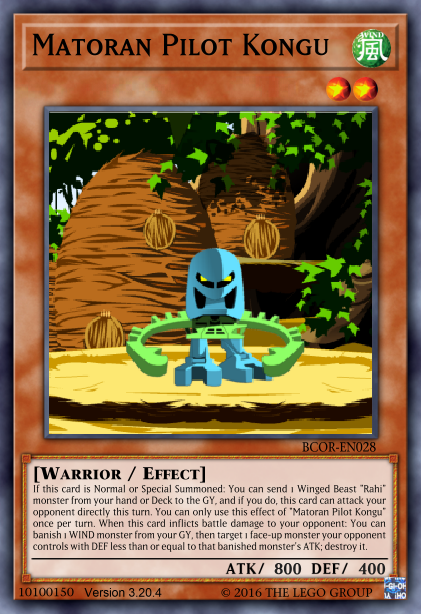
If this card is Normal or Special Summoned: You can send 1 Winged Beast “Rahi” monster from your hand or Deck to the GY, and if you do, this card can attack your opponent directly this turn. You can only use this effect of “Matoran Pilot Kongu” once per turn. When this card inflicts battle damage to your opponent: You can banish 1 WIND monster from your GY, then target 1 face-up monster your opponent controls with DEF less than or equal to that banished monster’s ATK; destroy it.
Bionicle: Challenge of the Rahi (v3.20.4)
Makani offers a simple yet enticing array of effects. On Normal or Special Summon, he brings out another Matoran (including visitors from other villages, whom he welcomes musically) from the hand, and in subsequent turns you can recycle a WIND Warrior by banishing him from the GY. Oh, and on top of this he’s a Tuner, giving you access to the pretty decent WIND Synchro pool.
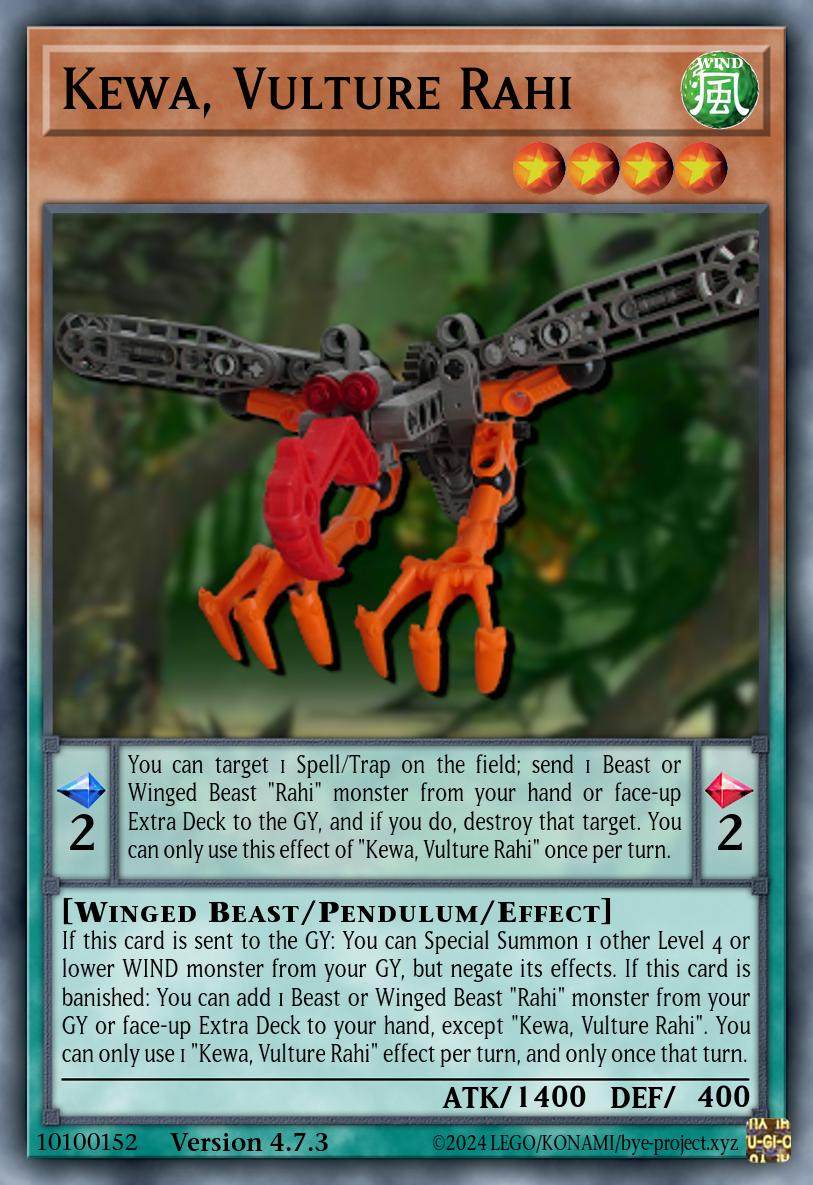
Kongu‘s on-summon effect takes him to the skies on the back of a Winged Beast Rahi milled from the Deck, allowing him to attack directly for a turn. This makes it easy for him to inflict battle damage, which then triggers the effect to banish a WIND monster from the GY (potentially the very Rahi he sent there) and get rid of an opponent’s monster with insufficient defense. And the hidden trick to all this is that you can actually use Kongu even on the very first turn to get more monsters on the field. How? With the right bird, of course.
[ Pendulum Effect ] You can target 1 Spell/Trap on the field; send 1 Beast or Winged Beast “Rahi” monster from your hand or face-up Extra Deck to the GY, and if you do, destroy that target. You can only use this effect of “Kewa, Vulture Rahi” once per turn. —————————————- [ Monster Effect ] If this card is sent to the GY: You can Special Summon 1 other Level 4 or lower WIND monster from your GY, but negate its effects. If this card is banished: You can add 1 Beast or Winged Beast “Rahi” monster from your GY or face-up Extra Deck to your hand, except “Kewa, Vulture Rahi”. You can only use 1 “Kewa, Vulture Rahi” effect per turn, and only once that turn.
Bionicle: Challenge of the Rahi (v4.7.3)
The Kewa is a common ride for Le-Matoran pilots, and makes itself attractive for Kongu’s mill effect by bringing back any other low-level WIND monster when sent to the GY. You do have to set up the GY first to do anything with this, but if you have that, it’s just a free monster on the field. It can also recycle a Rahi in your GY when banished, which might have some applications in this deck. I haven’t tried.
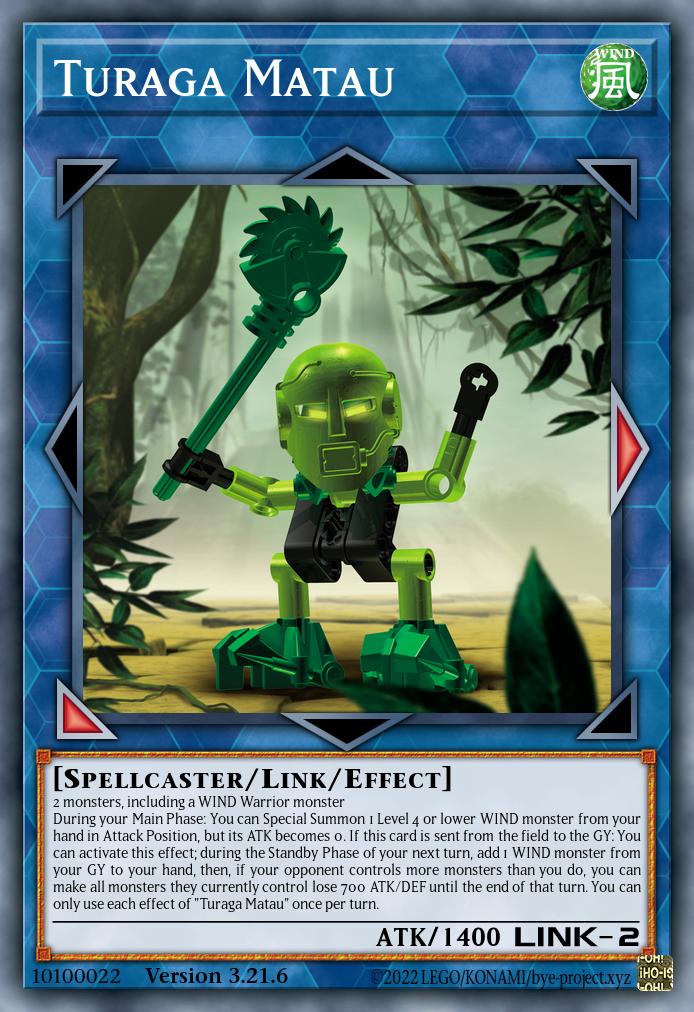
So we have seen that basically all our main deck monsters provide some way to potentially get 2 Warriors on the field, and with 2 Warriors on the field we of course make Isolde because that card is cra- wait, what do you mean Le-Koro locks you to WIND? Well, well, good thing we have a Turaga to go into instead.
2 monsters, including a WIND Warrior monster During your Main Phase: You can Special Summon 1 Level 4 or lower WIND monster from your hand in Attack Position, but its ATK becomes 0. If this card is sent from the field to the GY: You can activate this effect; during the Standby Phase of your next turn, add 1 WIND monster from your GY to your hand, then, if your opponent controls more monsters than you do, you can make all monsters they currently control lose 700 ATK/DEF until the end of that turn. You can only use each effect of “Turaga Matau” once per turn.
Bionicle: Coming of the Toa (v3.21.6)
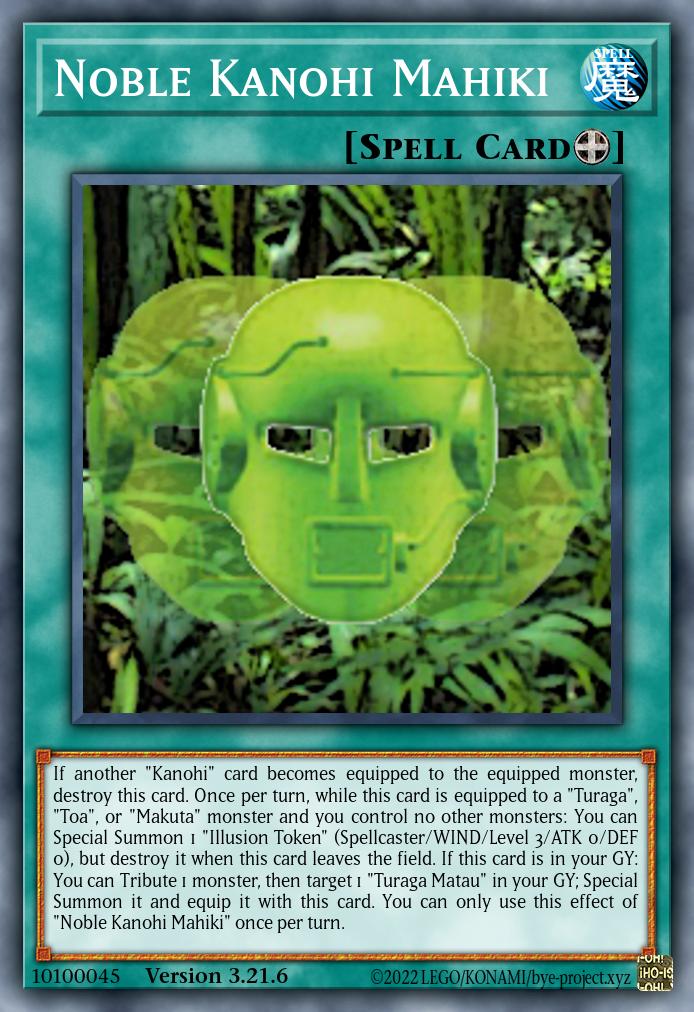
Noble Kanohi Mahiki
Equip Spell
If another “Kanohi” card becomes equipped to the equipped monster, destroy this card. Once per turn, while this card is equipped to a “Turaga”, “Toa”, or “Makuta” monster and you control no other monsters: You can Special Summon 1 “Illusion Token” (Spellcaster/WIND/Level 3/ATK 0/DEF 0), but destroy it when this card leaves the field. If this card is in your GY: You can Tribute 1 monster, then target 1 “Turaga Matau” in your GY; Special Summon it and equip it with this card. You can only use this effect of “Noble Kanohi Mahiki” once per turn.
Bionicle: Coming of the Toa (v3.21.6)
Matau has a reputation as a jokester, with hilarious jokes such as “summoning a monster in Attack Position but with 0 ATK”. Funny how that just so happens to be a good way of making use of your Le-Koro searches in case they don’t have the ability to Special Summon themselves. Arguably more important, however, is his second effect, representing his other side as a reliable leader in times of crisis: Delayed recycling that comes with a debuff for your opponent’s field if you’re behind.
This is perhaps the single effect that most clearly shows what I’d like Le-Koro as a strategy to be about. While Onu-Koro ensures your ability to recover and make comebacks by refilling your resources in proportion to the work you performed with them, Le-Koro more so aims to achieve the same by giving you access to resources when you need them and allowing you to get the most out of just a few cards.
That second point, and the focus on recovery in general, make the Kanohi Mahiki’s ability to revive Matau a bit more relevant here than it was for the other villages. In particular, there’s a combo where you, starting from an empty field with Matau and Mahiki in GY, just need to Summon any monster, tribute it to get back Matau, summon a Token with the Mahiki, summon a WIND monster with Matau, and you have all the materials for a Link-4 (though one of them being a Token somewhat limits your options). If Matau gave you something back during the Standby Phase, you already have one of the two monsters required for this. If you have Le-Koro, the initial Summon can also be used to ensure you have something to Special Summon with Matau’s effect. If Tamaru is in your GY, you just need a WIND monster and any card, rather than two monsters. Everything has its part to play.
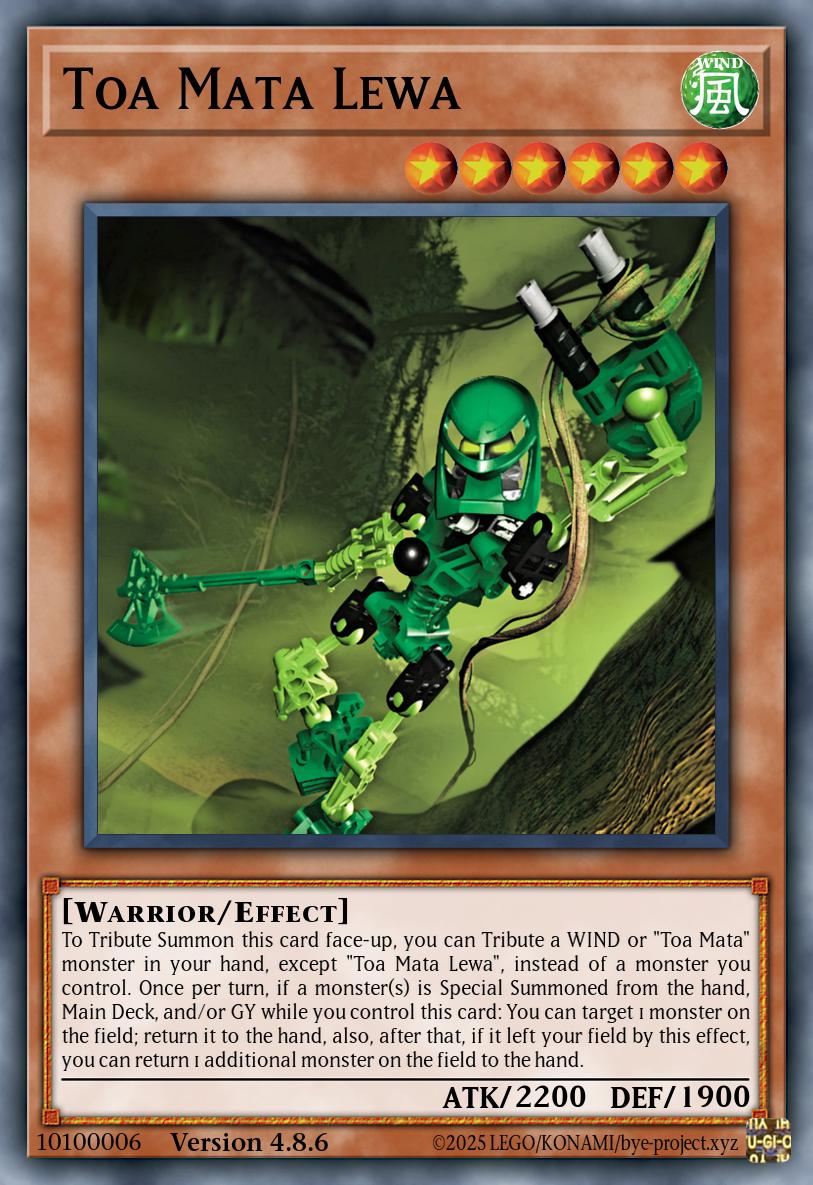
But what about the valiant hero of Le-Koro, the Toa of Air? Well, he doesn’t quite contribute to this directly, but can still make for a nice bonus if you have him around.
To Tribute Summon this card face-up, you can Tribute a WIND or “Toa Mata” monster in your hand, except “Toa Mata Lewa”, instead of a monster you control. Once per turn, if a monster(s) is Special Summoned from the hand, Main Deck, and/or GY while you control this card: You can target 1 monster on the field; return it to the hand, also, after that, if it left your field by this effect, you can return 1 additional monster on the field to the hand.
Bionicle: Coming of the Toa (v4.8.6)
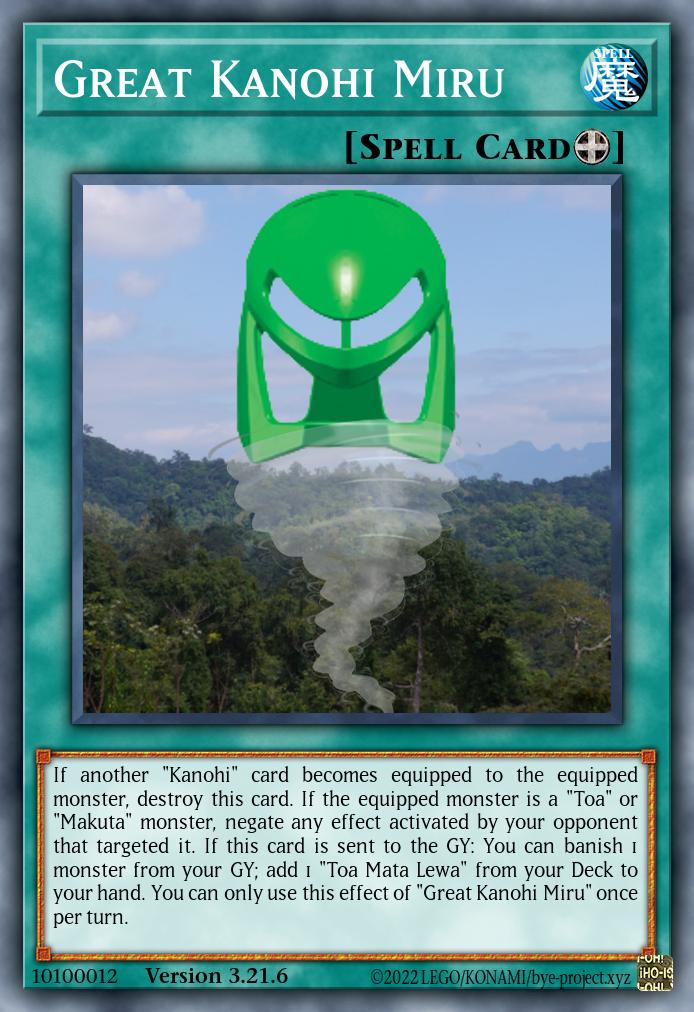
Great Kanohi Miru
Equip Spell
If another “Kanohi” card becomes equipped to the equipped monster, destroy this card. If the equipped monster is a “Toa” or “Makuta” monster, negate any effect activated by your opponent that targeted it. If this card is sent to the GY: You can banish 1 monster from your GY; add 1 “Toa Mata Lewa” from your Deck to your hand. You can only use this effect of “Great Kanohi Miru” once per turn.
Bionicle: Coming of the Toa (v3.21.6)
With air being the final element in my list, Lewa is also the last member of the Toa Mata to receive his overhaul, so his design is tailored more towards filling gaps in their strategy than towards helping out Le-Koro (partially also because I’ve noticed the Toa have rather limited usefulness in their village’s strategy anyway). Since the Toa Code has made me avoid monster removal so far, that was a pretty obvious gap, and I think bouncing them to the hand – a mechanic already associated with the WIND Attribute anyway – is gentle enough to not count as killing. It can even be non-targeting with the extra investment of also bouncing one of your own monsters, which is a design I’m fairly proud of. As for how this fits into Le-Koro, well, the trigger is Special Summons from just about anywhere other than the Extra Deck, which should be happening a lot with all the revival and re-setup going on. As I said, a nice bonus while you’re doing that.
Finally, the Kanohi Miru protects against targeting effects (“floating” out of their reach), and does it in such a way that equipping it mid-chain (e.g. with a Suva) still stops previously activated effects. No particular relevance to Le-Koro’s strategy here, but cool to have in those occasional instances when you do set up Lewa.
Since Le-Koro already locks you to WIND, I figured we might as well go for some Speedroids to easily access that Attribute’s Synchro pool, which is probably the most decently equipped Extra Deck toolbox it has to offer. They also happen to be pretty fun, and if I was above playing with toys as a grown man, we wouldn’t be here.
The glaring weakness of the Speedroids is that they aren’t Warriors, and thus neither searchable by Le-Koro, nor qualified as material for Matau, nor able fulfill the conditions for Tamaru to Special Summon himself. Luckily, at this point the expansion includes enough Le-Matoran to easily fill that gap, with triple Makani and Tamaru for the free summons and double Kongu to do funny things with the Kewa if we already have GY setup. Takua is also playable in this deck since we can sneak him in before any WIND locks go into effect, and with that amount of Matoran in attendance, the Vuata Maca Tree can be a pretty good way to provide us with extra gas.
Other inclusions of note are Ghost Mourner – a bad Effect Veiler with a good Attribute – as well as an unusually high number of two copies of the Noble Kanohi Mahiki. This is because, as previously stated, its revival effect is actually relevant to this strategy, and making a Token isn’t bad either. However, the reliance on making Matau means it’s more nice-to-have than essential, so two is the highest I’m willing to go.
The Extra Deck consists of Matau, some generic WIND Links (there really aren’t many, sadly), Isolde for when we aren’t locked and want to set up Kanohi for basically free, Unchained Abomination as a Link-4 that can easily be made from a Mahiki-revived Matau, and WIND Synchros for just about every Level.
Best of Test
Best of Test: Le-Koro
This strategy’s performance in testing was initially quite poor, but eventually improved to more average levels after a lot of fiddling in the deck editor without needing that many signficiant design changes. I think the main problem was just in making what was, at the time of the video, a mashup of a subcritical mass of Speedroids sprinkled with just a few Six Samurai monsters work without the two halves tripping each other up, and I’m sure it could be done much better than I had it at that point (e.g. even one Den-Den Daiko Duke would probably help the recovery focus a lot). Also, firing the Le-Koro search at the wrong point so it either negates an important effect or locks you into WIND too early can screw everything up in an instant, and as the supremely intelligent individual I am it took some practice before I finally learned to not do that.
Conclusion
The aim of Le-Koro as a strategy is to make comebacks and rebuild somewhat decent boards from a bare minimum of resources in your hand and field. This is facilitated by a village that will give you access to more or less any of its villagers if you manage to summon anything, a Turaga who will give you back a crucial resource just in time to start rebuilding, and Matoran who let you easily make the important jump from one monster on the field to two.
The main reason I decided to make my own site for the Bionicle YGOPro Expansion was that imgur, which I had previously been using for release posts, just felt way too limited. All I could make there was a long, long scroll of card images with a textual description below each, where both the transcribed card text (for readability) and any design notes lived. Anything that didn’t belong to one particular card, like an introduction of an archetype, had to be finagled in in some unfitting way or another. And then their anti-spam features eventually started making it even harder by just destroying any links in the text, which made it impossible to download the actual expansion pack with a single click coming from the imgur album. I think that was about the point I realized I would eventually need to find a different solution, and after looking around a bit it became clear the only way to really improve things would be a dedicated website. And so I made one, consolidating the project description, expansion list, download links, release posts and more into one nice package, and everyone lived happily ever after.
But wait, is this really all that much of an improvement? Sure, the format of the releases and theme guides is now much more free than it ever was on imgur and I can ramble about high-level details all I want in addition to introducing individual cards, but at the end of the day it’s still just some boring text and images I put together manually. You can click on the pics to get a little overlay that includes a transcription of the card text, which is nice, but surely we can do better on a site that can be customized down to the source code level, right?
Right! The potential of displaying cards in some fancy manner of my own crafting was actually a major reason I opted to make a WordPress site from scratch instead of just quickly putting something up on wordpress.com or Blogger. And I’m proud to now announce the first steps towards that have successfully been taken.
Behold: The fruit of this site’s very own plugin, the BYE Cardviewer Block!
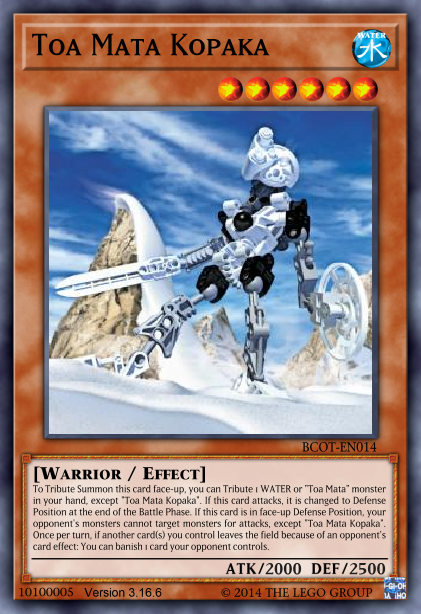
To Tribute Summon this card face-up, you can Tribute 1 WATER or “Toa Mata” monster in your hand, except “Toa Mata Kopaka”. If this card attacks, it is changed to Defense Position at the end of the Battle Phase. If this card is in face-up Defense Position, your opponent’s monsters cannot target monsters for attacks, except “Toa Mata Kopaka”. Once per turn, if another card(s) you control leaves the field because of an opponent’s card effect: You can banish 1 card your opponent controls.
Bionicle: Coming of the Toa (v3.16.6)
Yes, yes, I know, it’s still just text and images. But all I have to do to get it into the post is specifying which card and version I want, and everything else gets fetched straight from the database and formatted in a standardized manner. It’s pretty, it’s cohesive, it’s reusable, and if you click on the card image it still opens the sweet little overlay just as before. Even comes with a separate layout for mobile (or otherwise horizontally challenged) devices!
As any good way of displaying Yu-Gi-Oh cards should, the block accounts for the different types of stats found across different types of monsters:
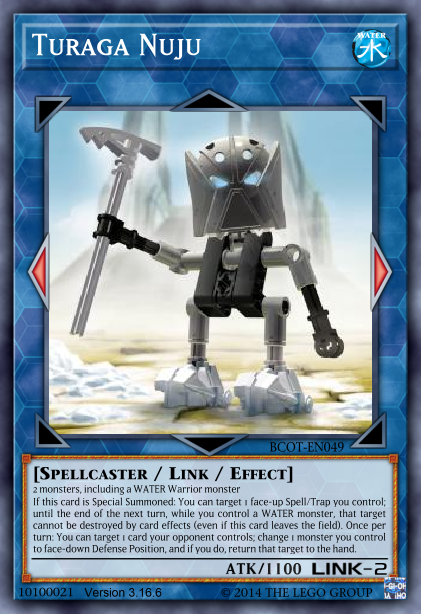
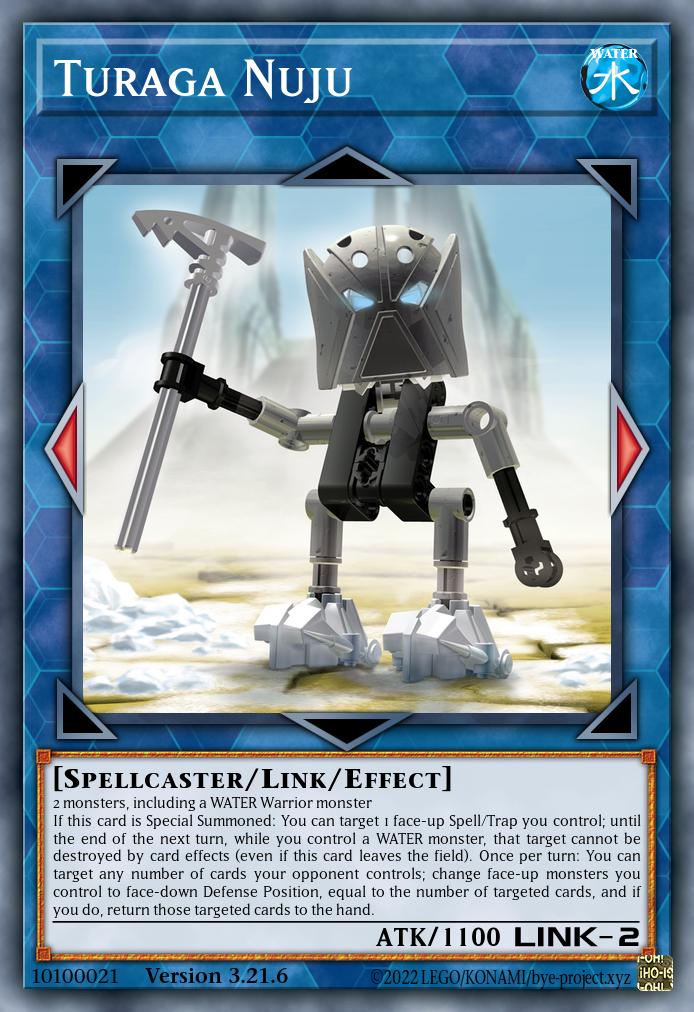
Turaga Nuju
Link Effect MonsterLink-2 [◀ ▶] | WATER Spellcaster | ATK 1100
2 monsters, including a WATER Warrior monster If this card is Special Summoned: You can target 1 face-up Spell/Trap you control; until the end of the next turn, while you control a WATER monster, that target cannot be destroyed by card effects (even if this card leaves the field). Once per turn: You can target 1 card your opponent controls; change 1 monster you control to face-down Defense Position, and if you do, return that target to the hand.
Bionicle: Coming of the Toa (v3.16.6)
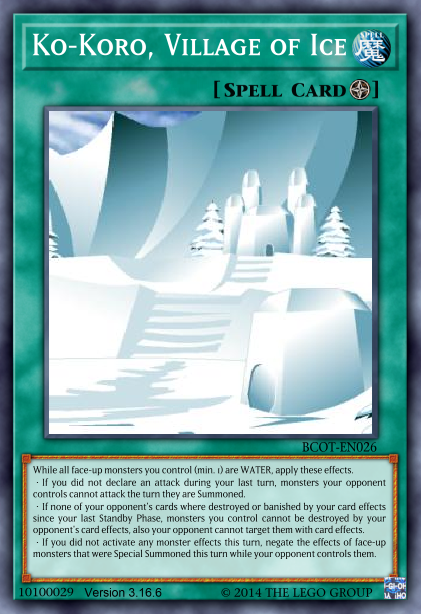
And for the simpler Spells/Traps that are free of such cumbersome details, it just leaves out that line entirely:
Ko-Koro, Village of Ice
Field Spell
While all face-up monsters you control (min. 1) are WATER, apply these effects. ●If you did not declare an attack during your last turn, monsters your opponent controls cannot attack the turn they are Summoned. ●If none of your opponent’s cards where destroyed or banished by your card effects since your last Standby Phase, monsters you control cannot be destroyed by your opponent’s card effects, also your opponent cannot target them with card effects. ●If you did not activate any monster effects this turn, negate the effects of face-up monsters that were Special Summoned this turn while your opponent controls them.
Bionicle: Coming of the Toa (v3.16.6)
If you’re browsing on mobile, you’ll see these blocks as a single-column layout with all the info listed beneath the card image, but on desktop it just shows image and info next to each other. However, we also have the option to force the mobile layout on wider screens which can be used to do things like comparing two versions of the same card side-by-side:
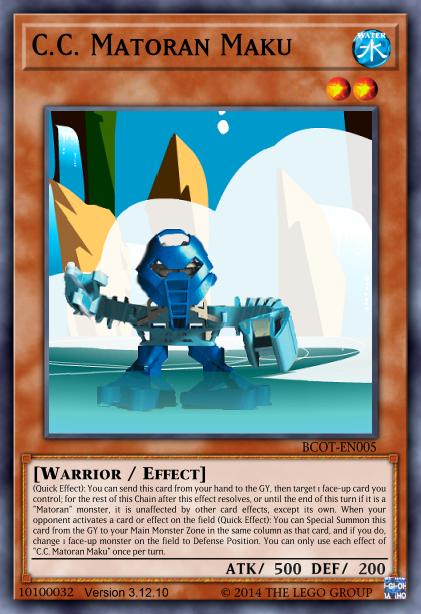
(Quick Effect): You can send this card from your hand to the GY, then target 1 face-up card you control; for the rest of this Chain after this effect resolves, or until the end of this turn if it is a “Matoran” monster, it is unaffected by other card effects, except its own. When your opponent activates a card or effect on the field (Quick Effect): You can Special Summon this card from the GY to your Main Monster Zone in the same column as that card, and if you do, change 1 face-up monster on the field to Defense Position. You can only use each effect of “C.C. Matoran Maku” once per turn.
When your opponent activates a card or effect on the field (Quick Effect): You can Special Summon this card from your hand or GY to your Main Monster Zone in the same column as that card, and if you do, change 1 face-up monster on the field to Defense Position. (Quick Effect): You can target 1 other face-up card you control; for the rest of this Chain after this effect resolves, or until the end of this turn if it is a “Matoran” monster, it is unaffected by other card effects, except its own. You can only use each effect of “C.C. Matoran Maku” once per turn.
Bionicle: Coming of the Toa (v3.16.6)
For readers cursed with particularly narrow screens, these two might still look like they’re just underneath each other, but I swear they line up if there’s enough space available. Most importantly, either version is perfectly readable, and all the information you could want about a card is right there.
For the time being, this post here will be the only part of the site using the new layout, because to be quite honest it’s still very much a prototype. The frontend looks fairly presentable already, but hidden in the backend is a plain HTML form where I have to manually enter every single card’s information to get it into the database. Similarly, configuring the blocks is done by typing the identifiers of the desired card into haphazardly placed text fields. So before I really start using it, I still need to put some work into improving those portions, ideally with an option to directly upload a .cdb file and proper configuration UI featuring some idiot-proof dropdowns. Frontend may receive some updates along the way, too, but the nice thing about custom blocks is that the copies I’ve already used here will udpate without any extra work needed!
As a last note, if you happen to be seeing this and thinking “Hey, I could use that too!”, good news: The source code is all available on GitHub. It’s obviously tuned and tested for my specific needs, so make adjustments as needed.
EDIT 2021-10-12: Upon further consideration, maybe tabs would be the better way to do comparisons? Then nothing has to get squished.
(Quick Effect): You can send this card from your hand to the GY, then target 1 face-up card you control; for the rest of this Chain after this effect resolves, or until the end of this turn if it is a “Matoran” monster, it is unaffected by other card effects, except its own. When your opponent activates a card or effect on the field (Quick Effect): You can Special Summon this card from the GY to your Main Monster Zone in the same column as that card, and if you do, change 1 face-up monster on the field to Defense Position. You can only use each effect of “C.C. Matoran Maku” once per turn.
When your opponent activates a card or effect on the field (Quick Effect): You can Special Summon this card from your hand or GY to your Main Monster Zone in the same column as that card, and if you do, change 1 face-up monster on the field to Defense Position. (Quick Effect): You can target 1 other face-up card you control; for the rest of this Chain after this effect resolves, or until the end of this turn if it is a “Matoran” monster, it is unaffected by other card effects, except its own. You can only use each effect of “C.C. Matoran Maku” once per turn.
It is always nice to see the content I upload getting some comments. It’s not so nice to see that literally 100% of them (at least on this site) have been obvious spam, now clocking in at another nice round mark of 30. Maybe I should do something about that after all. Anyway, for now, let’s take another fun trip into The Spam Zone.
(General Disclaimer: Don’t go to any links you see in the following images, they’re probably evil scam pages that will mine Bitcoins in your browser and eat your cat)
First up we have a very subtle advertisement of a certain type of content (with wrong tags, once again), and an equally subtle call for help.
If these short and to-the-point comments aren’t enough entertainment for you, then no need to worry, for two members of the Scato collective have once more shown themselves to ramble about …something.
Somehow only Vanessa can into URLs.
Other highlights include this person(?) who just went “hey, oil” without any fanfare:
This one who knows how to get rich (obviously legit):
And this one who thinks I already am rich enough to be interested in renting a private jet:
Finally, we have a special feature of this particular spam gallery, and that is that there’s actual a common source to a large part of it. All comments from there are compiled in the gallery below, so we don’t have to make this post even more longer than it deserves to be.
And that’s all for Vol II of the spam gallery! I honestly don’t really want to make another one of these, so for now I’ve enabled the Friendly Captcha plugin, because it’s the one Captcha I could find that doesn’t need cookies (and thus I don’t even technically need to bother with a cookie notice). If it works as intended, you shouldn’t notice it’s there unless you’re a spambot (lmao nevermind I just forgot to turn it on), so please do consider leaving a legitimate comment somewhere! One of the reasons I even bother publishing my stuff is so I can get feedback and criticism from the public, but somehow the public seems hesitant to provide that. Odd.
Back to our regularly scheduled trip around the island of Mata Nui, we now arrive in the snowy realm of Ko-Wahi and enter the Village of Ice. However, unlike the previous updates of this sort, this is a BYE release rather than a BCOT release, which means all the Rahi and Bohrok cards are in the package as well! (I didn’t change them since the previous version, but they’re there)
As for what I did change with this version, well first of all you can just check the overview right above. For more detailed information and design notes on the new Ko-Koro cards, I refer you to the Theme Guide, and the other update I’ll go over briefly right here.
C.C. Matoran Maku got the change I talked about a few months ago, with her handtrap effect to make a monster unaffected by effects for the duration of a Chain getting moved to the field so it aligns better with observed Warrior design conventions. In exchange, it’s a bit easier to get her on the field now, since she can be Special Summoned from the hand as well if your opponent activates an effect in the wrong column.
That concludes the summary for this release, thanks for reading! If you have anything to say about these updates, simply leave a comment below.
When I set out to make Ko-Koro, there were already a few specific goals I was aiming for with the design: It should reflect the principle of Peace that MNOG2 assigned to the village, the playstyle it facilitates should be clearly distinct from the other Koros, and it should especially be incompatible with the Ga-Koro strategy with which it shares the focus on the WATER Attribute. Given these requirements, the following part of the quote at the top of the BS01 “Peace” article stood out to me:
On Mount Ihu, nothing grows and nothing changes. The mountain is perfectly at Peace.
In other words, “Peace” as a concept is (semi-)canonically equated to a lack of change, and in card game terms that comes out to a type of strategy that is as unique as it is controversial – stall. By preventing your opponent from making progress towards victory, you buy yourself the time to achieve some win condition that would normally be too slow to work. And this inherent slowness gives us a nice big point of distinction from Ga-Koro, which is all about quick effects and playing on both your and your opponent’s turn.
Ko-Koro, Village of Ice
Field Spell
While all face-up monsters you control are WATER (min. 1), apply these effects. ●If you did not declare an attack during your last turn, monsters your opponent controls cannot attack the turn they are Summoned. ●If none of your opponent’s cards were destroyed or banished by your card effects since your last Standby Phase, monsters you control cannot be destroyed by your opponent’s card effects, also your opponent cannot target them with card effects. ●If you did not activate any monster effects this turn, negate the effects of face-up Special Summoned monsters while your opponent controls them.
Bionicle: Coming of the Toa (v3.21.6)
With that settled as the direction I wanted to go in, I sketched up the Ko-Koro field spell with three effects that limit your opponent on the condition that you also limit yourself in a similar way (much like a peace treaty), all under the shared condition that your monsters are all WATER to establish that Attribute focus. While the basic outline of this idea survived testing pretty much unchanged, the details of the effects underwent a lot of changes, so let’s just look at them point by point:
If you did not attack during your last turn, your opponent’s monsters cannot attack on the turn they are Summoned. This effect started life as a total attack lock with the same condition and I honestly think that might have been fine in a realistic environment, but apparently the EDOPro AI is completely unable to deal with this type of restriction and it leads to the overly long stall games everybody hates, so I had to tone it down a bit. If the strategy works as intended, this honestly barely makes a difference, for reasons I’ll get into in a bit.
If you did not banish/destroy any of your opponent’s cards since your last Standby Phase, your monsters get targeting and destruction protection. This one is super significant since the blanket protection makes it very hard for your opponent to break through even otherwise unimpressive opening boards, enabling you to build on them in consecutive turns until you reach something actually game-winning. On the other hand, the condition attached to it requires you to opt out of the vast majority of removal, massively influencing deckbuilding and the design of other cards related to Ko-Koro. Initially, the restrictions were even harsher as you were not allowed to make your opponent’s cards leave the field with your effects in any way whatsoever, but after one particularly atrocious test duel I realized this just forces you into situations where you cannot possibly clear the way to deal damage and are stuck passing back and forth for like 40 turns. Speaking of damage, I briefly had an extra stipulation that did not allow you to deal effect damage if you wanted this protection (because burn of all things as a win condition for an ice deck is kinda stupid), but then I remembered Wave-Motion Cannon exists and enables burn wins without ever needing to deal damage while you are stalling. So I gave up on that restriction – I will be judging you if you play Ko-Koro Burn, but you are free to do so.
During turns in which you did not activate any monster effects, your opponent is pretty much under Lose 1 Turn (sans position changing)Skill Drain (for Special Summoned monsters). The main purpose of this one is to prevent most decks from comboing into big bosses that just win them the game even under Ko-Koro’s restrictions, while also ruining any possible Ga-Koro synergy with its condition. It actually didn’t change much from its very first draft to its initial release, unlike the other two. I honestly think “no monster effects for you” is generally a cool drawback on a big floodgate, as it pretty much prevents it from being used in tandem with an oppressive board of negating and disrupting Extra Deck monsters. One thing that did get dropped on a later revision was the limitation that effects only stay negated during the turn the monster is summoned, because it just made you way too vulnerable to something as simple as Special Summoning a monster during your End Phase.
Overall, the payoffs for these effects make it so that your opponent has a very hard time doing anything to your monsters unless they get an extra turn of setup so they can attack, while the restrictions greatly limit your ways to counteract that setup. The game you play under Ko-Koro essentially consists of using your limited options to keep your opponent off anything that could break them out of this stall situation, while gradually building momentum turn by turn until you reach a point where you are ahead far enough to safely break the peace and go on the offensive.
But if we want to avoid destruction, banishment, and battle, how are we actually supposed to get the opponent’s monsters off the field before they stop being affected by Ko-Koro? Some generic real cards can do that of course, but the answer that exists natively within this village’s support is Turaga Nuju.
Turaga Nuju
Link Effect MonsterLink-2 [◀ ▶] | WATER Spellcaster | ATK 1100
2 monsters, including a WATER Warrior monster If this card is Special Summoned: You can target 1 face-up Spell/Trap you control; until the end of the next turn, while you control a WATER monster, that target cannot be destroyed by card effects (even if this card leaves the field). Once per turn: You can target any number of cards your opponent controls; change face-up monsters you control to face-down Defense Position, equal to the number of targeted cards, and if you do, return those targeted cards to the hand.
Bionicle: Coming of the Toa (v3.21.6)
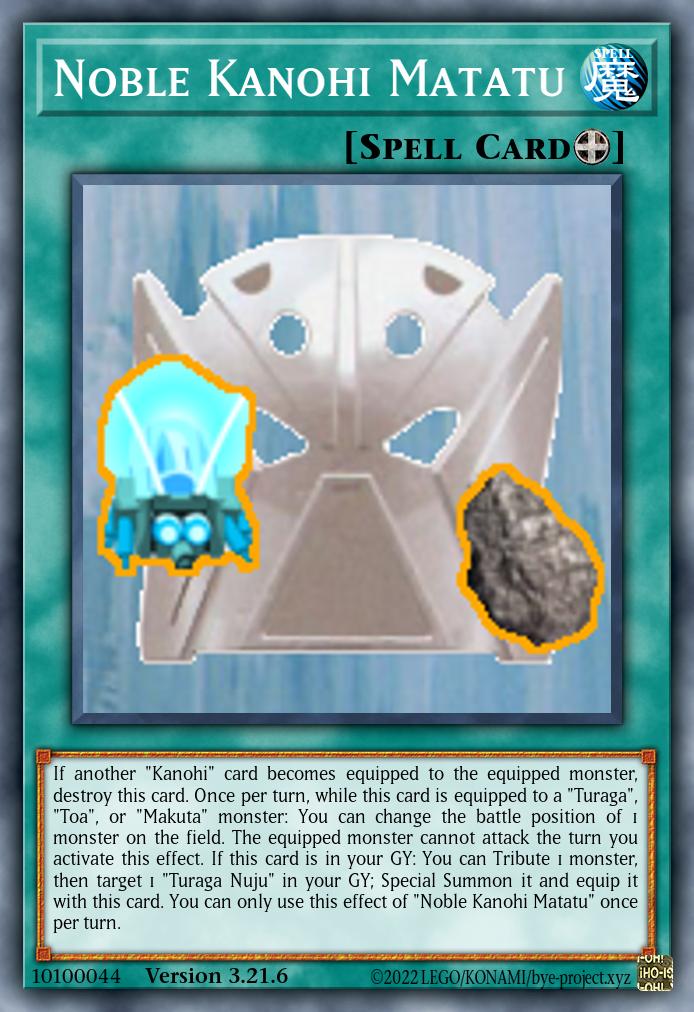
Noble Kanohi Matatu
Equip Spell
If another “Kanohi” card becomes equipped to the equipped monster, destroy this card. Once per turn, while this card is equipped to a “Turaga”, “Toa”, or “Makuta” monster: You can change the battle position of 1 monster on the field. The equipped monster cannot attack the turn you activate this effect. If this card is in your GY: You can Tribute 1 monster, then target 1 “Turaga Nuju” in your GY; Special Summon it and equip it with this card. You can only use this effect of “Noble Kanohi Matatu” once per turn.
Bionicle: Coming of the Toa (v3.21.6)
Being concerned with the future as he is, the first thing Nuju will do upon entering the field is protect a face-up Spell/Trap from destruction for a short while, and he himself doesn’t need to stay around for this – you just need any WATER monster. Now, the idea here is obviously to target Ko-Koro, hopefully leading to a situation where your opponent cannot get rid of your monsters because of the Field Spell, but also cannot get rid of the Field Spell before dealing with your monsters. Other applications are quite limited, and while this one important use case is kinda enough, I am strongly considering also allowing face-down targets for just a bit of extra utility.
But the main point of the card lies in the second effect, representing the most notable trait of the Turaga of Ko-Koro: He communicates almost exclusively in bird language. And thus, he has a removal effect that is tailored for the strategy and designed in the “language” of birds, specifically those of the frosty variety, by which I mean exactly Penguins. By flipping one or more of your monsters face-down, he returns the same number of cards your opponent controls to the hand, resetting any progress made towards escaping the Ko-Koro lock. Get it, because there are Penguins in the game that bounce stuff when they flip, haha
Meanwhile, the Kanohi Matatu is a non-targeting “telekinetic” battle position changer, and one neat way to use it is to flip the monster you used for Nuju’s effect back up and trigger some effect that way. Yes, the mental focus required for that on the noble version means you don’t get to attack with the equipped monster the same turn, but being able to reuse a Penguin Soldier seems well worth that.
Or, if bouncy birds are not your speed, maybe I can interest you in some villagers who also have beneficial interactions with the strategy.
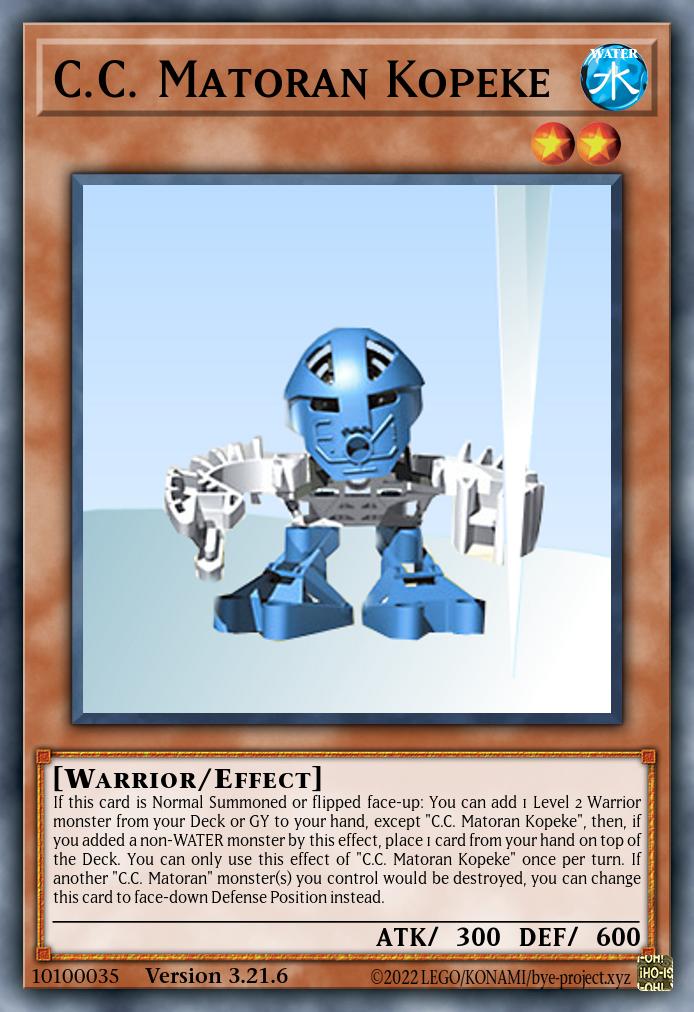
If this card is Normal Summoned or flipped face-up: You can add 1 Level 2 Warrior monster from your Deck or GY to your hand, except “C.C. Matoran Kopeke”, then, if you added a non-WATER monster by this effect, place 1 card from your hand on top of the Deck. You can only use this effect of “C.C. Matoran Kopeke” once per turn. If another “C.C. Matoran” monster(s) you control would be destroyed, you can change this card to face-down Defense Position instead.
You can banish 1 Spell/Trap from your hand or field; Special Summon this card from your hand. If this card is sent to the GY: You can target 1 of your banished Spells/Traps; place it on top of your Deck, and if you do, Special Summon 1 WATER “Matoran” monster from your GY, except “Matoran Scribe Jaa”, but negate its effects, also you cannot Special Summon while you control that face-up monster. You can only use each effect of “Matoran Scribe Jaa” once per turn.
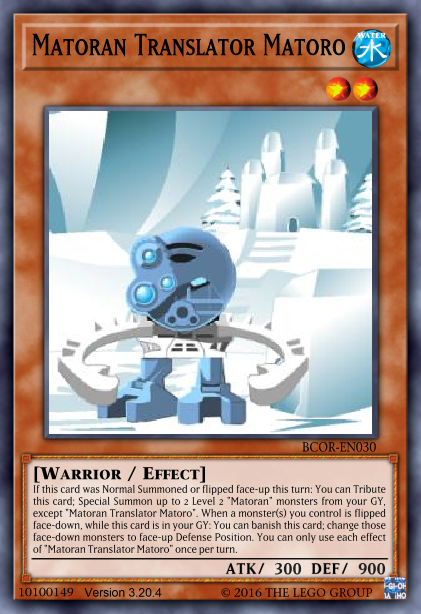
If this card was Normal Summoned or flipped face-up this turn: You can Tribute this card; Special Summon up to 2 Level 2 “Matoran” monsters from your GY, except “Matoran Translator Matoro”. When a monster(s) you control is flipped face-down, while this card is in your GY: You can banish this card; change those face-down monsters to face-up Defense Position. You can only use each effect of “Matoran Translator Matoro” once per turn.
Bionicle: Challenge of the Rahi (v3.20.4)
Kopeke, the resident Chronicler’s Company member, is a classic searcher on Normal Summon who also works when flipped face-up. This means that in a stall situation where your opponent can’t remove your monsters and you keep flipping and bouncing with Nuju, you get a search every turn. You get to pick from a fairly wide (but not particularly powerful) pool of all Level 2 Warriors, but for best advantage you want to pick the WATER ones, meaning Ga- and most importantly Ko-Matoran.
For example, getting Jaa is an easy way to set up Nuju. This scribe who writes down translations from the Wall of Prophecy has a pair of effects that, if used with Kopeke already on the field, really just amount to a Nuju ready to bounce at least one card and a Spell/Trap stacked on top of the Deck (this one’s the prophecy part). Ko-Koro decks generally being heavy on Spells and especially Traps (because they cannot disrupt with monster effects) means you should usually have the necessary fodder, and the nasty Special Summon restriction on the monster you bring back from the GY is conveniently turned off the moment Nuju flips it face-down.
Going even further beyond, Matoro is a Normal Summon for later in the game and trades himself off for up to 2 Level 2 Matoran in your GY. In his function as Nuju’s translator, he is also able to dispel the confusion caused by the Turaga’s use of bird language on your side of the field, immediately unflipping your newly face-down monsters. This basically speeds you up by a turn, lets you immediately trigger (pseudo-)flip effects, and gives you material for maybe ending the game with a big boss monster while your opponent’s field is clear.
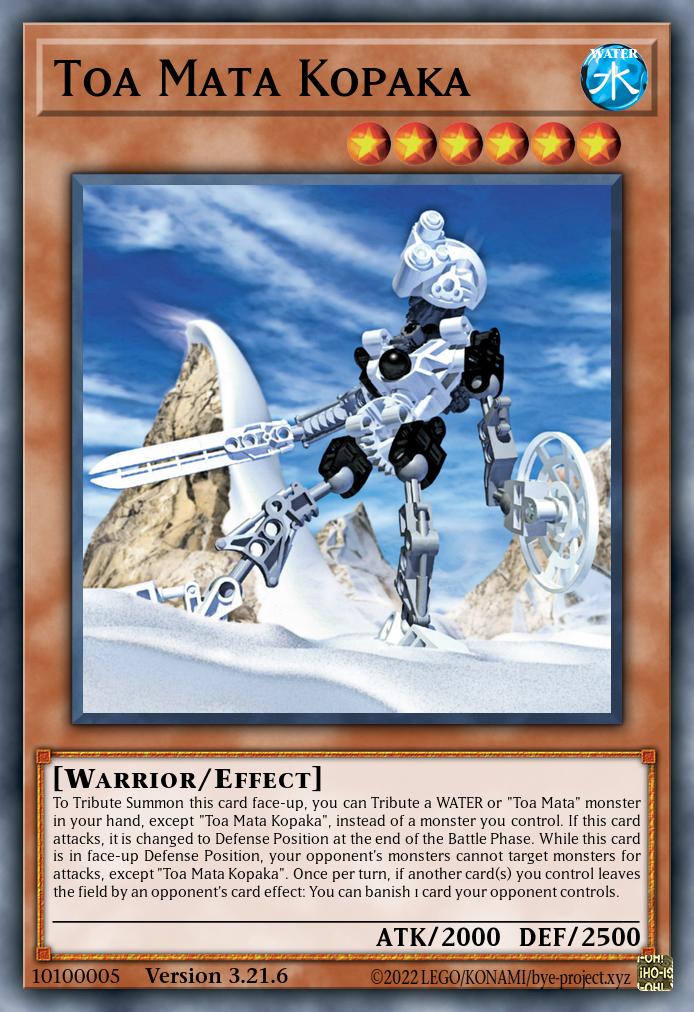
To Tribute Summon this card face-up, you can Tribute a WATER or “Toa Mata” monster in your hand, except “Toa Mata Kopaka”, instead of a monster you control. If this card attacks, it is changed to Defense Position at the end of the Battle Phase. While this card is in face-up Defense Position, your opponent’s monsters cannot target monsters for attacks, except “Toa Mata Kopaka”. Once per turn, if another card(s) you control leaves the field by an opponent’s card effect: You can banish 1 card your opponent controls.
Bionicle: Coming of the Toa (v3.21.6)
Great Kanohi Akaku
Equip Spell
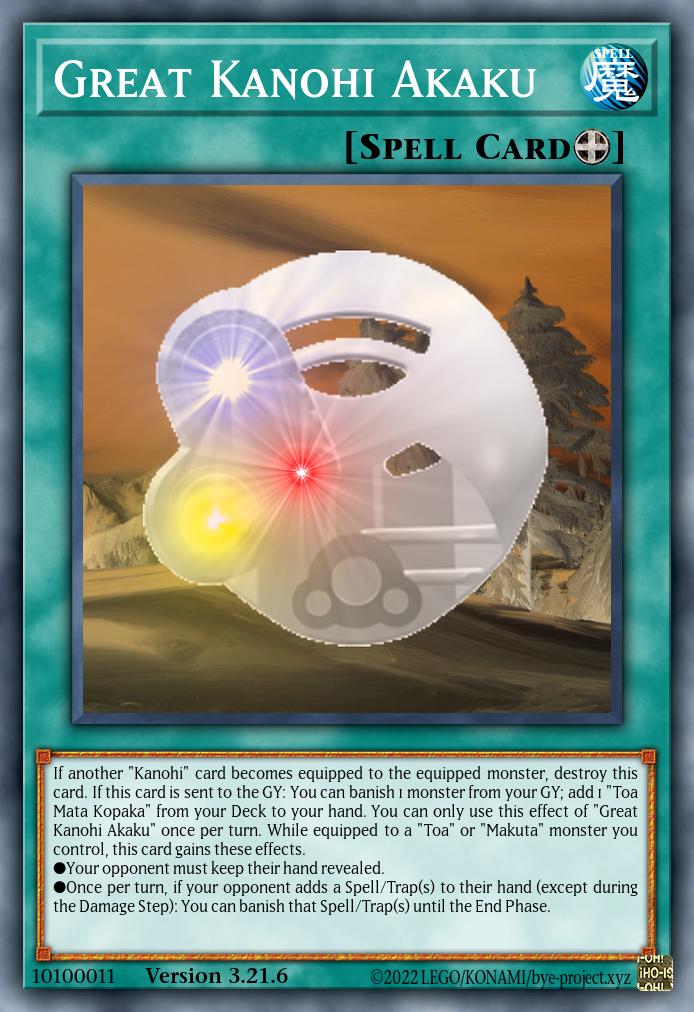
If another “Kanohi” card becomes equipped to the equipped monster, destroy this card. If this card is sent to the GY: You can banish 1 monster from your GY; add 1 “Toa Mata Kopaka” from your Deck to your hand. You can only use this effect of “Great Kanohi Akaku” once per turn. While equipped to a “Toa” or “Makuta” monster you control, this card gains these effects. ●Your opponent must keep their hand revealed. ●Once per turn, if your opponent adds a Spell/Trap(s) to their hand (except during the Damage Step): You can banish that Spell/Trap(s) until the End Phase.
Bionicle: Coming of the Toa (v3.21.6)
Finally, Kopaka is one of the major ways you can actively put pressure on your opponent amidst this stall-focused playstyle, and that is despite him technically being a mostly defensive card. The key point is that he can, to a degree, let you ignore Ko-Koro’s restriction on attacking, as he will change himself to defense at the end of the Battle Phase and proceed to redirect any attacks from your opponent’s side into his hefty 2500 DEF butt (incidentally, this marks the first actual stat change I’ve made in the BCOT overhaul – 2000/2150 was just a bit underwhelming). He also kind of indirectly protects your other cards (such as Ko-Koro itself) from removal effects by punishing any harm to those on his side with a non-targeting banish – this would turn off Ko-Koro’s protection and negation effects, but in the case where that’s the card that got removed, it doesn’t matter, right?
Protecting Ko-Koro is also the intent of the Kanohi Akaku, which uses its power of X-Ray vision to see through the opponent’s hand and can temporarily snipe out a freshly added Spell or Trap with expert precision. Since Spells in particular represent the most common form of generic S/T removal next to Extra Deck monsters that are neutered by Ko-Koro itself, this potentially takes those threats to your attempted lockdown out of the equation until you’ve had time to prepare for them.
Sample Deck
Ko-Koro forces you to forgo monster-based disruption if you want to use it as a proper floodgate, so in order to not get completely wrecked every time an opponent does manage to play through the village’s passive restrictions (or we just don’t draw it), the logical move seemed to be using lots of Traps to fill this hole. And when WATER and Traps are in the requirements, the answer probably lies in Paleozoics with a decent helping of Frogs.
Starting from the boring parts, we have the classic Frog engine of Dupe Frog, Ronintoadin, and Swap Frog plus Paleozoics Canadia and Olenoides to get lots of Aqua Level 2s. Why only two Olenoides in the Main Deck and no Dinomischus? Because we don’t want to destroy or banish anything if we can help it, but also can’t justify skipping out on Spell/Trap removal entirely.
To make Nuju, we need WATER Warriors, and so we have the Ko-Matoran lineup of triple Kopeke, triple Jaa, and a single Matoro. Normal Summoning Kopeke and searching Jaa gives you Nuju with fodder to bounce at least one card, assuming we have access to even a single one of the Spells and Traps that make up more than half of the Deck (an especially good play is using Mata Nui to search Ko-Koro and then using the island still on the field to fuel Jaa’s effect). Matoro is a secondary search target to speed things up a bit once the engine is running, playing more than one would probably be justifiable as well. Our final WATER Warrior is Kopaka, but he’s more for edge cases and lethal pushes than for Nuju material.
The Spells are merely Ko-Koro itself plus its searcher Mata Nui, the Kanohi, and basic consistency stuff, so not much to say there. For non-Paleo Traps, I included Ice Dragon’s Prison as nontargeting removal (clashes with Ko-Koro, but sometimes you can’t avoid that – at least it’s an ice card) and Infinite Impermanence as just about the only major handtrap we can use without disabling the floodgate.
The Extra Deck is a mix of Links and Rank 2 Xyzs, most importantly Nuju and Toadally Awesome. Another inclusion to deal with untargetable stuff is Sky Cavalry Centaurea, and amusingly enough, using that sets you up perfectly for Zeus. Of course, neither of those are WATER, so once you do that you’re at least temporarily abandoning the usual Ko-Koro strategy. But hey, gotta have a Plan Z.
Funny things in the side deck include Gameciel and Sphere Mode Ra for going second, Demise of the Land and Metaverse to hit your opponent with the Ko-Koro floodgate as a surprise, Evenly Matched and Macro Cosmos because even though their effects make cards get banished it doesn’t count as cards being banished by your effects (’tis a very silly game), and Ice Barrier as another nontargeting removal option (also an ice card!).
Best of Test
Best of Test: Ko-Koro (v3.16.6)
This deck performed quite interestingly in testing. Not only did it have the highest winrate out of everything I’ve put through the structured test circuit so far (mostly because the AI is unable to play under Ko-Koro), its good and bad matchups were also quite different from usual. In particular, this was the only deck so far that won its match against the Dragoon AI (by simply never letting the boy come out), and also the only deck that lost the match against the Chain Burn AI (turns out going slow and protecting your field is a bad strategy against heaps of effect damage, and Ojama Tokens screw me over to a hilarious degree).
Conclusion
The central strategy of Ko-Koro is restricting yourself in order to slow down your opponent as well, and then using the fact that you’re better adapted to playing under these limitations to gradully approach a game-winning position. This is a very unusual playstyle with a lot of weaknesses, such as Ko-Koro doing almost nothing against already established boards (though this point was somewhat helped by unlimiting the effect negation), but between the additional support offered by powerful Traps and the AI’s sheer inability to counteract what you’re doing, it worked so well in testing that I kind of had a hard time justifying any buffs. As a result, the cards this time may be a bit undertuned if you wanted to use them against a human opponent with brain cells and all that, but that may not matter much when the main use case for EDOPro custom cards is just the AI.
As a final note, despite my doubts about the powerlevel, I must say I’m very happy with some other aspects of the design, in particular how “icy” it ended up being:
It accomodates some ice-related cards like the Penguins, Ice Dragon’s Prison, and Ice Barrier really well.
The strategy of going first and preventing battle stands in perfect contrast to Ta-Koro, were you want to go second and battle as much as possible.
The crucial need to accurately judge when you can start pushing for victory and turn off Ko-Koro without screwing yourself mirrors the Ko-Matoran’s focus on knowledge and foresight.
The deck melts against burn like an ice cube in the sun.
The first three expansions I made as part of this project (Coming of the Toa, Challenge of the Rahi, and Beware the Swarm) were developed for YGOPro Percy, which means the old releases have some compatibility issues with the current EDOPro. For BCOT, I’m currently in the process of resolving this by doing a complete overhaul that also fixes the glaring design flaws in there, and fixing the rest was kind of put off until after that. But then, I figured some basic compatibility updates couldn’t take that long, and here we are: The first complete release of the Bionicle YGOPro Expansion for EDOPro!
Since overarching lore connections already resulted in some dependencies between different expansions “packs”, I’ve been meaning for a while to move from the single-pack release mode to one where all of them are treated as an unified whole, so this is a very good step in the right direction. On that note, it’s worth pointing out that this is essentially only a new release mode, not a new version – only scripts were updated and no card designs were changed from the latest v3.15.5, so that number remains in effect for all the cards found here.
In the future, all updates will come as this kind of full package, even if all cards changed are from one single expansion pack. This will simplify future cross-expansion updates, such as redesigning the Rahi archetype which has members in both BCOR and BBTS, as it allows smoothly doing those whenever I feel like it without needing to touch the rest of the respective expansions.
Anyway, for a quick look at the updated scripts and some of the cards that are now available for play, look no further than the video below.
As you can see, there’s a lot to try out, so if you haven’t already, I recommend you click the download link near the start of the post and have some fun! As always, feedback is greatly appreciated.
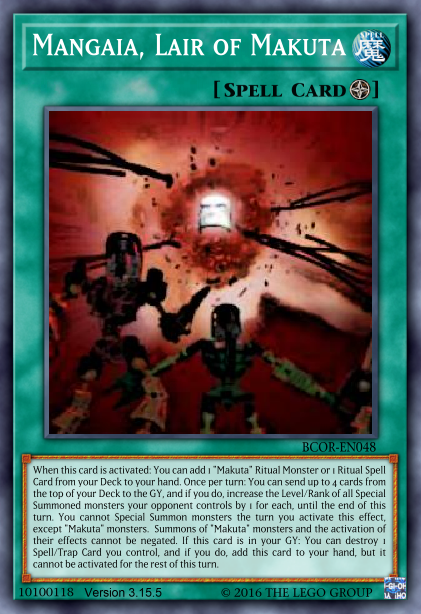
No, not talking about Miserix, we still have quite a few years to go before getting to that guy. The Makuta in question here is the one and only who was released as a Ritual Monster in BCOR:
The Makuta
Now this particular form of the master of shadows is certainly a bit too small to qualify for the “Kaiju” title, but of course that term here refers to the actual archetype. Those are high-level monsters summoned to your opponent’s field by tributing one of their monsters, and if you add to that Makuta’s ability to return high-level monster to the hand when he is summoned, the bit of synergy that prompted this deck idea should be quite apparent.
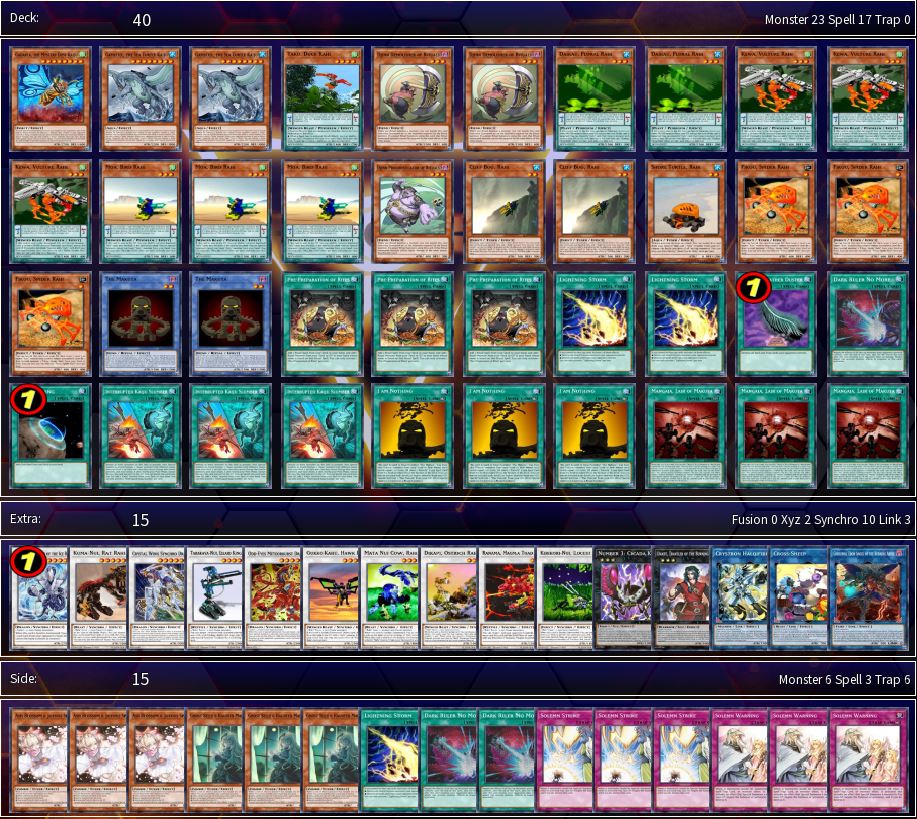
Kaiju Makuta Deck
(The above deck is also included in the new BYE release for EDOPro as BYE_Makuta)
Basically, you want to use Makuta to clear the field of monsters, and to do that you have to make sure as many of your opponent’s monsters as possible fulfill the condition of being at least Level/Rank 5.
Mangaia, Lair of Makuta
Back in ze day, the trick to doing that was the Mangaia Field Spell, which can increase Levels and Ranks by up to 4 by self-milling. It also serves as a searcher for Makuta or his Ritual Spell and protects them from negation, so using this was usually enough to get pretty much anything off the field. Until Link Monsters came along, because those have neither Levels nor Ranks to be increased and so literally do not care about any of this. They can, however, still be tributed for Kaijus, so that’s a convenient way to fill that gap.
Once you have successfully summoned and resolved Makuta, he can tribute himself to summon a Rahi from anywhere, ideally going into some big Synchro for a quick win. Failing that, his Ritual Spell does allow summoning him once more from the GY, so that can still give you a second chance (remember, any Kaijus you used before will also be back in your hand ready to go again!).
Some additional interesting inclusions in this deck are the Ritual Djinns, which can be used as material for a Ritual Summon while in the GY and thus go well with Mangaia’s milling effect. Cherubini can send not only those directly to the GY, but also any of the Level 3 Rahi to trigger their effects, and Cross-Sheep gives you one of its better effects for summoning a Ritual Monster, which the Makuta Ritual Spell conveniently does twice. Finally, if you’re wondering why the deck uses specifically Gadarla as part of its Kaiju lineup, that’s because some genius thought it made sense to let the Kewa search every single WIND monster. Very balanced.
I’ve probably mentioned this before, but the Rahi archetype from BCOR is in a bit of a weird spot design-wise, since I never really got it into a state I’m totally happy with. It’s therefore pretty high on the list of things that might need an overhaul in the future. But until that happens, they’re pretty much a hodgepodge of not entirely thought-out themes and mechanics, and right now I’d like to point out something interesting that emerged from that without much planning on my part.
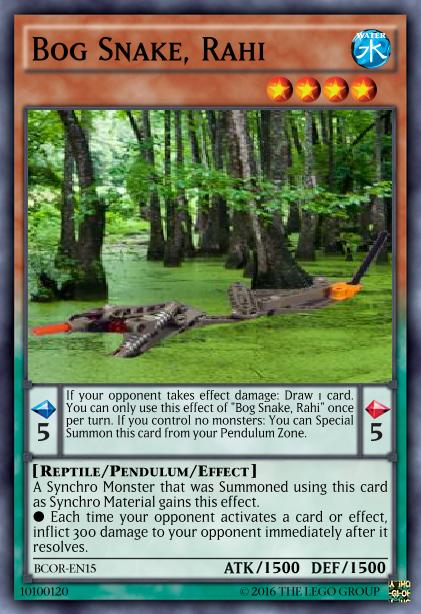
Bog Snake, Rahi
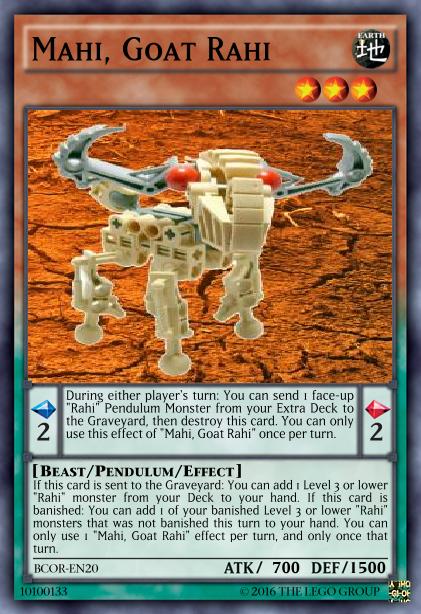
Mahi, Goat Rahi
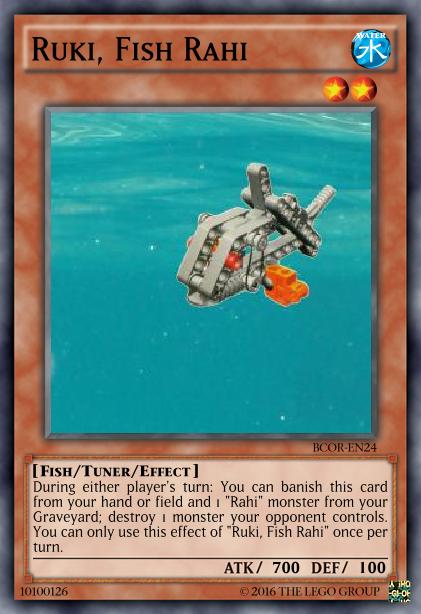
Ruki, Fish Rahi
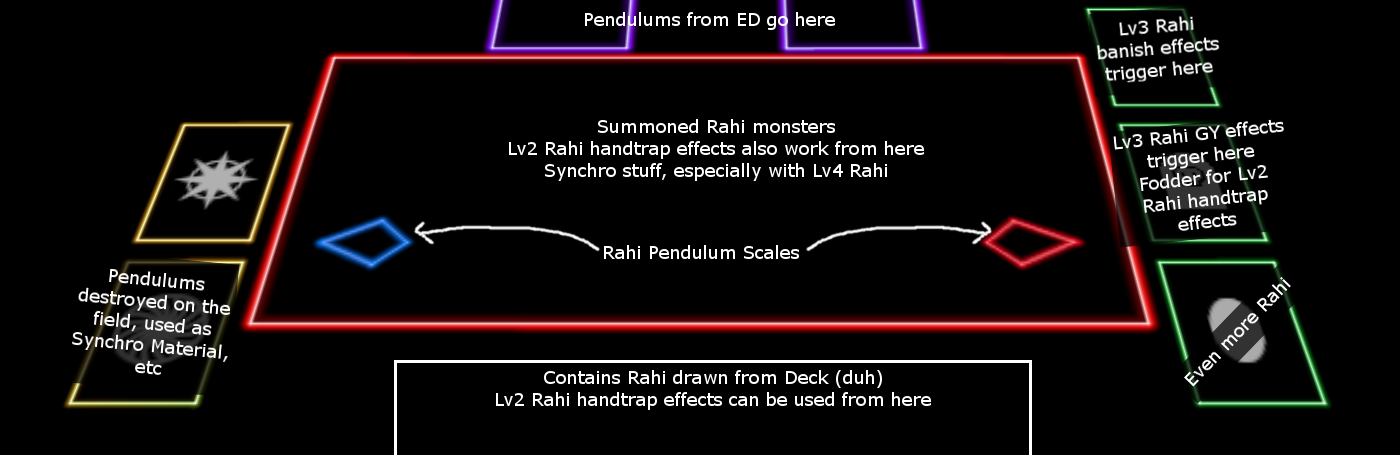
Pictured above are examples of the three most commonplace variations Rahi come in: Level 4 Pendulum Monsters who can Special Summon themselves from the Pendulum Zone and give effects when used as Synchro Material, Level 3 Pendulum Monsters with effects that trigger when going to the GY or getting banished, and Level 2 Tuners with handtrap effects that require banishing themselves plus a Rahi in the GY. The bottom line here is: Their gameplan involves them appearing in and moving between just about every location the game has (except non-Pendulum S/T Zones).
Why do I feel the need to highlight this? Because, if you think about it, it matches up perfectly with the way all the various non-civilized creatures known as “Rahi” inhabit every nook and cranny of the Matoran Universe. So I’m seriously considering keeping it around as a central point when the eventual redesign happens, even though Pendulum Monsters and GY effects in particular sounds like a somewhat moronic combination. With a bit of streamlining and proper balance considerations, I imagine this gimmick could be a lot of fun.