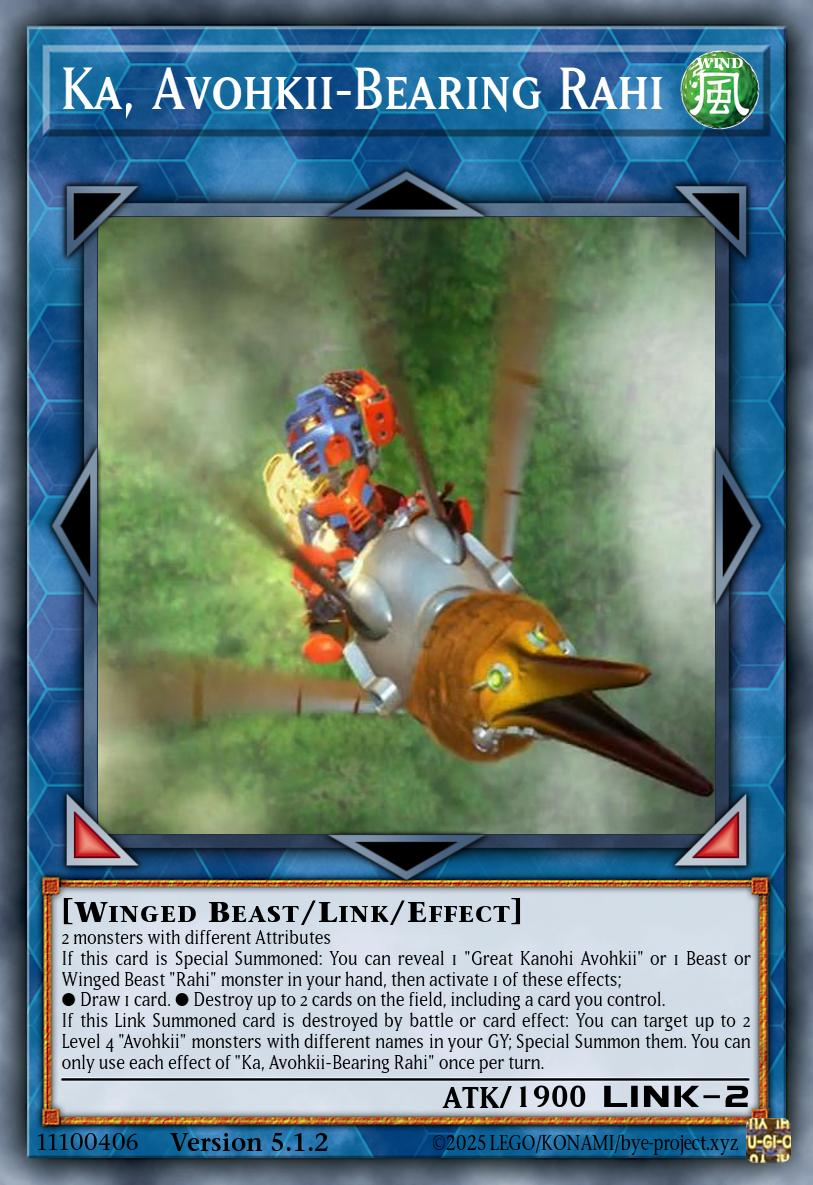
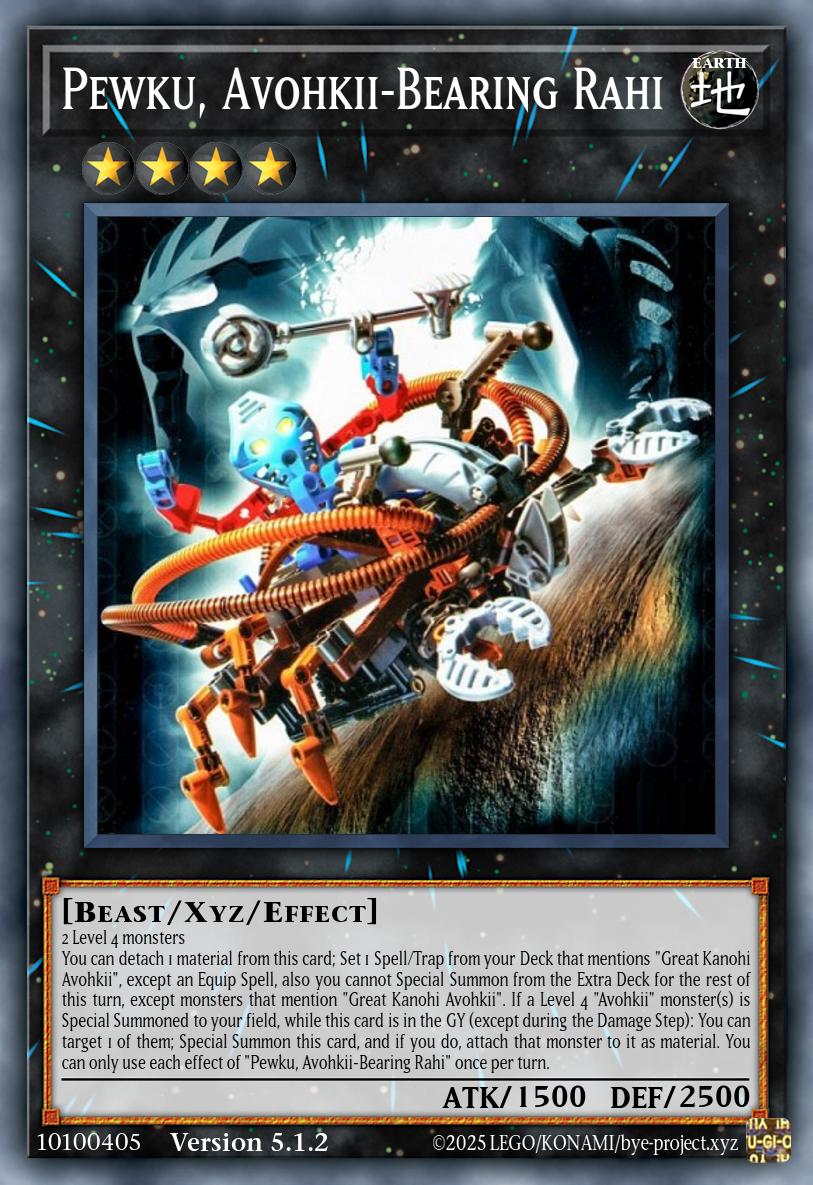
Triple Baka, if you will.
It’s April 1st, the day of the year where I talk myself into investing time into silly side projects that don’t go anywhere serious. In the past, this has brought forth some ideas that could honestly be pretty cool if pursued further, so this time I thought why not follow up on some of the greatest hits?
#1: Skull Army in Rush Duels
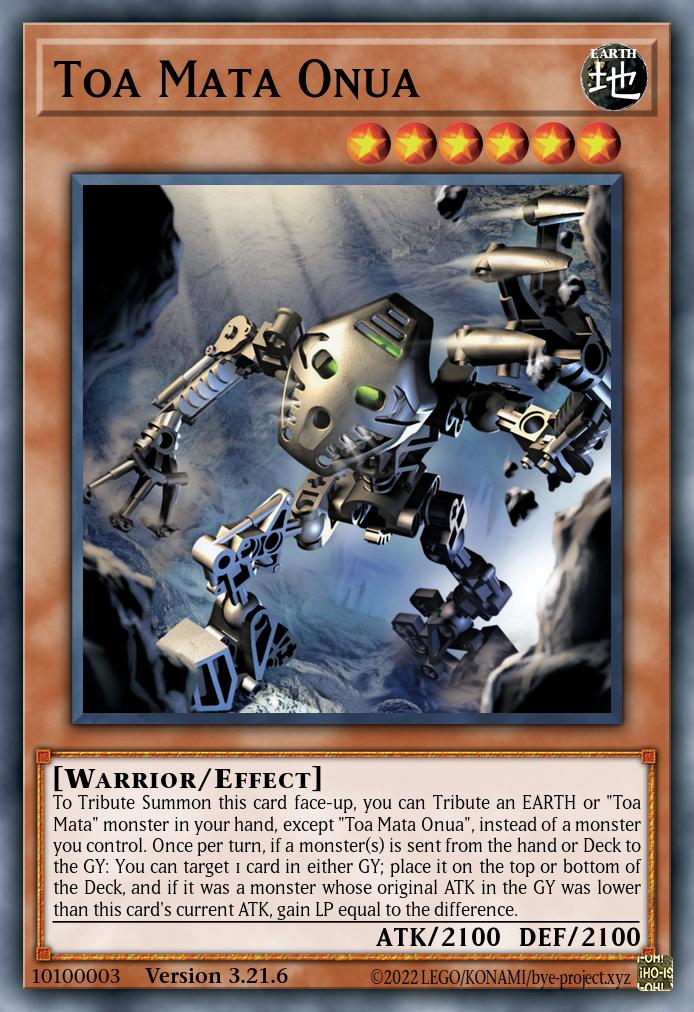
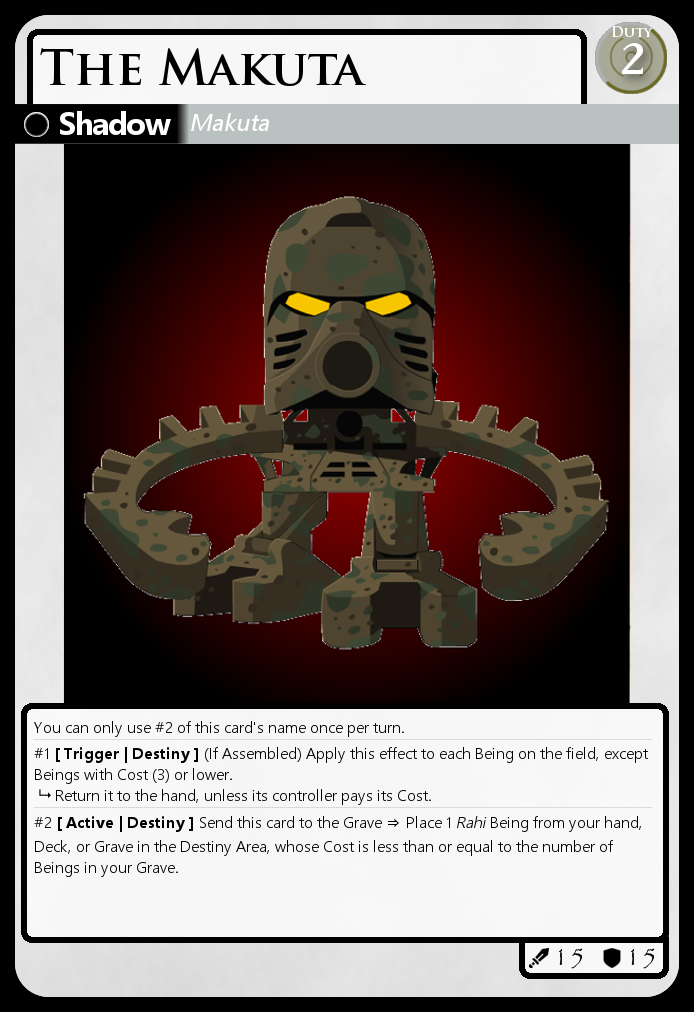
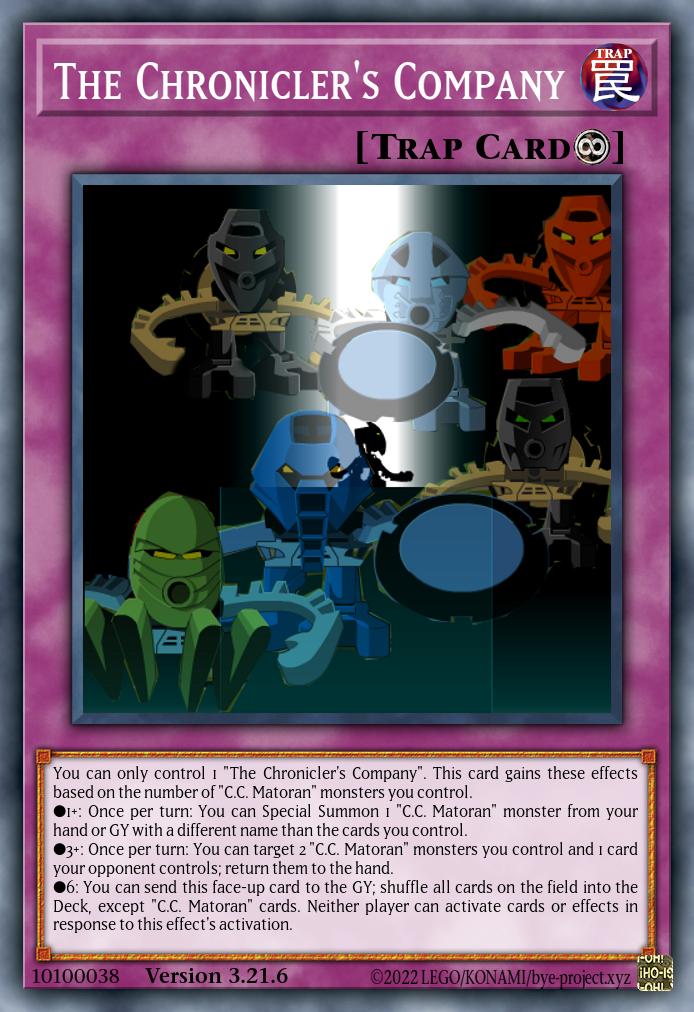
Once upon a time in 2021, an April Fools’ post had the honor of becoming the first ever so-called release post on this website, featuring the Toa of G2 adapted as Rush Duel cards. This left hanging a question that was often asked in early 2015 as well – where are the villains to face our heroes?
Oh look, here they are.
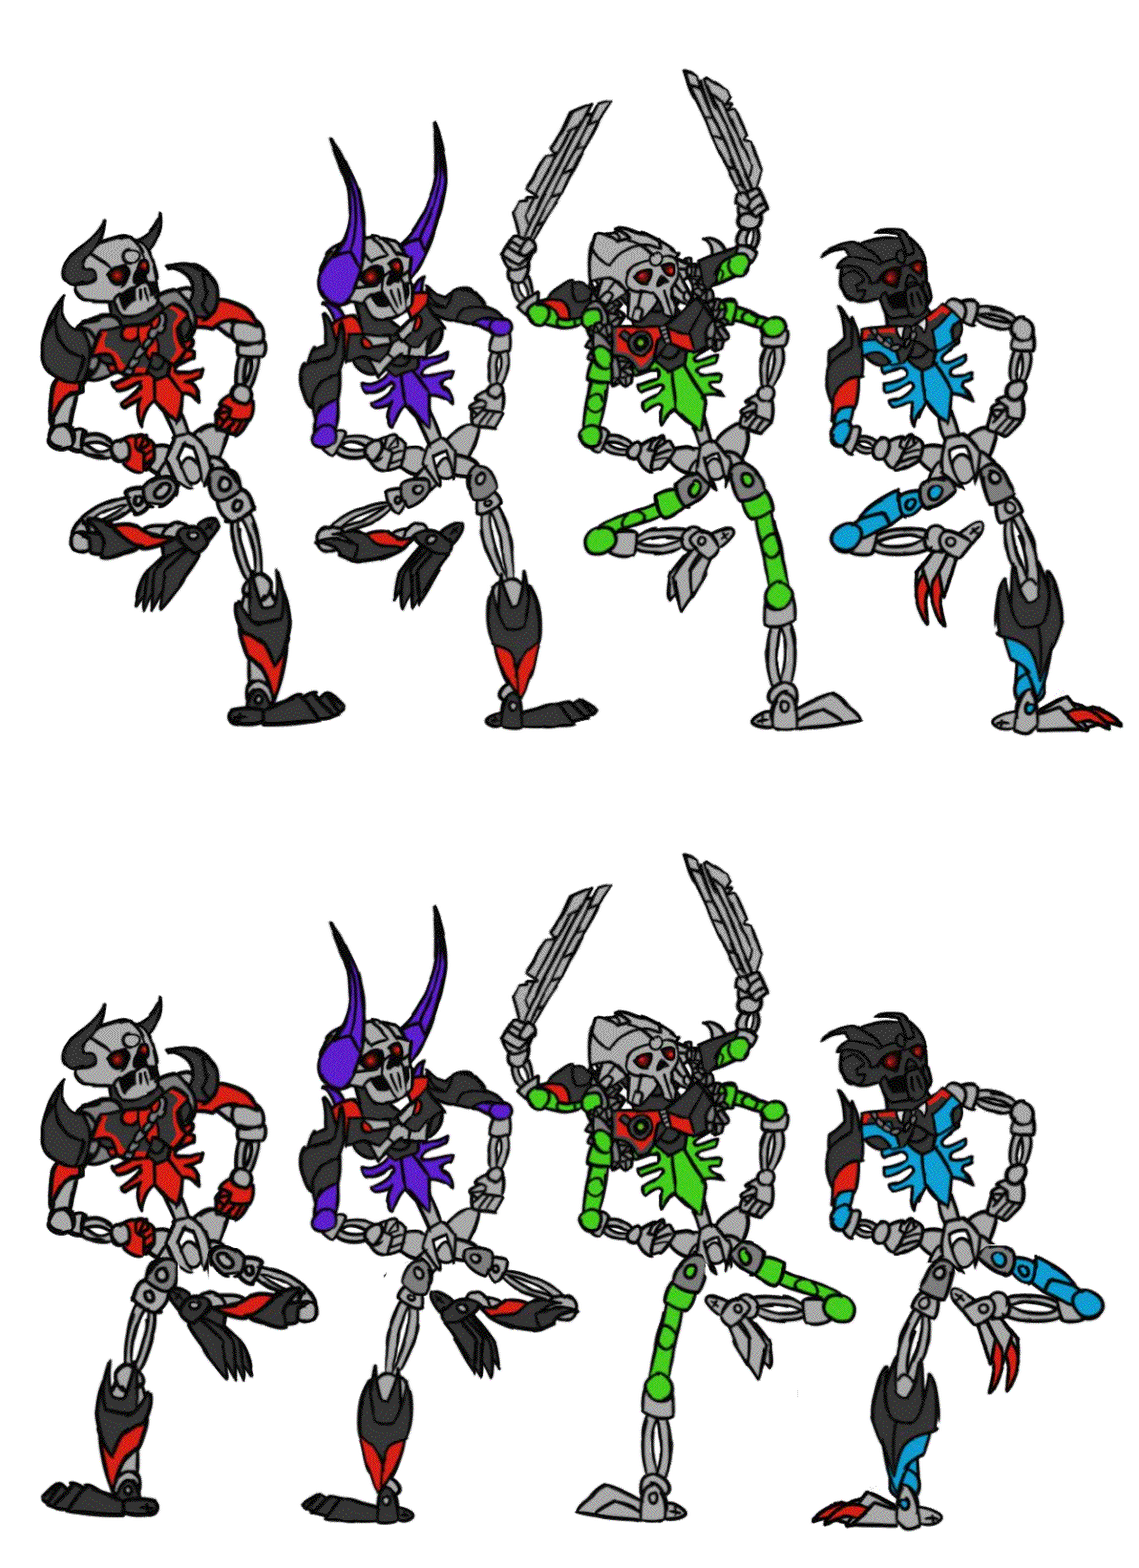
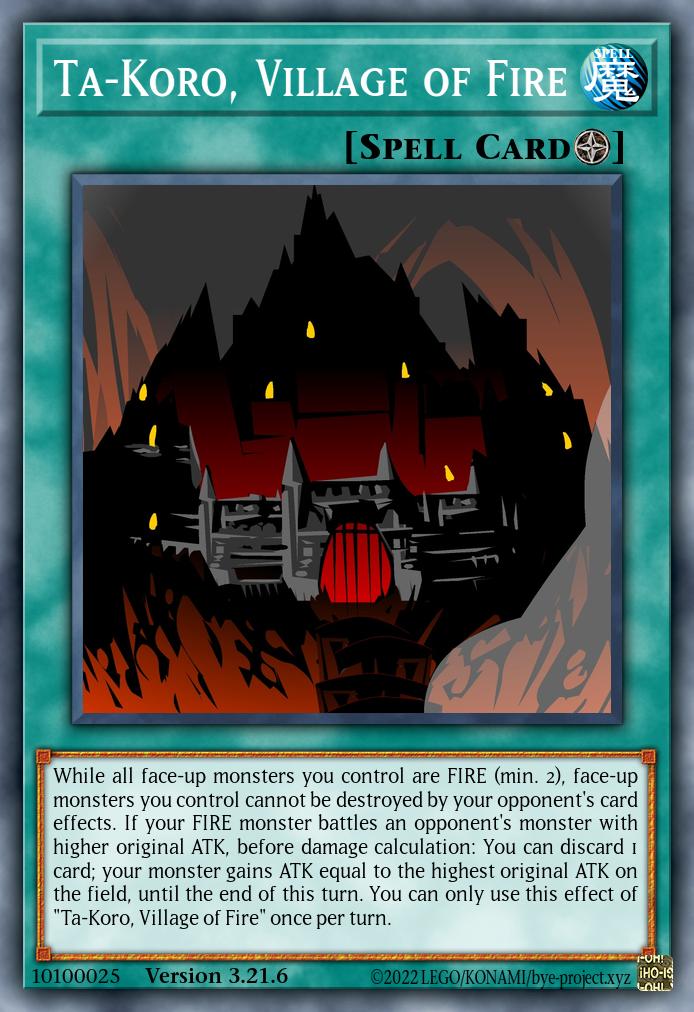
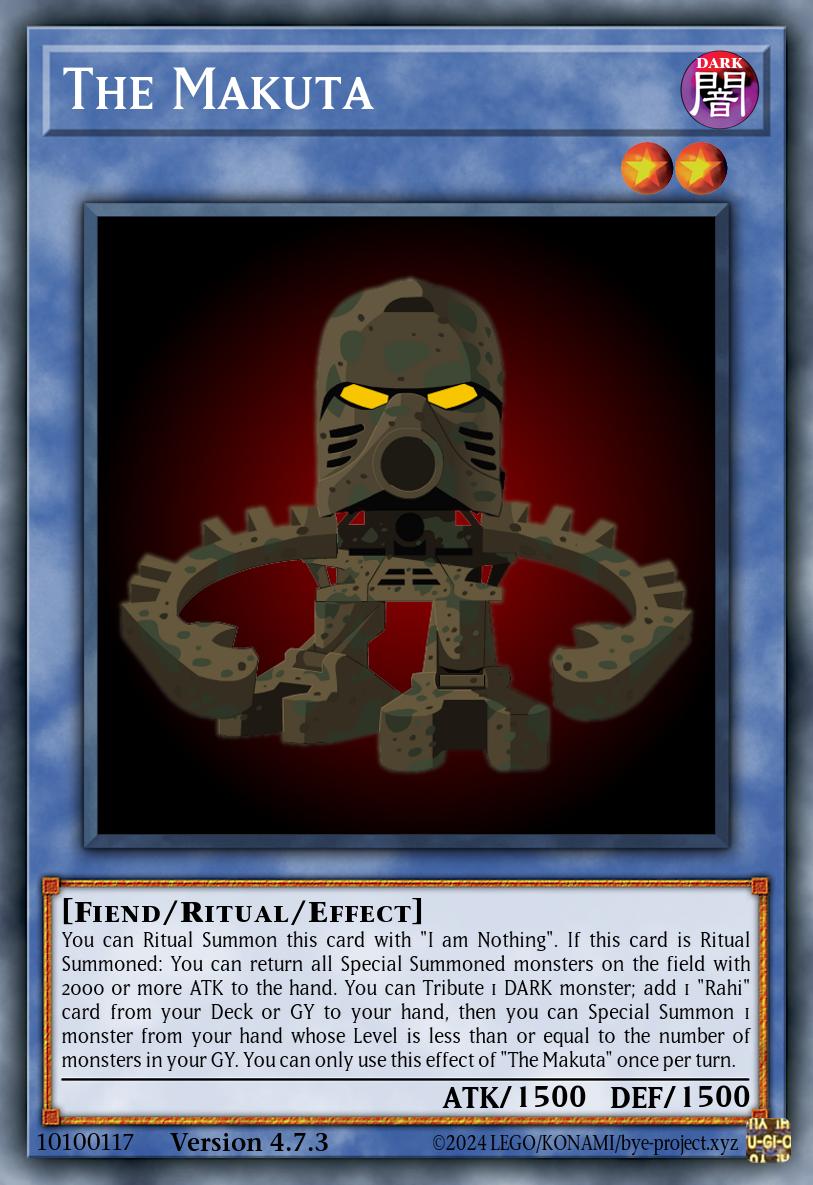
Enter the Skull Army led by Kulta the Skull Grinder, bringing along some new mechanics like Rituals and Contact Fusion that were added into Rush Duels over the past five years.
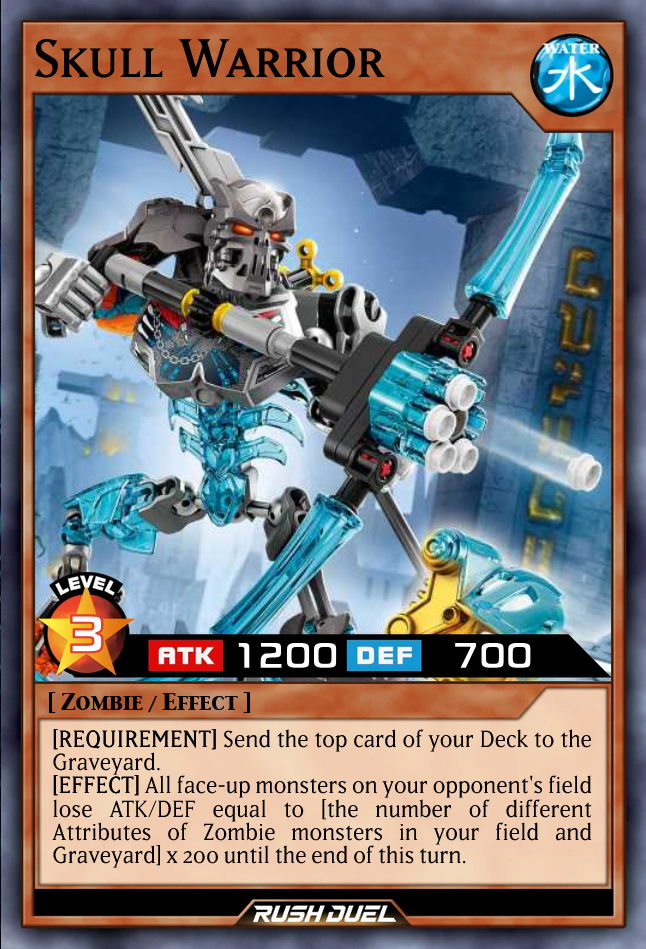
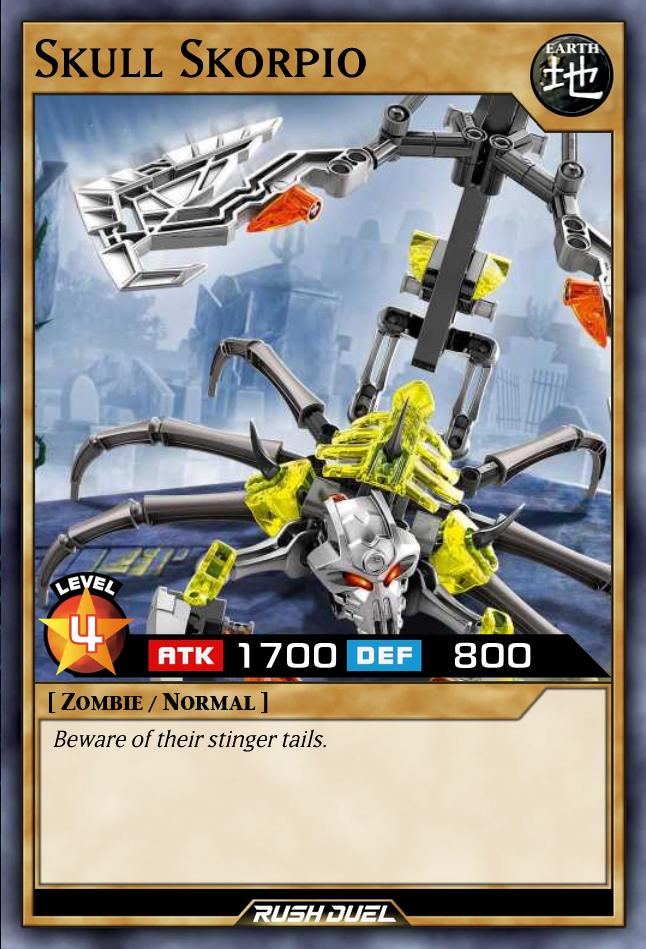
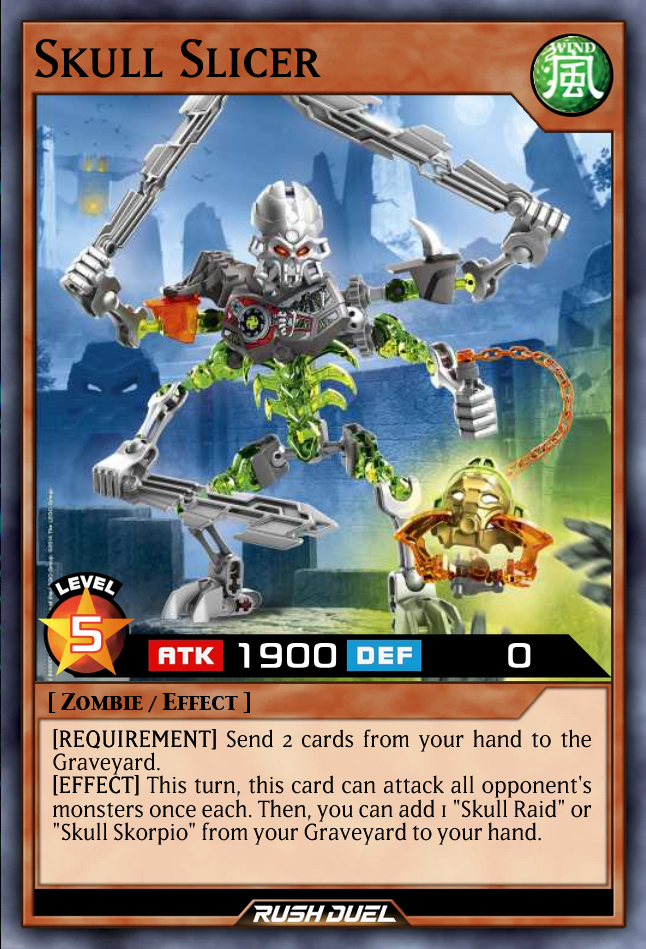
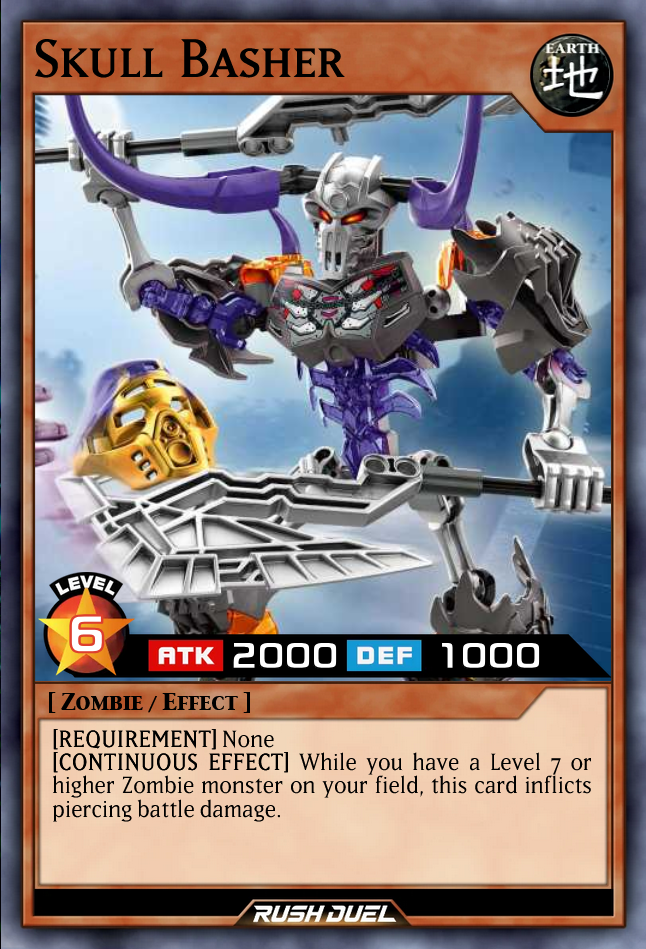
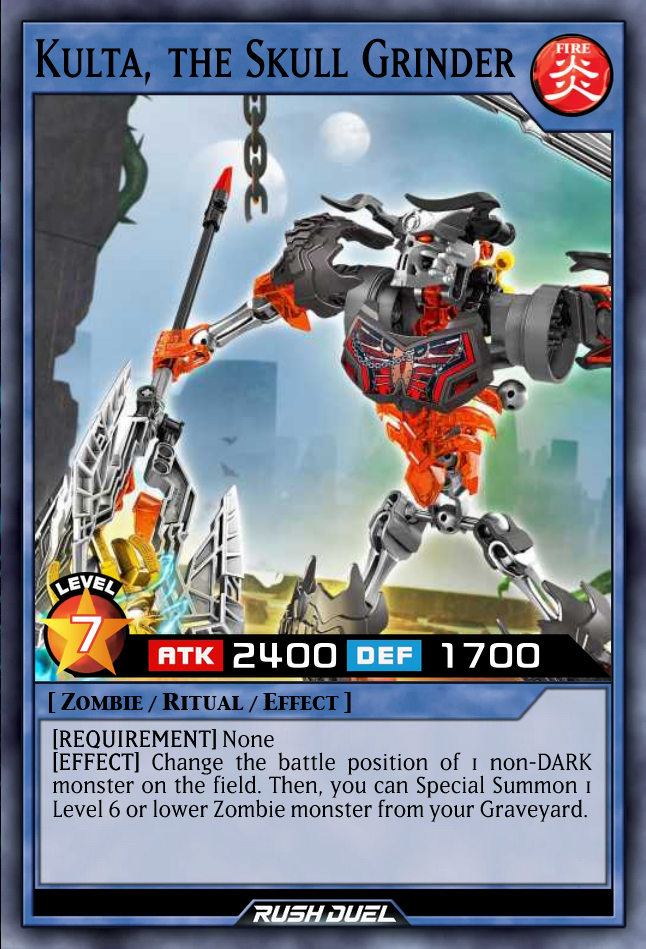
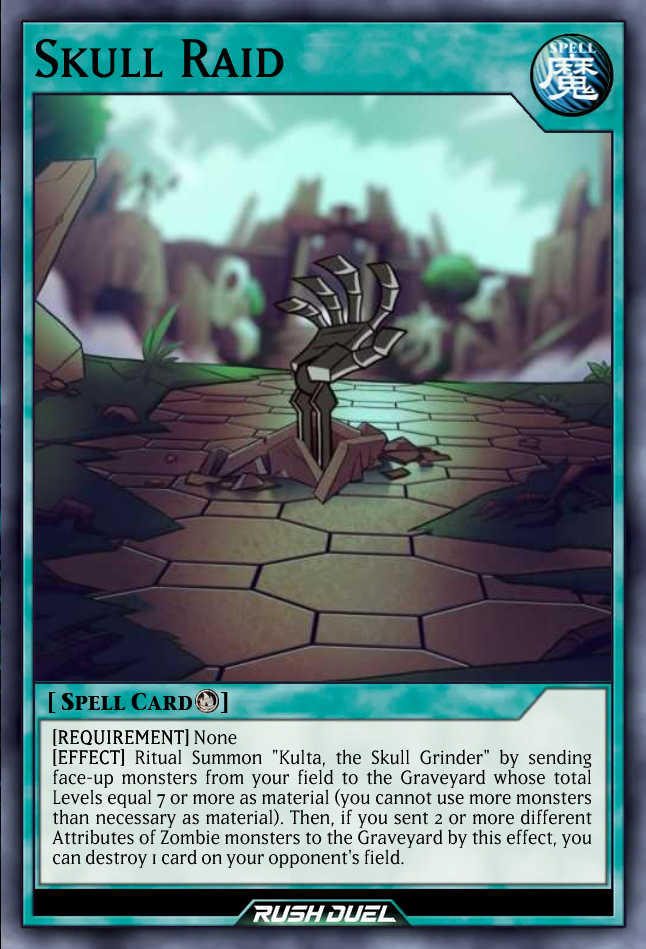
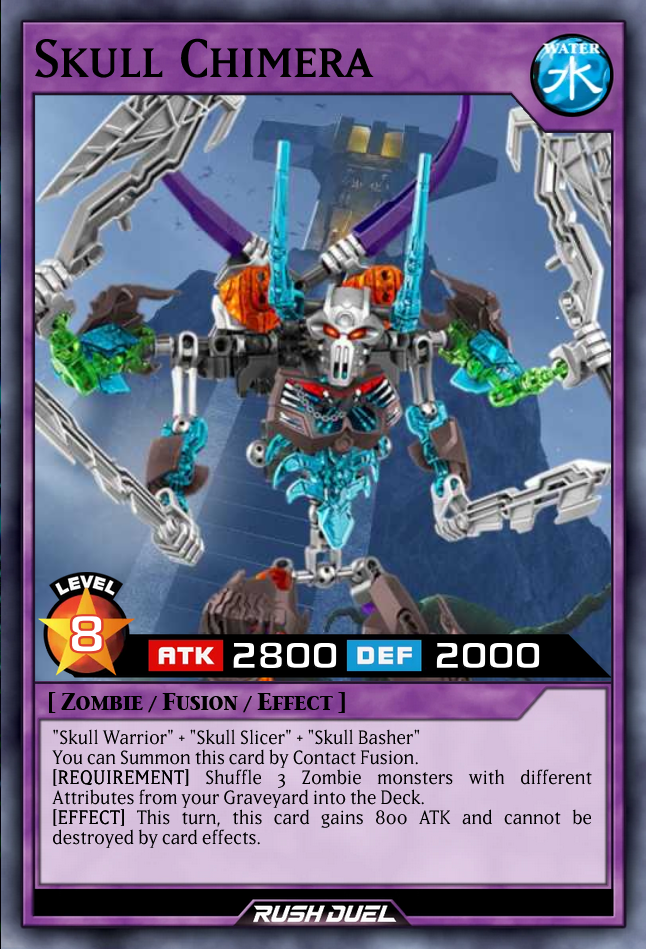
Download here (also includes the previous Rush release)
(This is a non-repository release in the old style, so you’ll have to copy the files into your game folder as per the included README)
Long story short, the core concept of these is beatdown with Zombie monsters whose gimmick is covering a bunch of different Attributes. Their boss Kulta is a Ritual Monster (those go in the Extra Deck in Rush Duels!) whose effect simply calls the others back out of the Graveyard, in addition to adjusting battle positions – but not of DARK monsters, because he himself is on Makuta’s metaphorical payroll. Fun Fact: This guy is also somehow the only FIRE Zombie in Rush Duels as of right now. Basher is an EARTH monster who simply deals piercing damage while you have a higher-Level Zombie around, making him ideal to revive with Kulta. Slicer is a WIND Zombie (an actually pretty well supported category) who can multi-attack at a hefty discard cost, but he can also offset that by adding back either the resident high-ATK Level 4 Normal Monster Skorpio (Beware its stinger tail!) or Kulta’s Ritual Spell Skull Raid. At Level 3 (this also has synergy with existing Zombie support), there’s the WATER Warrior, who makes use of your variety of Attributes to make the opponent’s field smaller. And finally, the Contact Fusion Skull Chimera combines Warrior, Basher, and Slicer to obtain … a big ATK stat and protection. The usefulness of this relative to how likely you are to make it mirrors how it never showed up in the story either.
From my brief gameplay experience, these slot pretty well into existing Zombie Ritual decks like Defiant Soul. One part of the design where I may have gone overboard is Kulta just being able to bring a guy back every turn, another more unexpected one is Warrior’s stat reduction and how it can stack if you manage to recycle him since it’s an (implicit) soft once per turn. But that’s just an initial, very vibes-based observation based on the few rounds of testing I managed to fit in.
#2: Toa Mata in Virtues
Virtues. A card game devised in 2024 to cause great damage to the human spirit without a single benefit hypothetically salvage my design work in case Konami comes after my ass with a C&D for making custom Yugioh cards. While the initial draft was quite comprehensive in all the mechanics I wanted to include, many details were still left open as they would require deeper consideration and/or testing than the allotted time could fit back then.
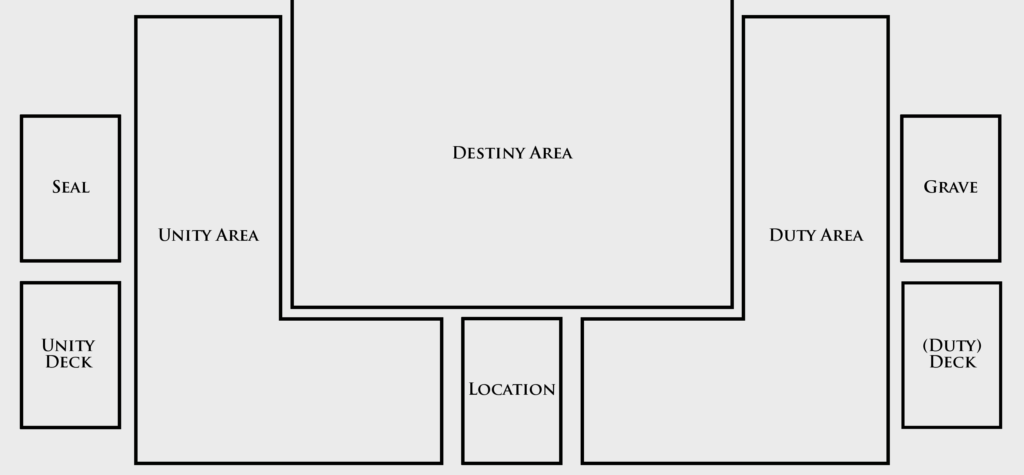
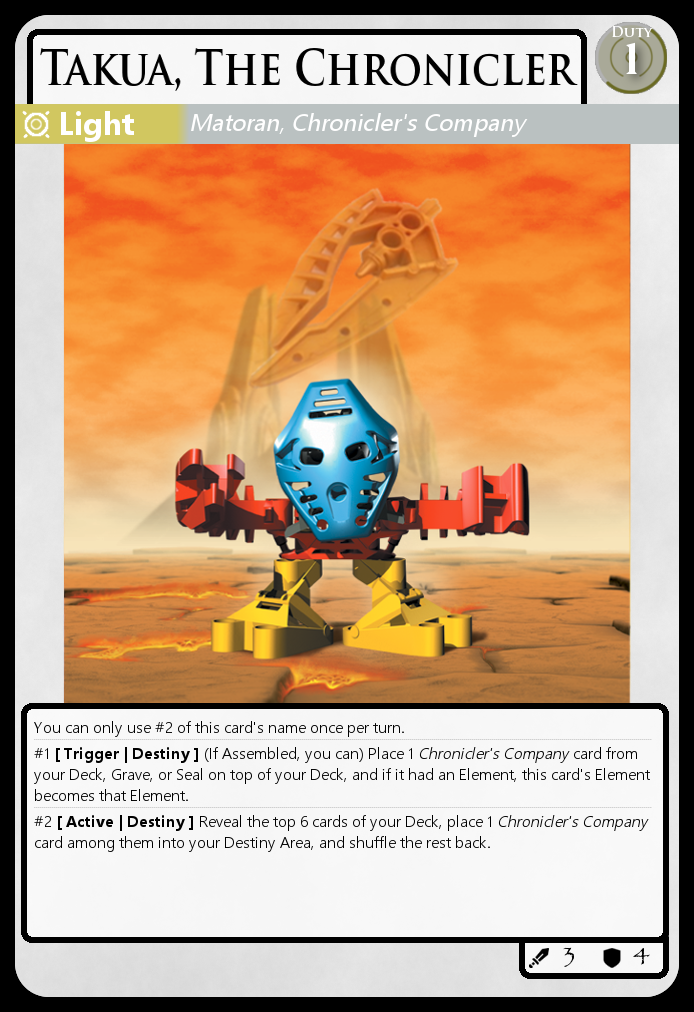
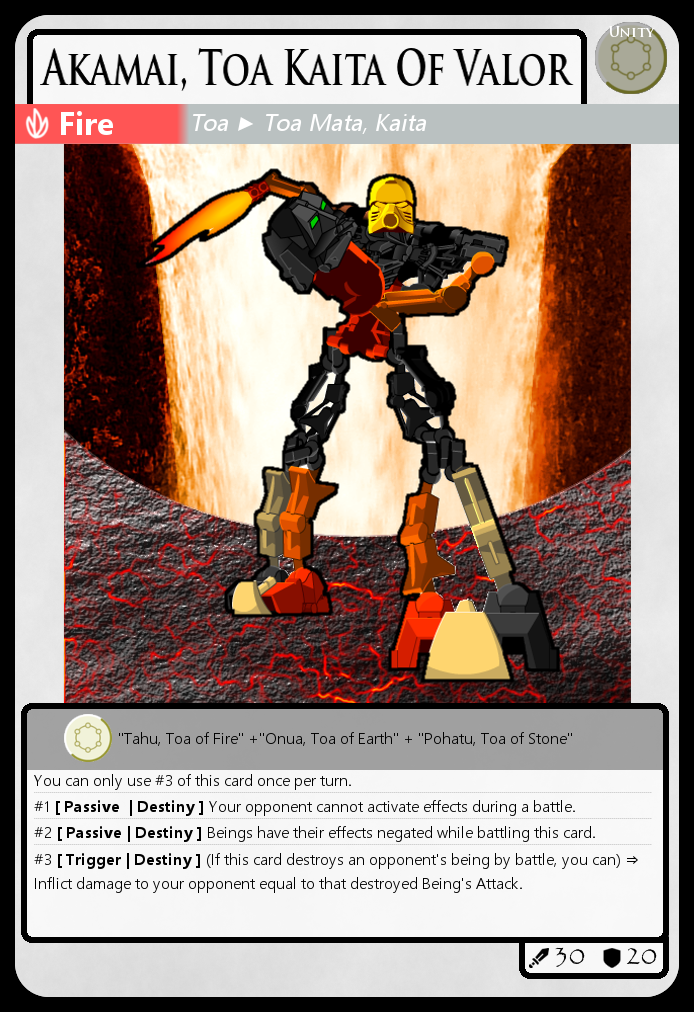
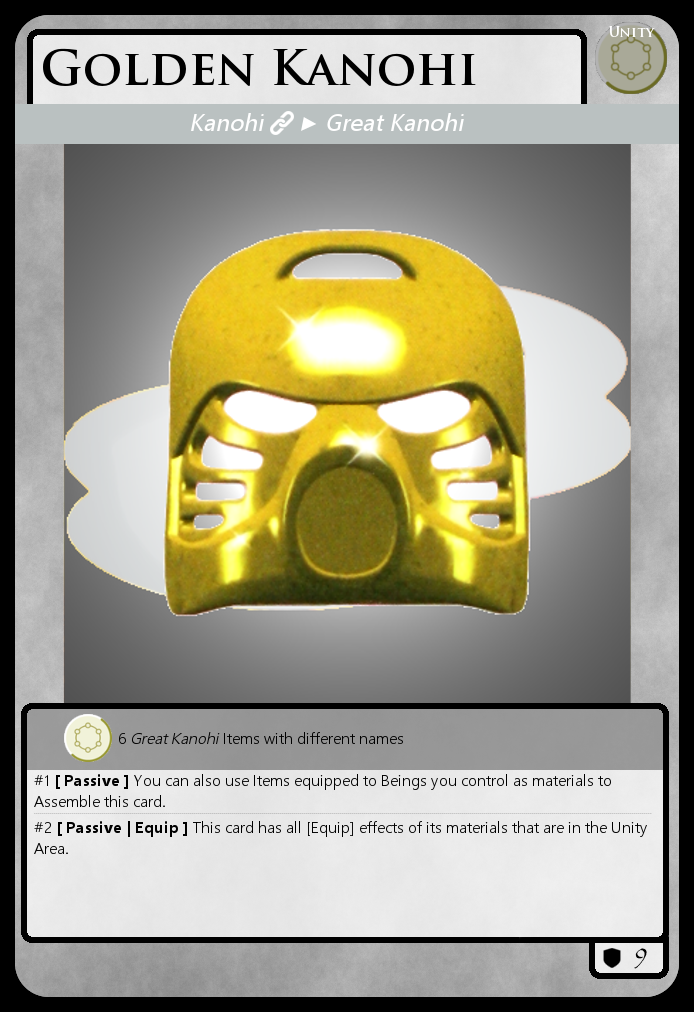
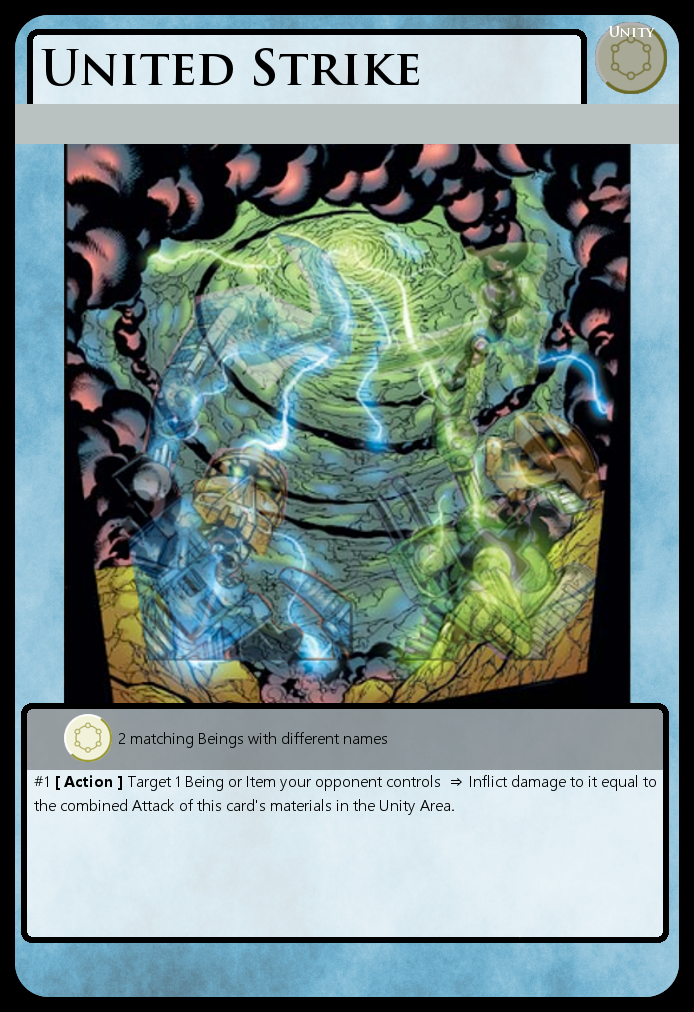
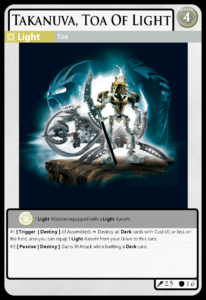
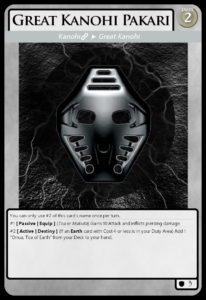
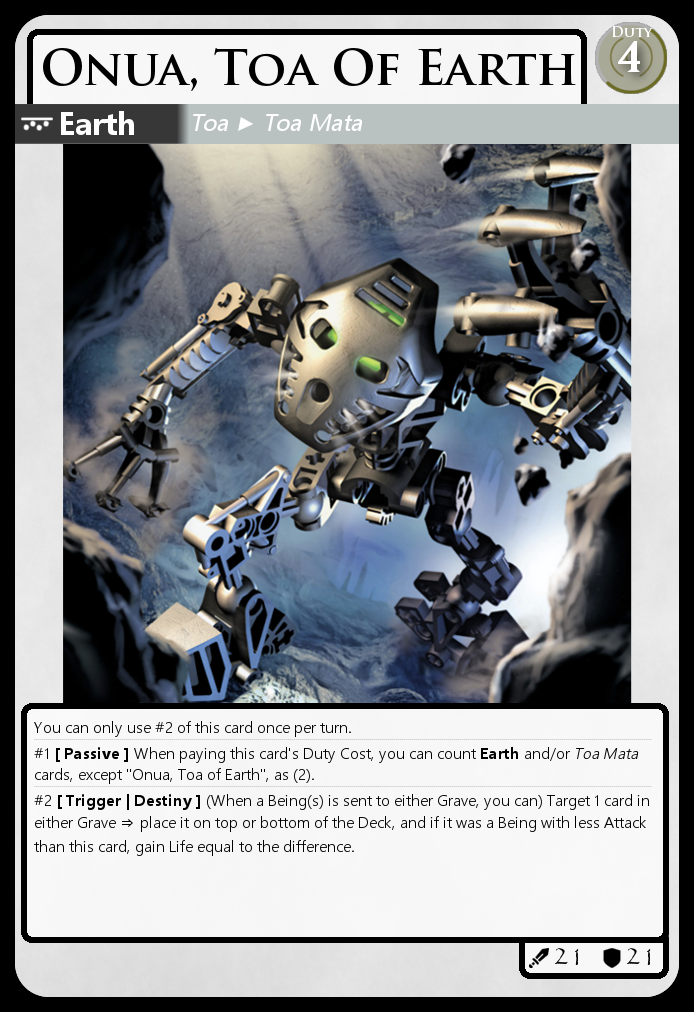
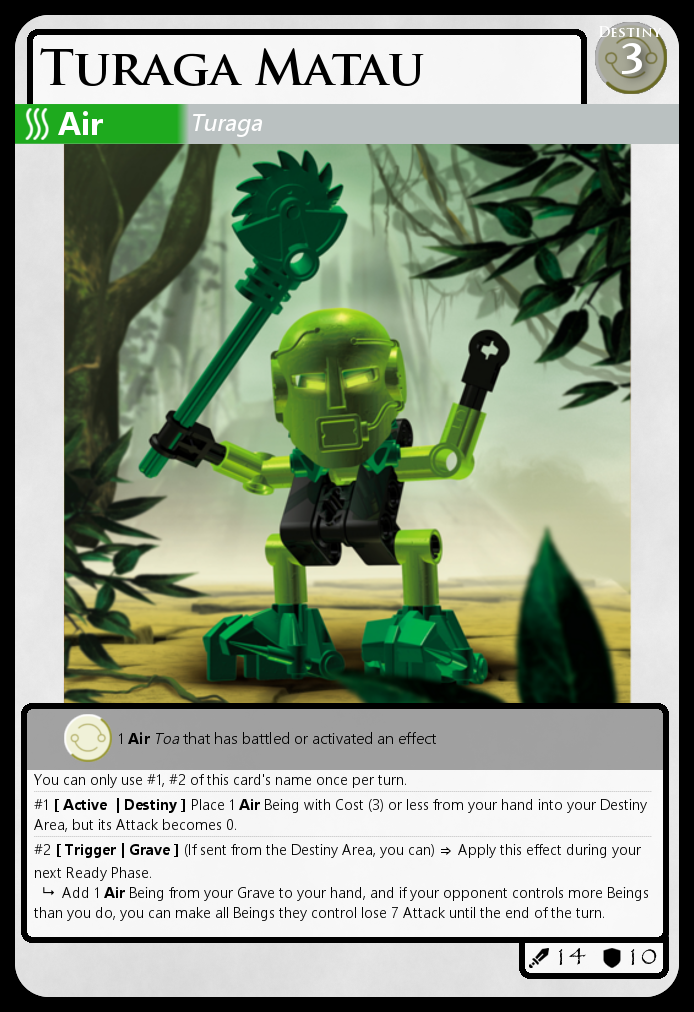
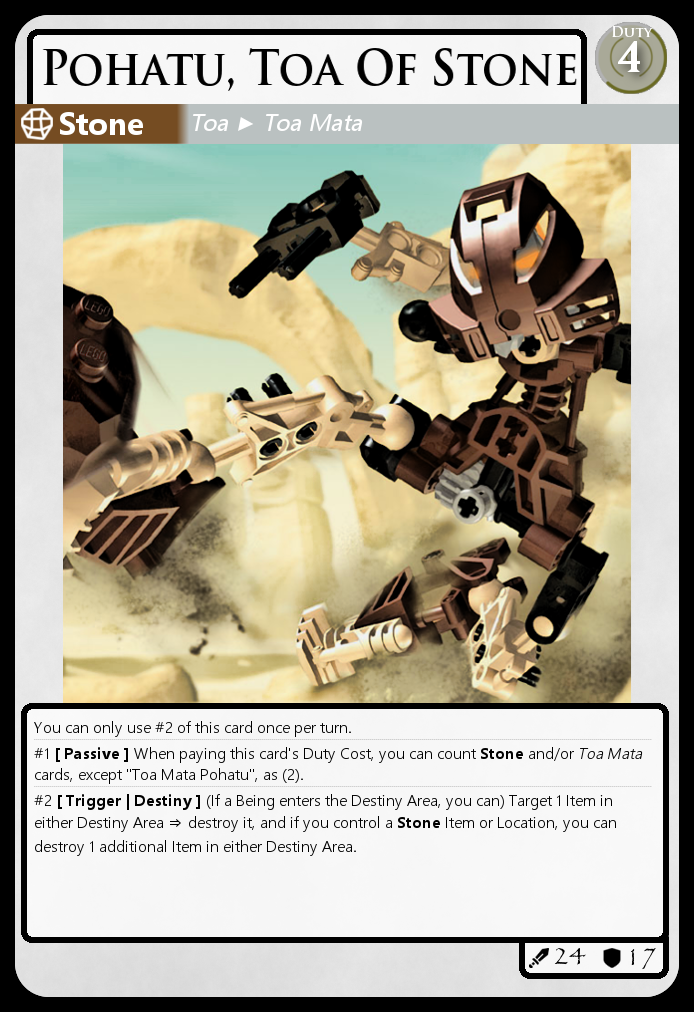
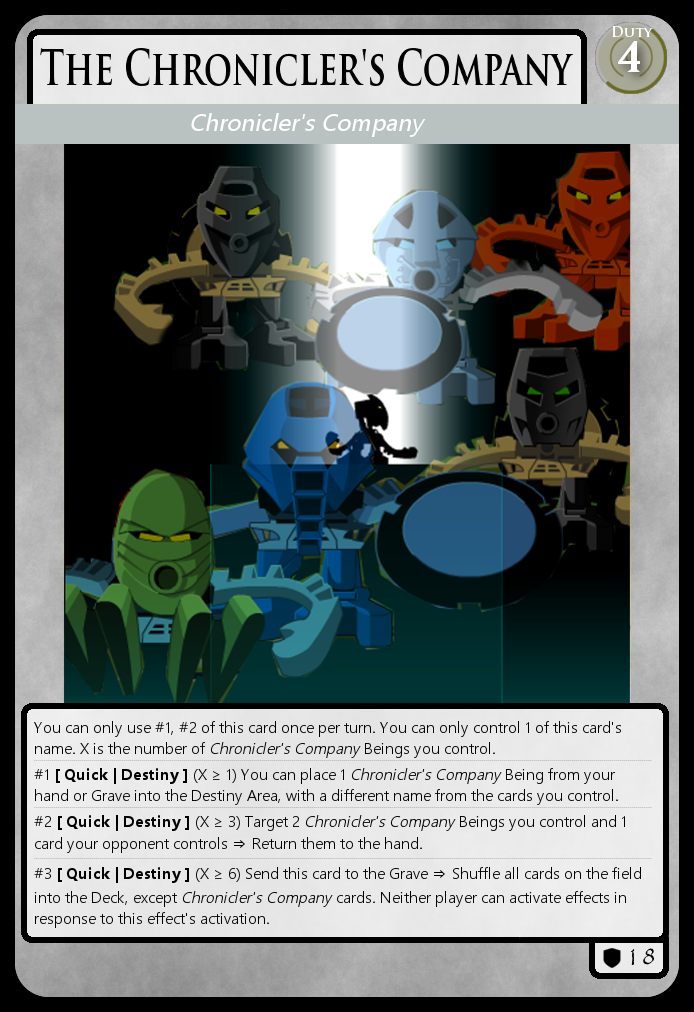
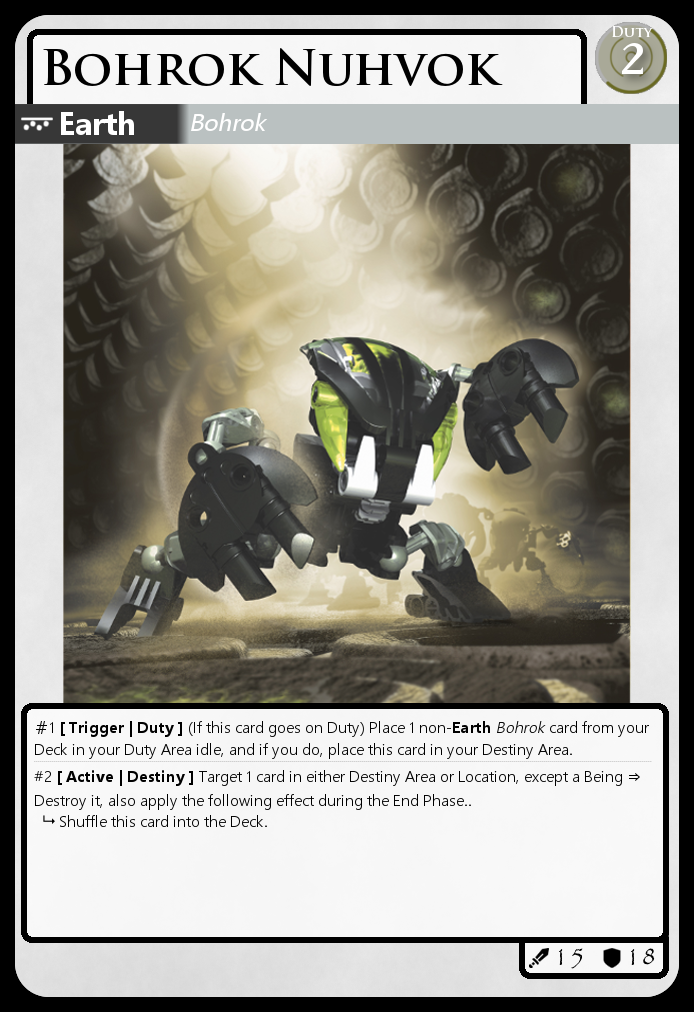
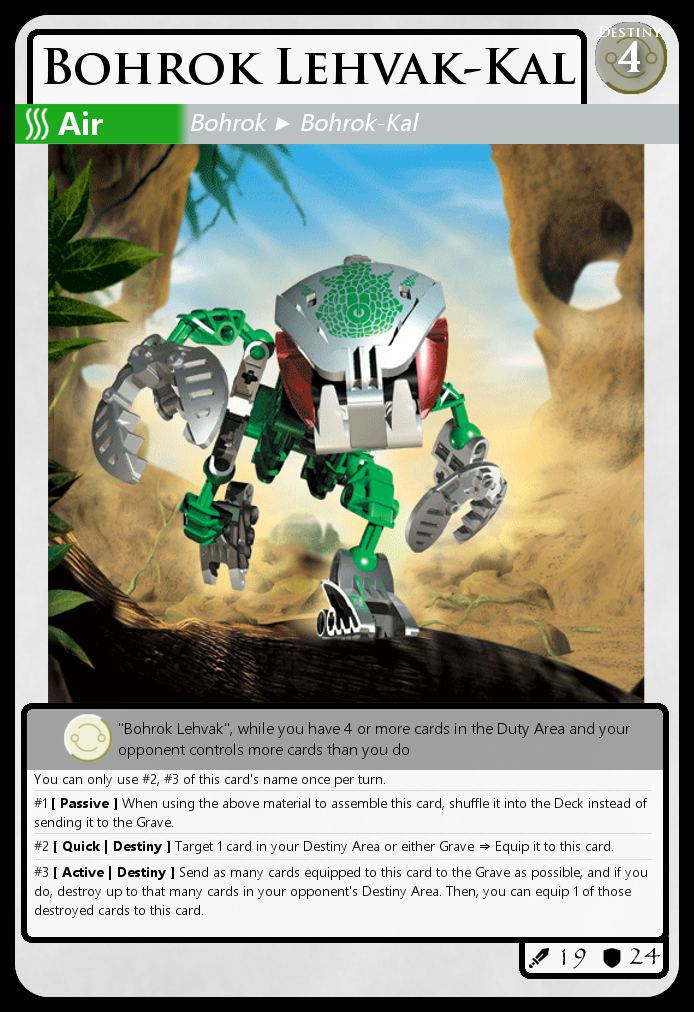
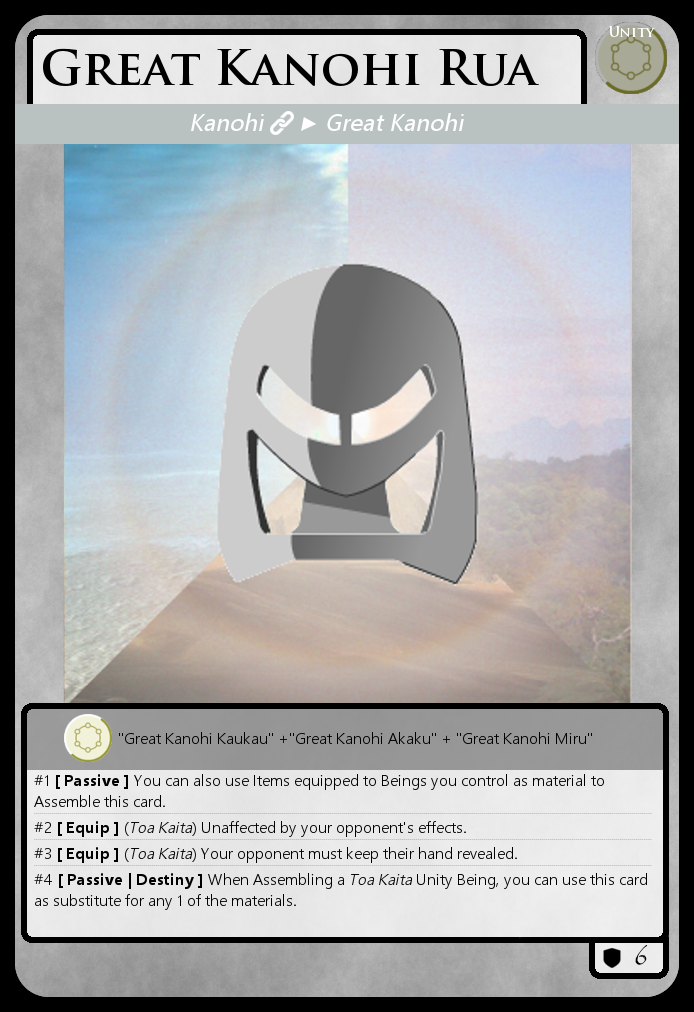
So the obvious thing to do when going back to it was to explore those, and for that I picked the classic Toa Mata as a case study. Behold their glorious forms:
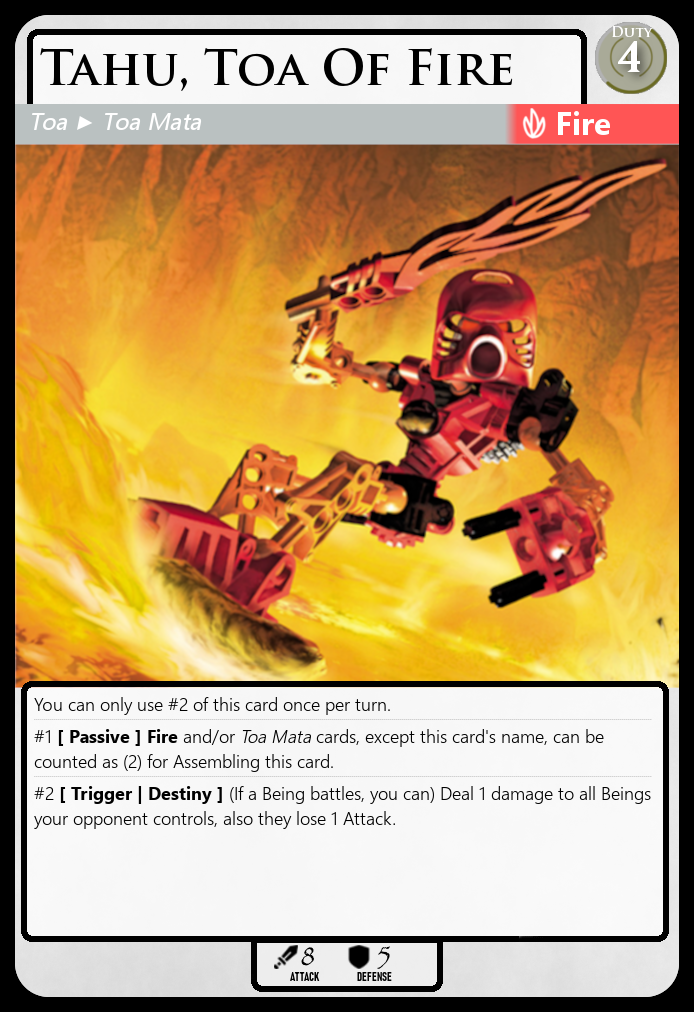
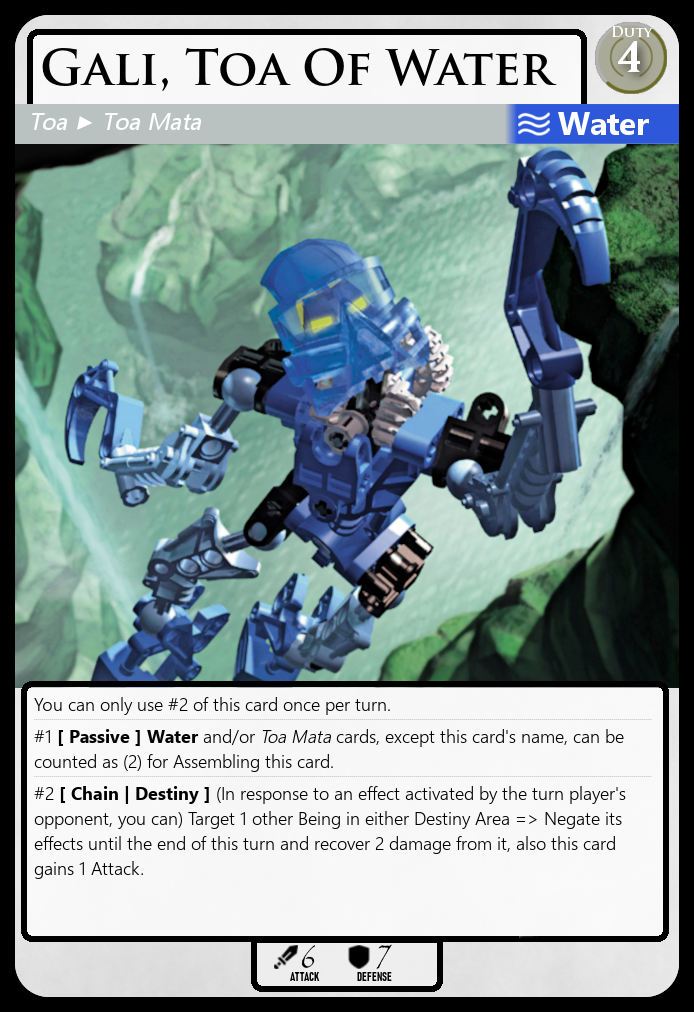
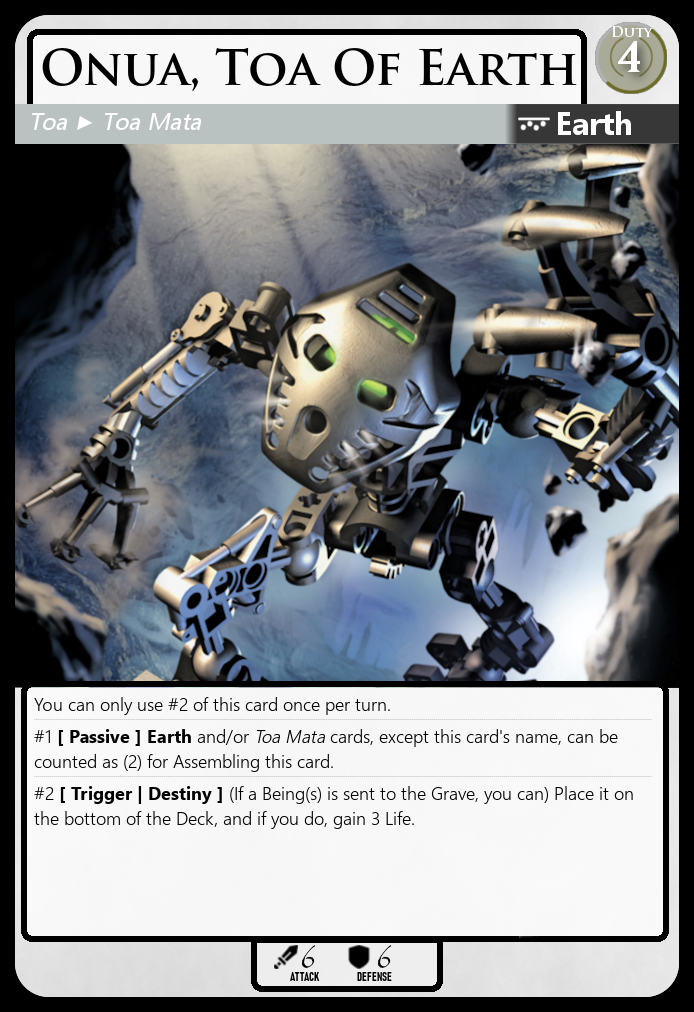
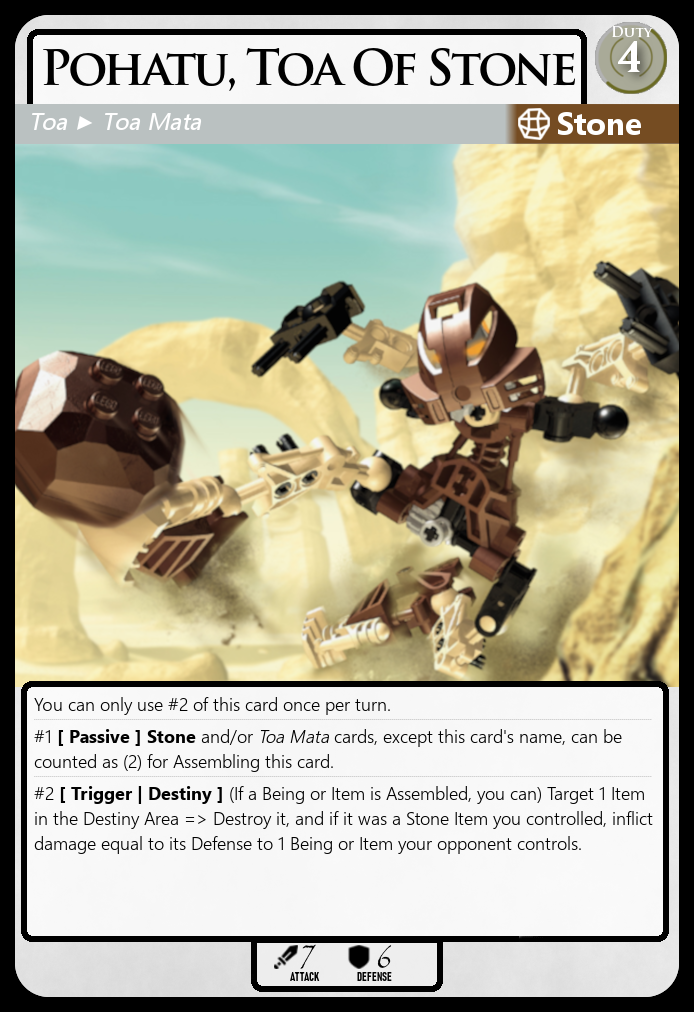
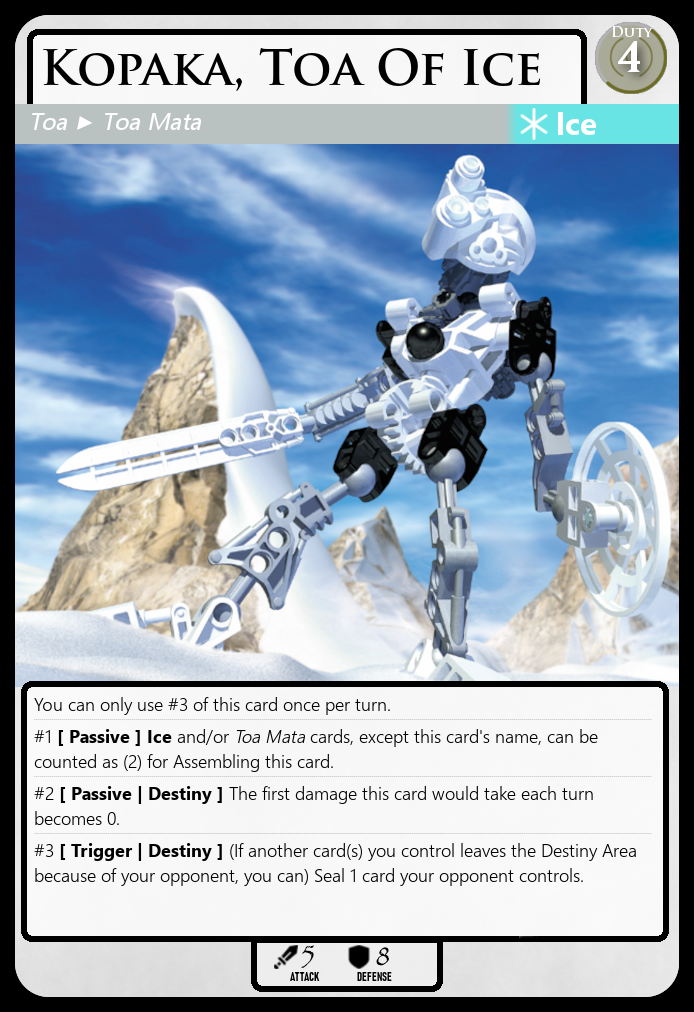
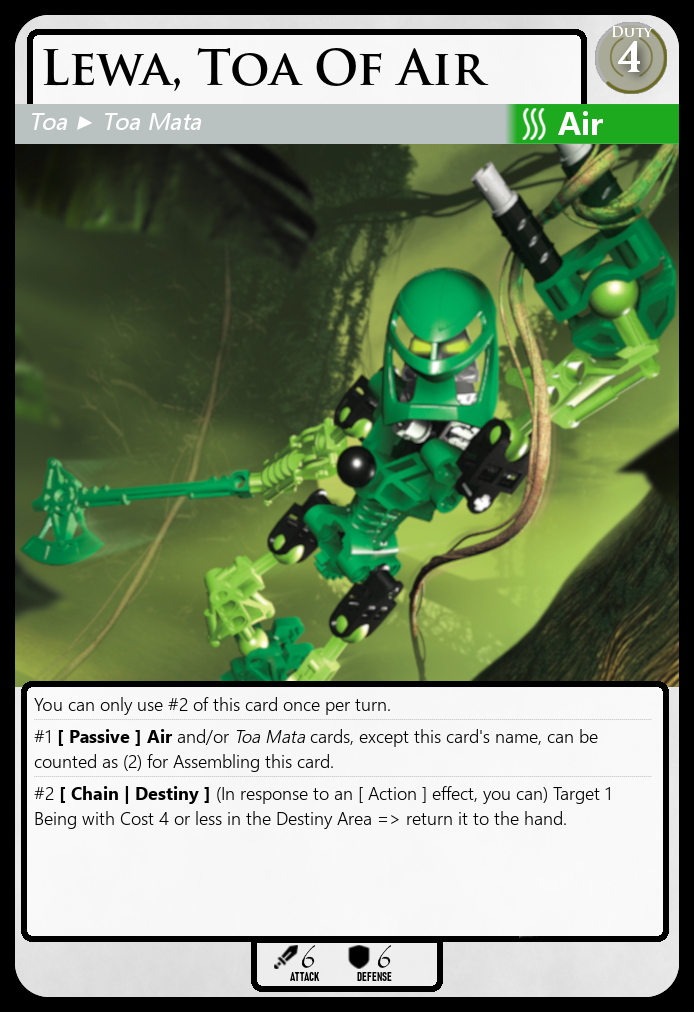
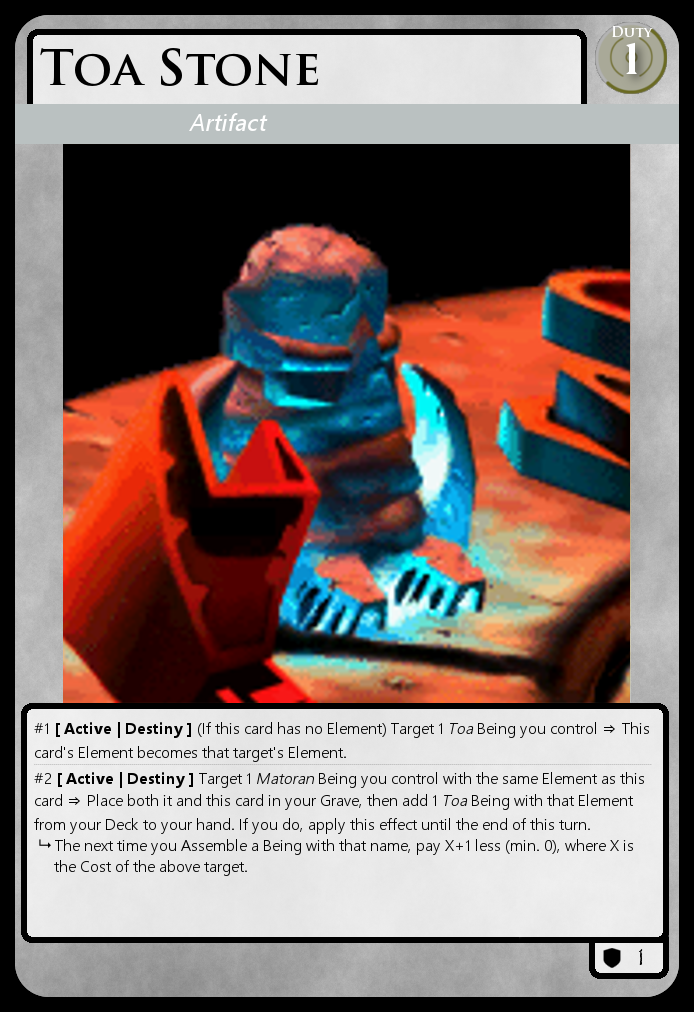
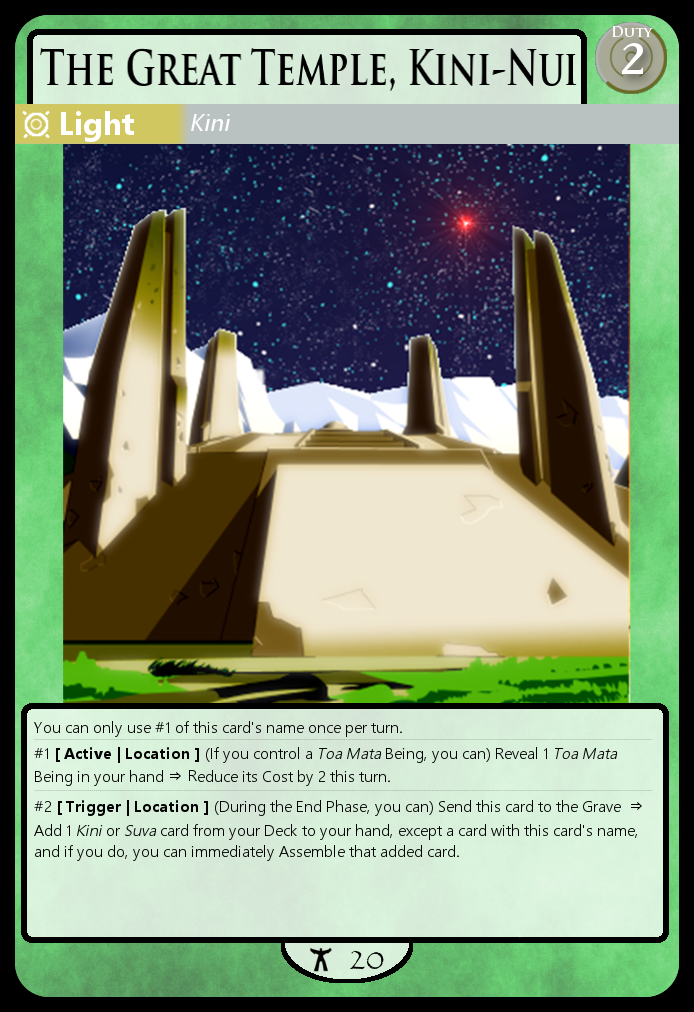
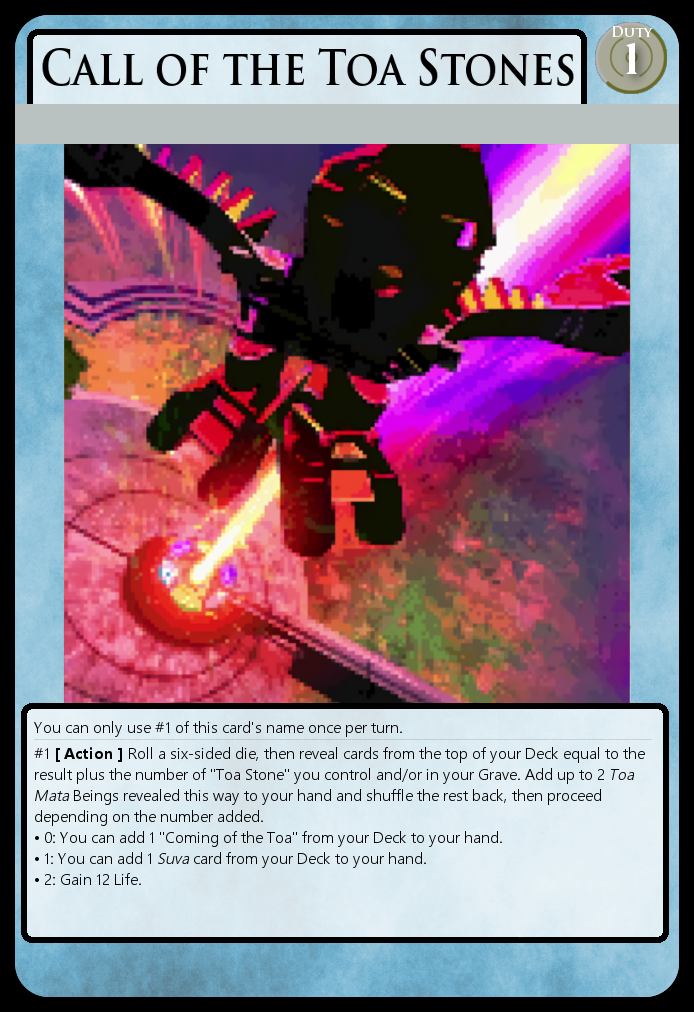
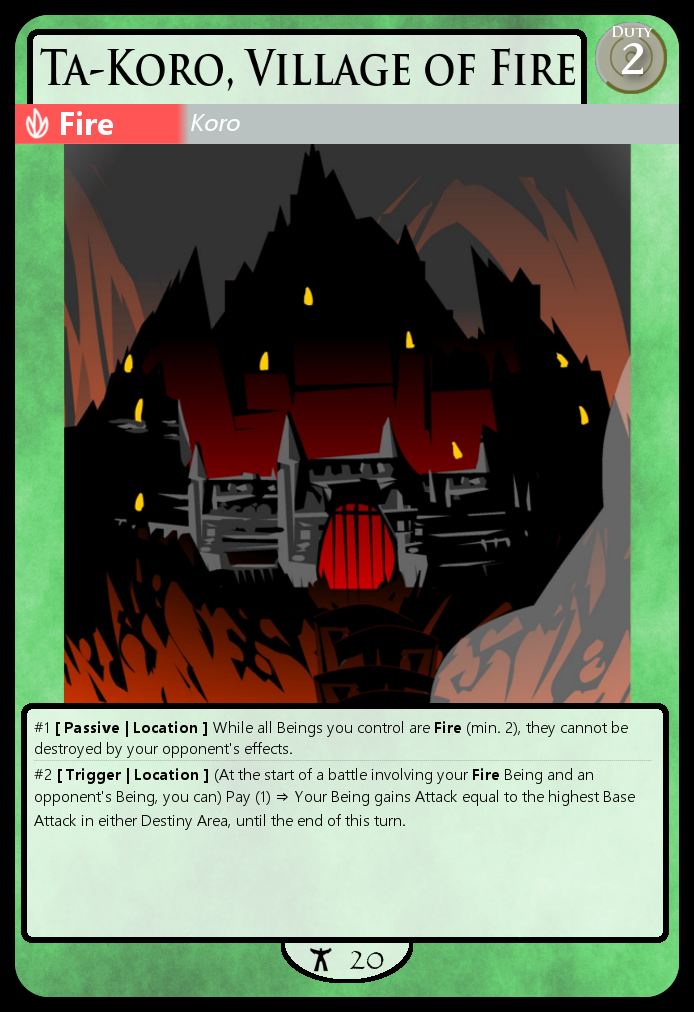
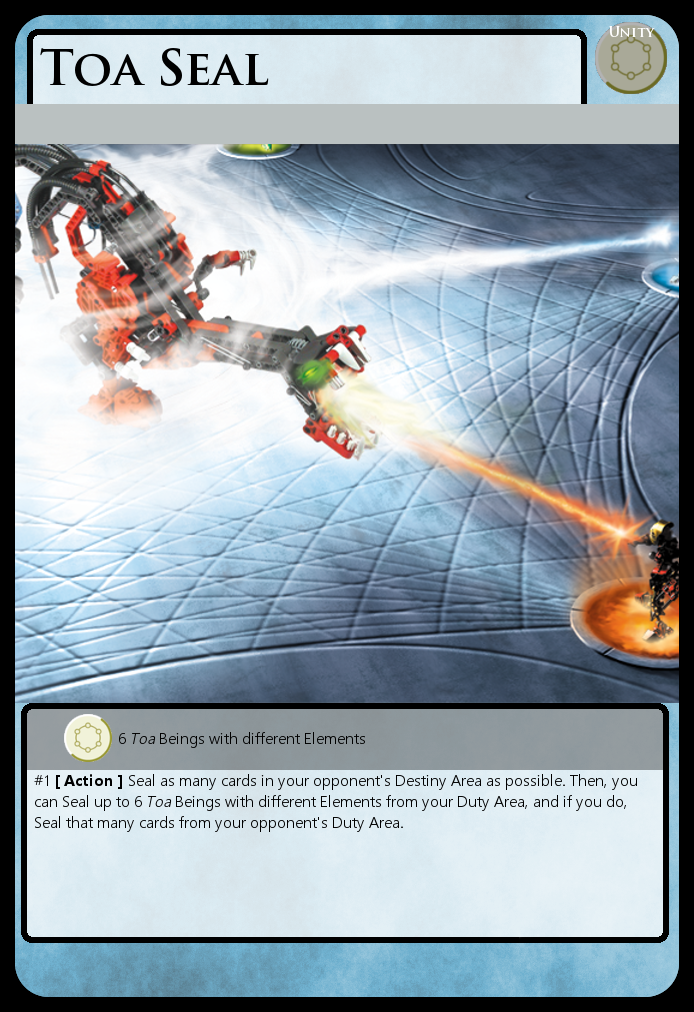
As a quick recap to what there’s to see on Virtues cards: The white frame color on all of these indicates they’re Beings, the active entities akin to monsters, creatures, minions, and so on. The “DUTY 4” in the top right corner is their Duty Cost, the number of cards in your Duty Area you have to turn in order to play (formally, “Assemble”) them. The line below that holds a list of groups, as well as an element, which are classifications used by card effects. Then below the image, the text box contains effects – nicely numbered and structured, but written in full sentences so that reading the card explains the card. Finally, the little box at the bottom contains Attack and Defense values, indicating how much damage a Being can deal and take, respectively.
There are some slight visual improvements here compared to the sample cards from two years ago – the Element moved to the right side so there isn’t an awkward gap on non-elemental cards, the image now takes the whole width of the card, the font size in the text box increased slightly, and the stats at the bottom are centered and labeled with their proper names for clarity.
The new versions of the Toa Mata you see above in this style were made while trying to find answers to all the open questions from last time. Let’s go over them by category.
Duty Costs
The general outline of the “Duty” resource system is that you place cards from your hand in a special Duty Area and then rotate them to pay the costs of other cards. At the start of the next turn, those cards recover so you can pay with them again, establishing a ramp that makes more expensive cards available the longer the game goes. Sounds simple enough, but there were several crucial details I was still pretty fuzzy on.
How many cards can you place in your Duty Area per turn? Part of me wanted this to be unlimited, so the level to which you trade card advantage for speed can be up to the individual, but it’s easy to foresee a scenario where simply dumping almost your whole hand into Duty right at the start and then getting to play powerful bosses every turn would be difficult to beat for more conservative strategies. My current, still rather experimental idea, to solve this would be: At the start of your turn, you get to place as many cards as you want from your hand in the Duty Area. However, the number of used Duty that recovers each turn is capped at how many cards the opponent has in their Duty Area. So if both players want to have a big chungus slugfest, they’re free to do that, but if one of them wants to take it slower, that approach automatically forces the game into a more manageable pace. Maybe this works as intended, maybe it has horrible unforeseen consequences, maybe it’s too complicated to keep track of – whatever the case, there’s always the fallback of just hard capping Duty/turn to 1, much like any card game with a resource system does.
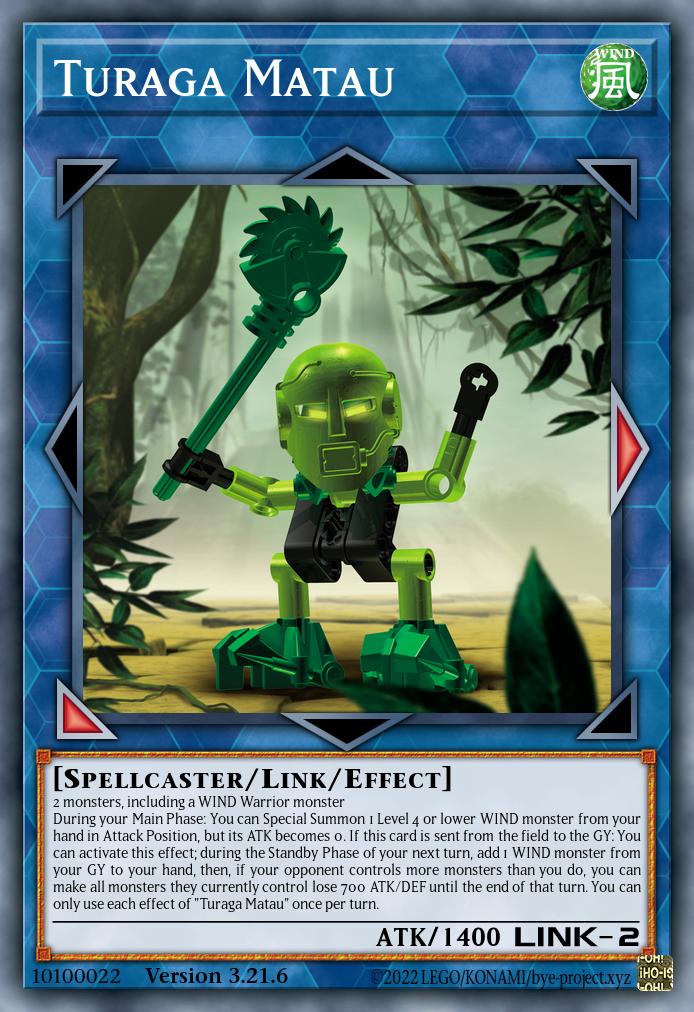
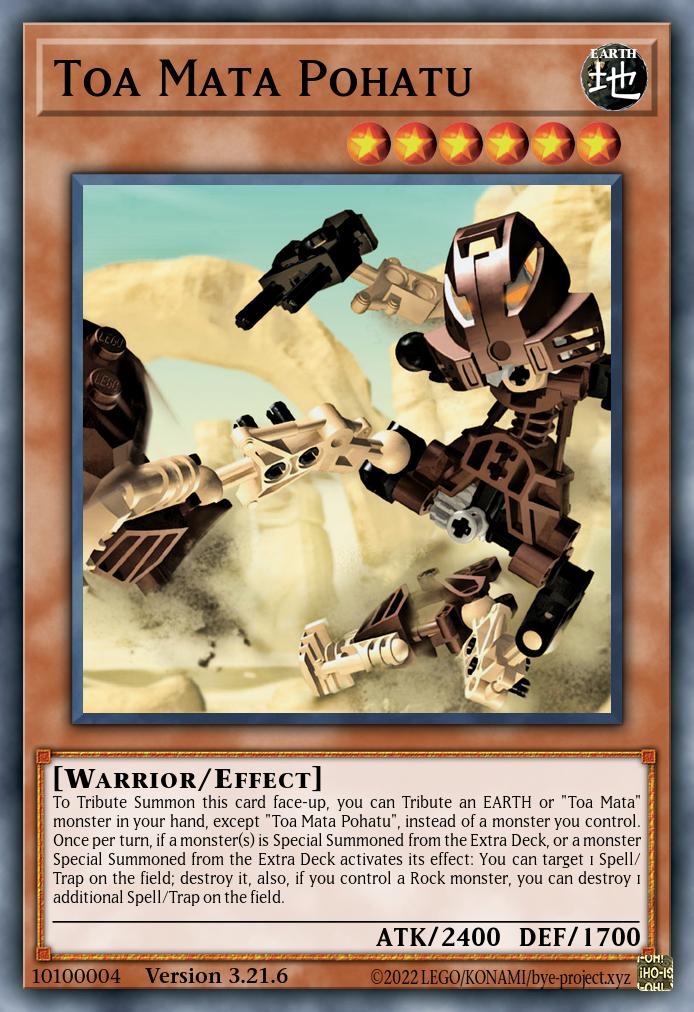
Should there be a soft deck building restriction associated with resources? A standard example would be the mana colors in magic, and I did originally have one in mind where you can only play cards that share at least one group or element with something in your Duty Area, but quickly dropped it because it didn’t seem to work the way it should. Thinking back, however, the main reason was that non-elemental cards – which includes most generic things – have a hard time finding matches, so that should be fixable by just limiting the rule to cards that have an element. Feels a bit arbitrary, but worth trying I’d say. If it’s no good, that just means element/group cohesion has to be achieved on the level of effects, like the Toa Mata already do with their passive cost reduction effects (adapted from their YGO incarnations’ Tribute-from-hand clauses).
Turn Structure
As briefly touched on, there’s a specific step at the start of the turn where you set up the Duty Area, but actually I have more generally de- and revised the structure of a whole turn.
- Start Phase: The following things happen in order.
- The turn player draws 1 card.
- The turn player puts as many Idle cards in their Duty Area as possible On Duty, but no more than the number of cards in their opponent’s Duty Area.
- The turn player can place any number of cards from their hand On Duty.
- All Ready cards in the turn player’s Unity Area return to the Destiny Area.
- Anything that should happen at the start of the turn according to effects.
- Proceed to the Main Phase.
- Main Phase: The turn player can perform any of these actions.
- Assemble a card from the hand by paying its Duty Cost.
- Assemble a card from the Unity Deck by moving the materials from the Destiny Area to the Unity Area.
- Assemble a card from the hand or Deck by sending its listed Destiny Material from the Destiny Area to the Grave.
- Equip an equippable Item in the Destiny Area to a Being.
- Use applicable [ Active ] or [ Quick ] effects of their cards.
- Declare an attack with a Being in the Destiny Area.
- Proceed to the End Phase.
- End Phase: The following things happen in order.
- Anything that should happen at the end of the turn according to effects.
- All damage is removed from Beings and Items.
- The turn player discards until their hand size is 6 or less.
“But wait”, the astute reader may note. “Where do Trigger effects go?”
Everywhere. Trigger effects go everywhere. Essentially, any time an action is performed as described above, it causes a State Check (name pending) in which the following happens:
- If a player’s Life is 0, they lose the game (this ends both the game and the State Check).
- If a Being or Item in the Destiny Area has 0 Defense after factoring in all modifiers and damage, it is destroyed.
- If multiple equips are in conflict, all but the most recently equipped one are destroyed.
- Any modifications due to [ Passive ] effects are refreshed according to the latest state of the game.
- If anything whatsoever changed during this State Check, perform another State Check.
And once that is done, both players get to declare any [ Trigger ] effects that met their condition at any point since the previous opportunity to do so – we have no such thing as missing the timing here, because why does any game even have that. As already decided in the earlier draft, multiple simultaneous effects activated here form a Chain, with the turn player’s coming first and the order being otherwise freely decided by the activating player.
And after that, Chain Building starts. The players alternately get a chance to append an applicable [ Quick ] or [ Chain ]* effect to the Chain, then once they both have nothing more to add, it all resolves backwards in one unstoppable sequence.
Oh yeah, and every time an effect is chained or resolves, there’s another State Check (this one not followed by Triggers). Or maybe not, we could also move that to only the end of resolution so a card/player can die mid-Chain and still be saved by a recovery effect that resolves immediately afterwards … another case of two viable options that would need to be tested for their exact implications.
I know this might be a bit late to realize this, but man, how is there a whole fucking minigame every time anyone does anything? CCGs are hell.
*Examples for [ Chain ] effects among the Toa are Gali, who responds to effects in general with targeted negation, and Lewa, who responds specifically to Actions (broadly the Virtues equivalent of Spells/Traps) with a bounce that can be either removal or a way to dodge something dangerous. The latter is a big change in trigger condition relative to the YGO Lewa design, because I suspect Le-Koro’s playstyle of spamming Special Summons would be hard to keep intact in a game driven by a resource system.
Battle
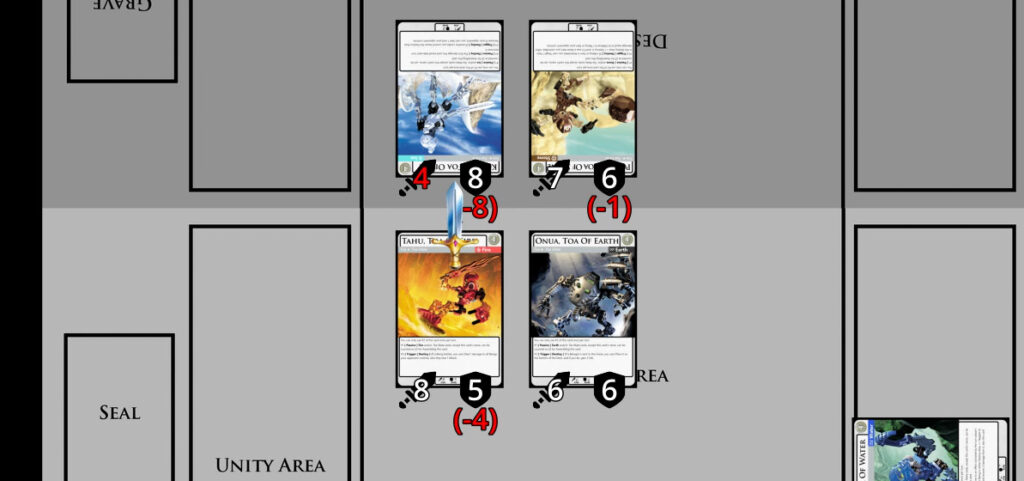
Since some form of battling between cards tends to be a central mechanic in these games, there’s a good argument to be made that you can’t reasonably start designing anything before you’ve settled on how the system for that works. As I am a deeply unreasonable person, this did not stop me from leaving a bunch of questions open about exactly this topic the last time we were here. Let’s do something about that.
The general outline of how battles should work was at least already established: Beings have Attack and Defense, Items have only Defense. A Being can attack another Being or an Item, any Being in that battle inflicts damage equal to its Attack to the other combatant’s Defense, and if anyone’s Defense hits 0 the card in question is destroyed.
Now when it comes to damage, how persistent should it be? My initial thought was “completely”, making Defense act as a little per-card health bar with all the cool narrative implications that holds. But keeping track of that seems a bit annoying as hell in a physical game – hence why it’s usually found in digital-first games like Hearthstone and Shadowverse. While I have no idea in what format Virtues is meant to be played, if it is ever meant to be played at all, it’s probably good not to close off options with fundamental design elements, so I settled on resetting accumulated damage at the end of each turn, which should keep the book-keeping from escalating too much. Another option would have been to make Defense simply represent how much attack you need to hit a target with in a single battle to beat it, but then making your little guys team up would only be possible if we had an MtG-type n:m battle system with multiple attackers and blockers going at it simultaneously, and I’m personally not very fond of how that plays.
Also regarding the management of damage, one important insight I had while brainstorming card effects is that “damage” and “Defense modifiers” should be two distinct concepts. That is, imagine damage not as a direct change to the Defense stat, but a separately tracked value per card that is used in the computation of the current Defense (= Base Defense +/- modifiers – damage). That allows the end-of-turn recovery to work smoothly even if there are lingering modifiers, lets card effects (e.g. Gali) say things such as “recover X damage”, and gives non-damage Defense reductions a role equivalent to reducing maximum HP, since by the formula you can’t heal past (Base Defense +/- modifiers) through merely removing damage. Incidentally, as can be seen on Tahu and Pohatu in our examples, damage can also be dealt by effects, in which case it simply adds to that same counter with nothing special to consider.
Okay, that’s how we do damage to cards, what about the players? Ostensibly, and largely for lack of better ideas, the way to win the game is to reduce someone’s Life to 0, so there needs to be some way to deal damage in that direction. The simplest case is attacking into an empty field, in which case you do a direct attack that makes your opponent lose Life equal to your Being’s Attack – having this is probably essential to properly incentivize playing Beings and Items to defend yourself. But should there also be player damage when two cards battle? My current leaning yes, specifically by having the excess damage from “overkilling” a target pass on to the player (so if you hit 4 Defense with 6 Attack, that’s 2 damage to the player). Alternatively, it could be a fixed amount of damage equal to the destroyed card’s cost value, to reward taking down bigger targets, but I’m not sure how that would work with Unity cards that don’t have a numeric cost. Anyway, both sound worth trying and testing in the event of further development.
To give all the numbers some grounding, we should probably establish a specific Life total, and for this I’ve decided on 36, a nice round number in base 6. Accordingly, I’ve scaled the stats of Beings so that the average Toa has around 6 Attack and the combined attacks of a standard team are approximately lethal. Comparing this to the numbers from Yugioh, it’s like if Toa were in the 1000-1500 ATK range, which is substantially smaller than my 2000+ ATK designs, so it’s probably a good thing the mechanics include plenty of damage being dealt from non-direct attacks. Or we might have to give up on some of the base 6 beauty, another question for practical testing.
There’s also the question of summoning sickness, i.e., should Beings be able to attack the same turn they hit the field? Many games don’t allow this, but my approach would be to make it legal and just keep the restriction in reserve as a balancing measure depending on how things work in practice. If we did have it, I’d probably also introduce a concept of position in the Destiny Area, where Beings that can’t attack are simply indicated by being turned sideways.
So, in summary, the battles work like this:
- During a player’s Main Phase, they can declare an attack with any of their Beings in the Destiny Area against an opponent’s Being or Item in the Destiny Area, or directly against the opponent if there are no other targets. The two entities involved are now formally considered combatants, one the attacker and the other the defender.
- At this timing, a State Check occurs, and this is also where any triggers that want something to “attack” or “battle” would fire.
- Any combatant with an Attack stat (= Beings) inflicts that much damage to the other. In the case of cards, that means increasing the accumulated damage that is subtracted from their Defense, and in the case of players it’s simply subtracted from their Life.
- At this timing, another State Check occurs, and triggers that revolve around damage being dealt fire (note that, due to the preceding State Check, any lethally damaged combatants will already be destroyed at this point!).
- The battle ends, and the statuses of combatants, attacker, and defender are lost.
What’s not mentioned here is the “overkill” damage dealt to players, because I’m thinking about having that be an inherent part of Defense-based destruction, so it would also happen when something is (more than) lethally damaged outside of battle by effects. Alternatively it would simply be an extra thing to take care of in Step 3 above.
Notably, while there is some manner of “damage step”, I’m not currently planning on imposing any restrictions on what can be activated during that part of the game. That means in particular that both Onua and Kopaka can apply their triggers if something is destroyed as a result of battle – may or may not have balancing implications.
What remains open
Given that time was fairly limited, I didn’t quite manage to get to everything I wanted to tackle for this revisit of Virtues. There’s a whole spreadsheet of card designs that I couldn’t finish to the point of having an image to post, and in the back of my mind I’ve also been strongly reconsidering a slight redesign of the field (moving the Duty Area to the bottom edge and the Unity Area to the left edge above the Unity Deck). Meanwhile on the card text side, I’ve been wondering if it might be good to introduce a separate quick effect marker that can be applied to [ Active ] and [ Action ] effects, so there are fewer fully distinct categories to keep track off.
I guess those will have to wait for round 3 and/or the intellectual property apocalypse.
#3: Bohrok in DE/JP/MA
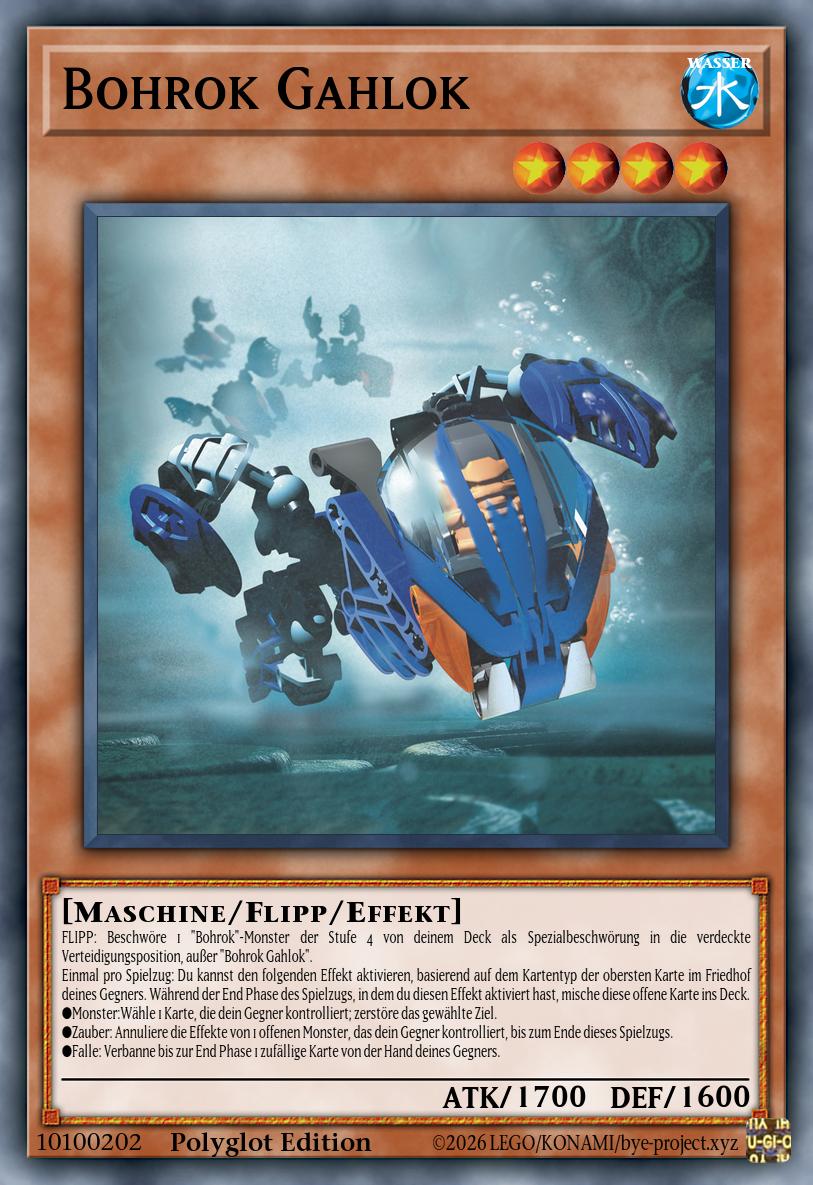
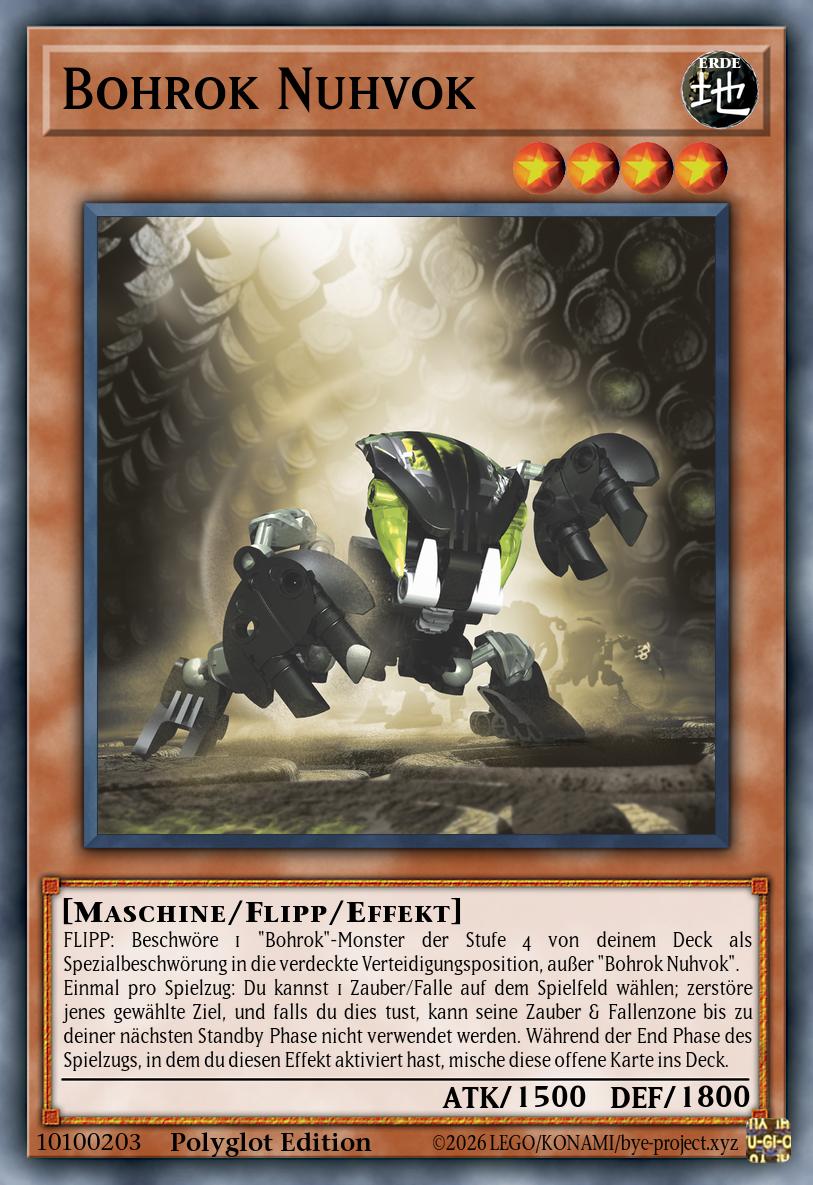
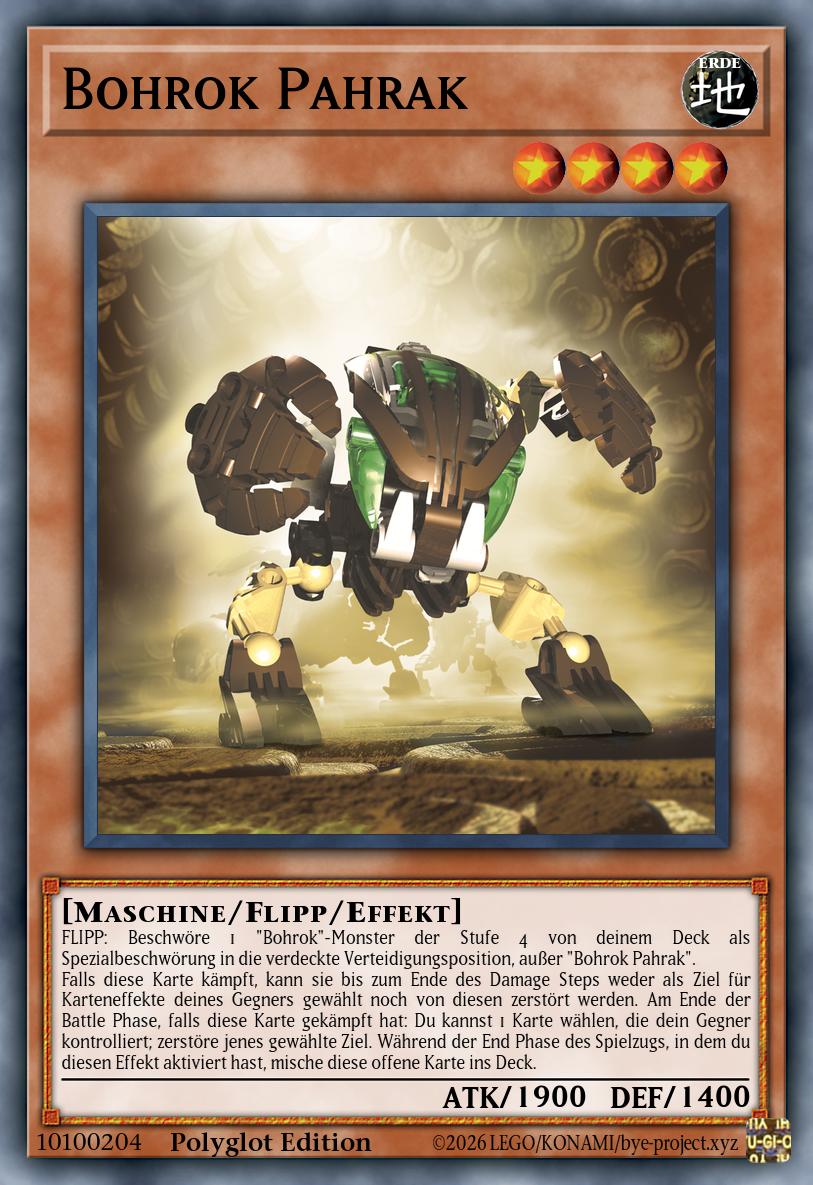
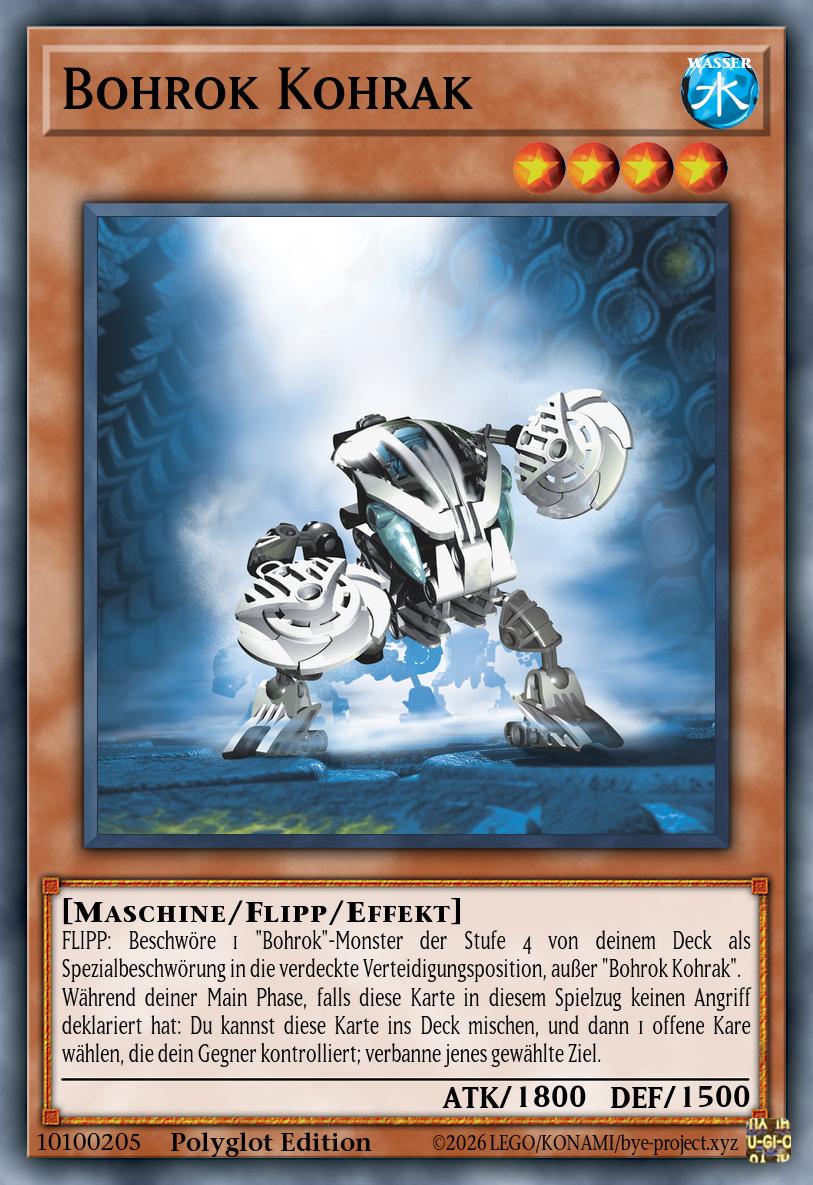
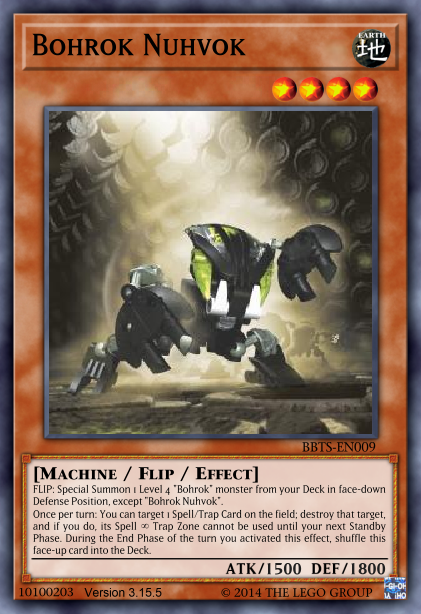
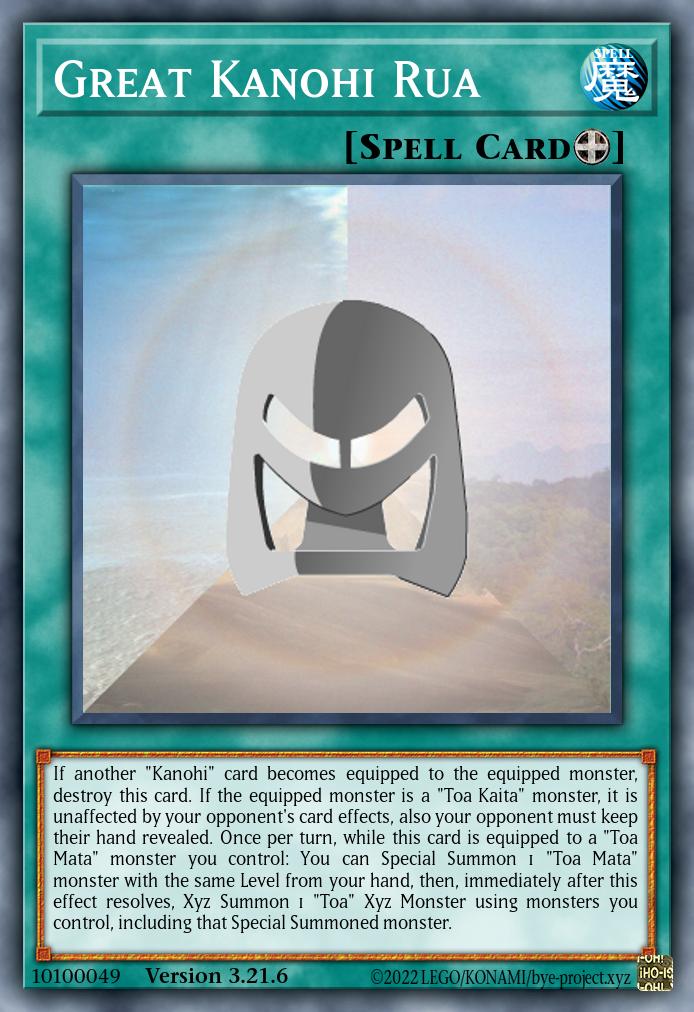
In 2023, the “Polyglot Edition” delievered translations of the basic Ga-Koro cards (because those include the Kanohi Rau, obviously) into every language in which I consider myself capable of assembling a card text: German, Japanese, and the Matoric conlang crafted from Bionicle terminology by word wizard outofgloom.
For our second time on this rodeo, the Bohrok seemed like a good candidate – overall nice, simple, and uniform, but featuring some structural components that weren’t touched on by the last round of translations.
For the sake of completeness, I’ve supplied download links for each translation, but the advancement of technology has rendered them kind of impractical: If you have the expansion installed via repository, as is the recommended method nowadays, the English cards provided that way will simply override the translations without leaving any trace. The only way to see them is to turn off the repository or use a whole separate install of EDOPro.
German
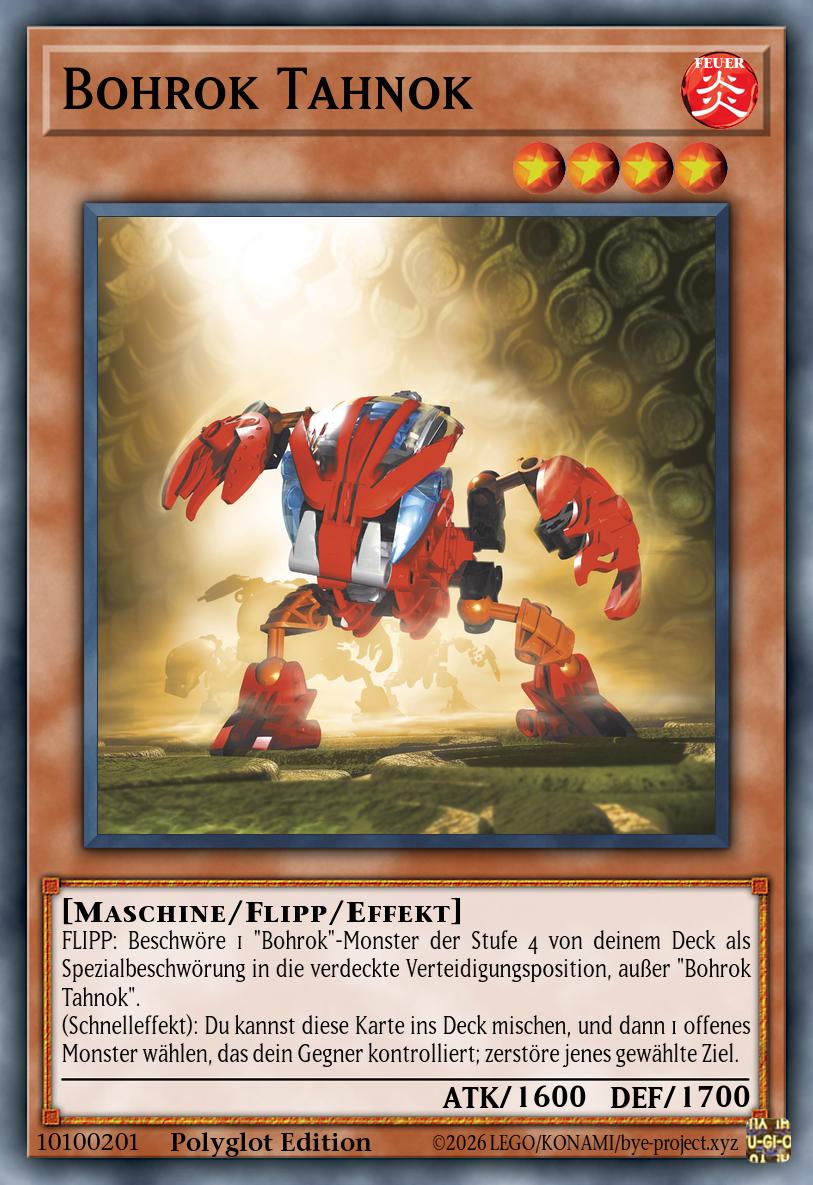
Bohrok Tahnok
Flip Effect MonsterLevel 4 | FIRE Machine | ATK 1600 / DEF 1700FLIPP: Beschwöre 1 “Bohrok”-Monster der Stufe 4 von deinem Deck als Spezialbeschwörung in die verdeckte Verteidigungsposition, außer “Bohrok Tahnok”.
(Schnelleffekt): Du kannst diese Karte ins Deck mischen, und dann 1 offenes Monster wählen, das dein Gegner kontrolliert; zerstöre jenes gewählte Ziel.
There’s not too much to say here, the process was the exact same as for the previous batch. One new thing I learned, or at least consciously noticed for the first time, is that German PSCT translates the “then” in “, then target” as “und dann”, while usually it’s only “dann”. Fascinating.
Japanese
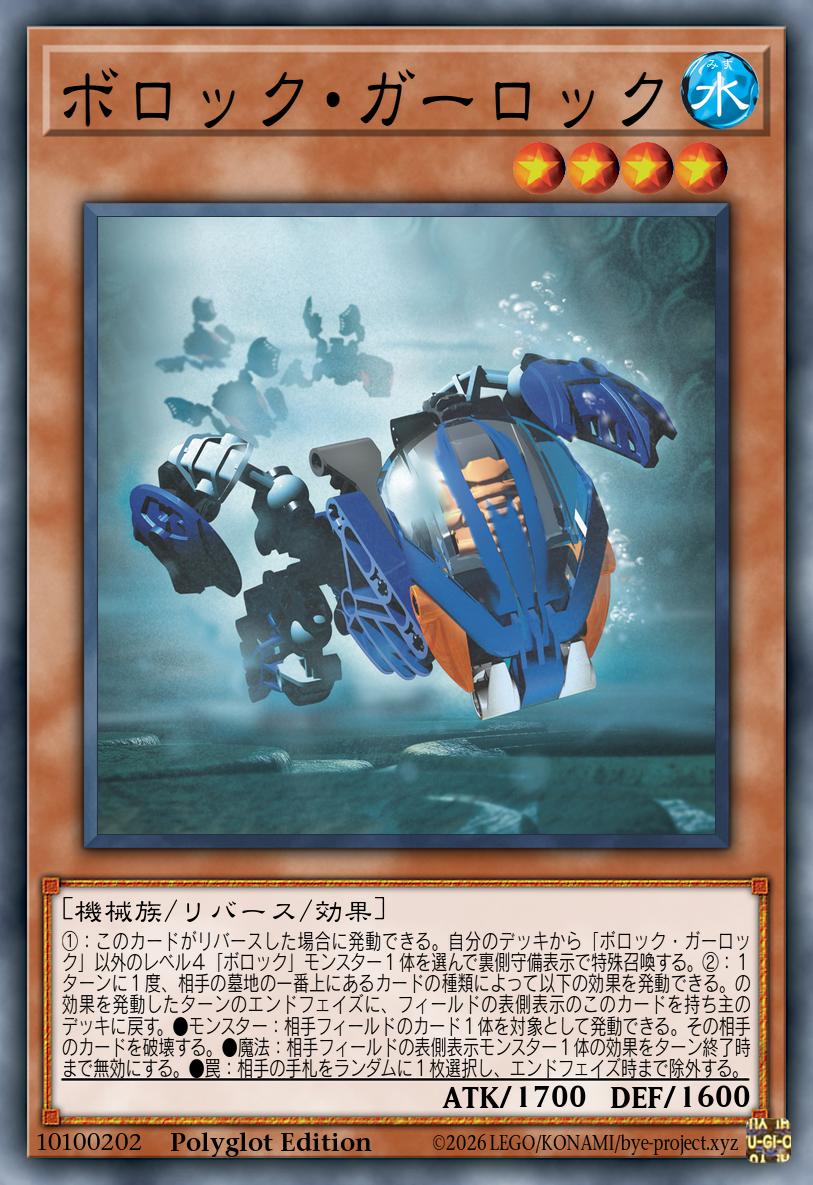
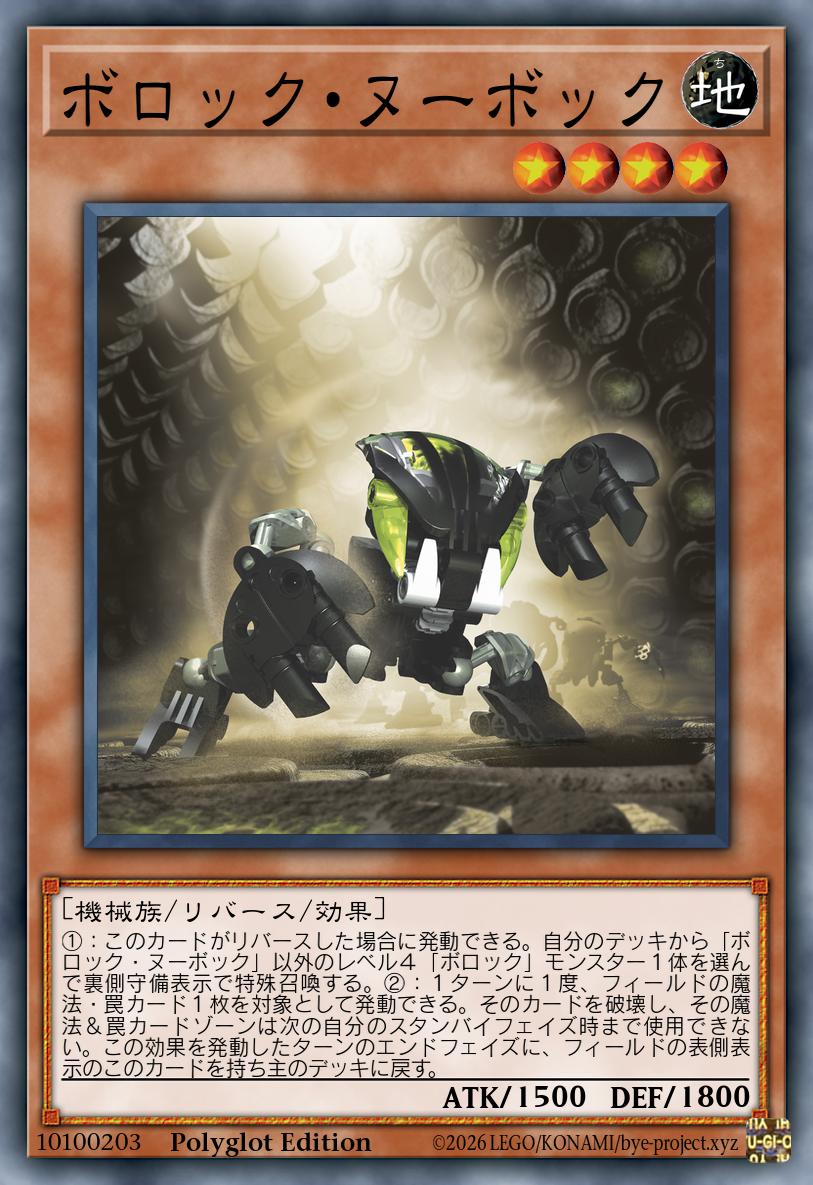
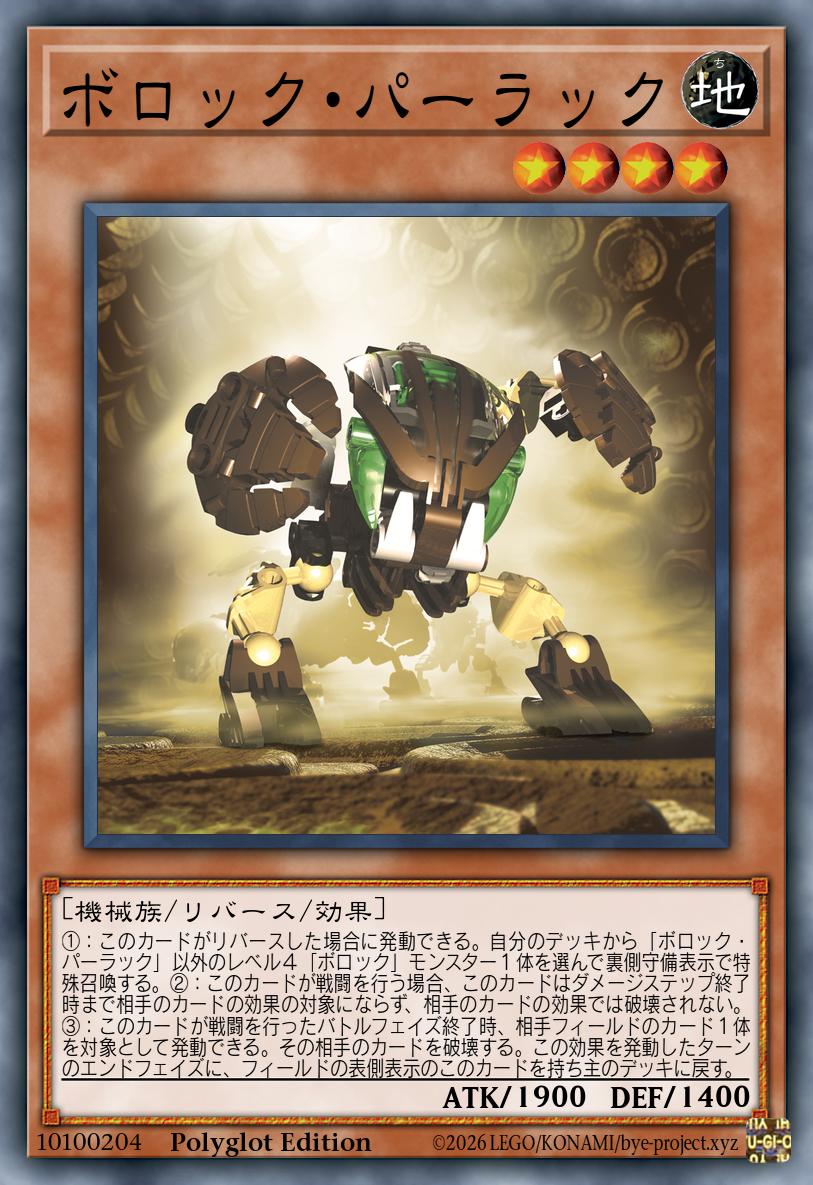
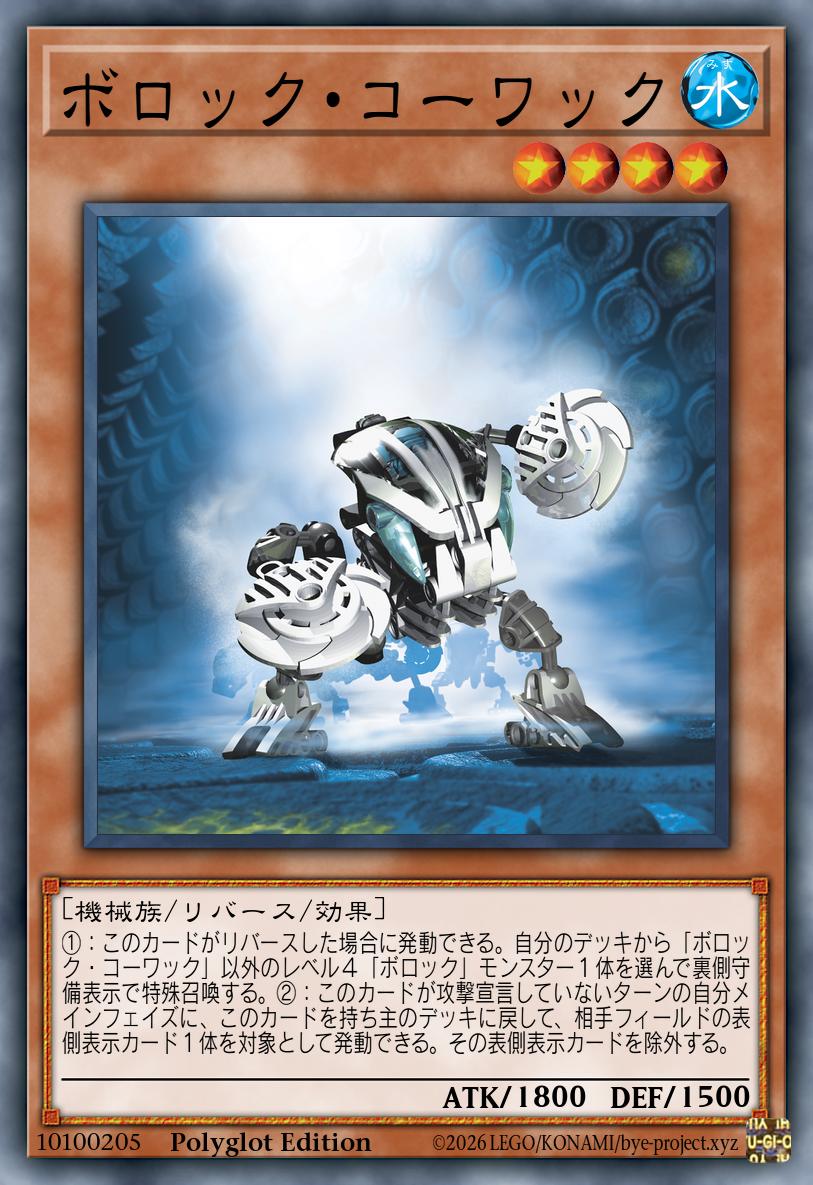
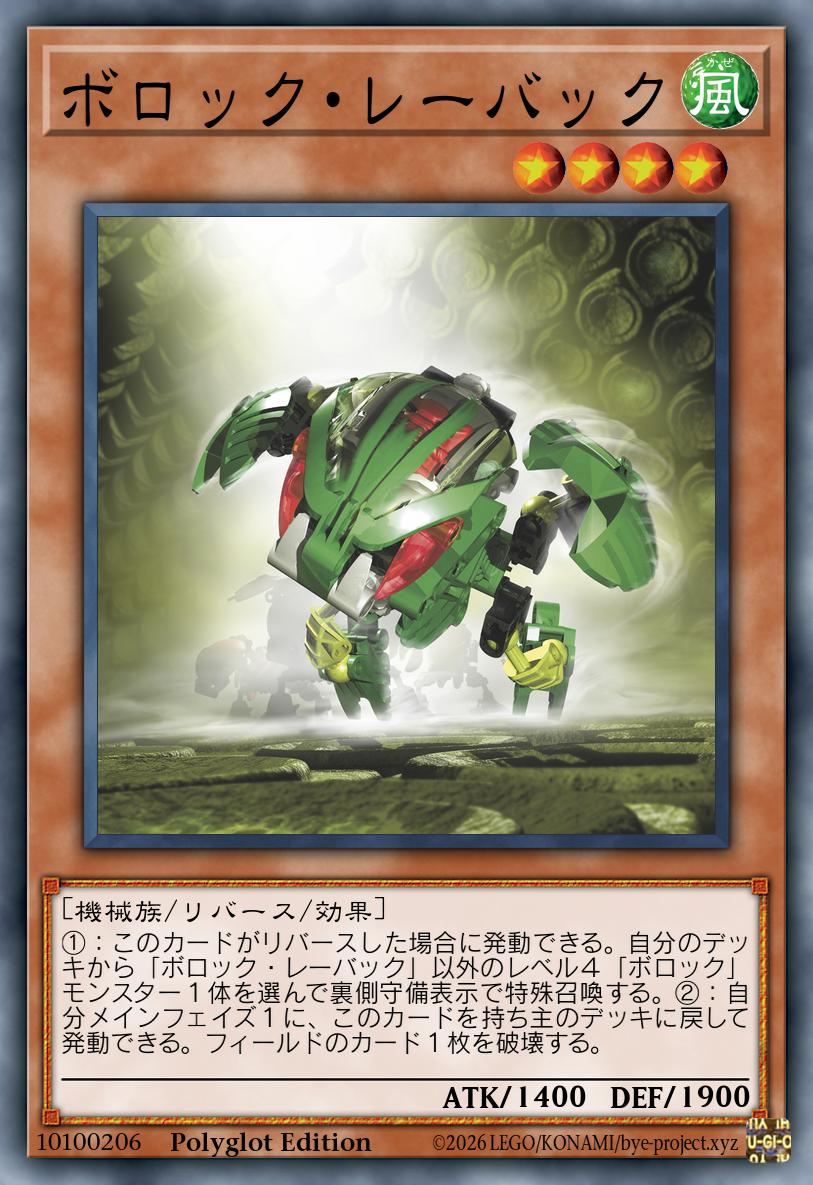
Business as usual over here as well, just stitching together appropriate phrases from the card database. And of course the beautifully elegant OCG format with its numbered effects; observe how it makes visible that Pahrak is actually the only Bohrok with 3 effects, technically.
I did face a slight bit of frustration with these when Magic Set Editor decided the already translated bottom halves of Gahlok and Nuhvok were garbage data that needed to be deleted with no backup, and another when it turned out my 2023 jury-rigging of ygopic to generate Japanese card images was based on an older version of the program and no longer compatible. Luckily there was time to resolve those problems since I ran into them a whole two days before the deadline.
Also something funny about the spelling of the names – I took the individual Bohrok’s names from Lego’s official building instructions download site for Japan, but for the Pahrak specifically it’s actually inconsistent because they spell its Kal version with a soft バ, as in “Bahrak”. I assume that’s a typo, though the odd spelling of Kohrak as “Koowakku” actually is consistent. The word “Bohrok” itself wasn’t so easy to find a primary source for, I ended up just basing it on what’s written on fan sites, same for “群れ” being the correct terminology for this particular swarm.
Matoric
Last but certainly not least, the translation that requires the most brain juice on account of not having any established concept of PSCT. I figured this wouldn’t be too difficult this time since I could just reference my notes from Ga-Koro … but it turns out those are nowhere to be found, so I had to re-engineer it based on the luckily extensive explanations in the 2023 post instead. See, the public walls of text DO serve a purpose!
The usual disclaimer: This ostensibly “Matoric” translation is technically its own dialect, in which I deliberately retain PSCT layout and punctuation and also make a bunch of more or less educated guesses on vocabulary and more involved grammatical constructions.
Alright, on to those pellets.

Bohrok Tahnok
Flip Effect MonsterLevel 4 | FIRE Machine | ATK 1600 / DEF 1700ROHAI: At sapuru’u a ka iru-hau a manas bahtu 4 “Bohrok” 1 (“Bohrok Tahnok” va) za fe-idoya.
(Kah-Akiro): O’o uka paro’o-sapo za sapuru ko kelika ya, ihu-manas ya-rupu borau-za 1 aro ya ka vo; oto’u-aro za ikhya.
One shared component between all Bohrok is the type line, which contains two new words to translate: “Machine”, which thankfully has an official dictionary entry as akka, and “Flip”, which is … surprisingly tricky.
In essence, the word refers to both a specific motion and the more general idea of something having opposing sides, all things which tend to be handled with affixal markers in the available language references. So isolating a standalone word for the concept itself needs a bit of spitballing, which in this case brought me to rohai, a combination of the marker -ro for “in front” and -hai for “behind”, aiming to express something like “back of front”. The reason I choose -ro to be abused as a prefix is because it’s also homonymous with ro simply meaning “item”, so you can have an alternate reading of “back of an item”, which still points in the right direction. Another important factor is that this is a nice, crisp combination that rolls off the tongue well, much like the original “Flip”.
With that figured out, we also have the first word of the shared Flip Effect covered, so that only leaves the rest. “Special Summon […] from your Deck” is a familiar structure with an easy enough translation:
At sapuru’u a […] za fe-idoya
With sapuru’u being “your Deck”, fe-idoya being the imperative (it’s mandatory!) of an “unusual being-calling” or “Special Summon”, and at_a the marker for “originating” from. Now we just need to fill in the rest:
- 1 Level 4 “Bohrok” monster – a simple chain of adjective-ish words, translated individually and flipped around for suffix modification: manas bahtu 4 “Bohrok” 1.
- in face-down Defense Position – we previously had ka hau a, “oriented towards defense”, to indicated that a Special Summon goes into Defense Position, so to further make that face-down or “downward”, just add another modifier and make ka iru-hau a.
- except “Bohrok Tahnok” – here it makes sense for readability to apply a slight restructuring previously used on Gali, and put a (“Bohrok Tahnok” va) right after the description of what you summon. That’s “other than Bohrok Tahnok” – not to be confused with the lesser Bohrok Tahnok or Bohrok Tahnok Va, of course.
And so, we arrive at a general translation of the Flip Effect that’s ready to use on all six of these Bohrok:
ROHAI: At sapuru’u a ka iru-hau a manas bahtu 4 “Bohrok” 1 (“Bohrok …” va) za fe-ido ya.
Neat. Now on to the Tahnok’s unique removal effect. Its most special trait is that it’s a Quick Effect, or kah-akiro, and it lets you target (aro ya) 1 face-up monster (ihu-manas) that your opponent controls (ya-rupu borau-za) and destroy (ikhya, as an imperative) that target (oto’u-aro). All familiar, or at least easy enough to derive from what we’ve seen before. Except there’s also the cost, “shuffle this card into the Deck” – how do you translate “shuffle”?
In a way it’s another of those card game terms like “card” and “deck”, but I think in this case we’re better served with a more general term expressing something like “to randomize”. Which is still not directly in the dictionary, just “randomness” as one meaning of rahi … but I’d rather not have the name of one of the largest archetypes double as game terminology. Luckily, there’s also an entry kelika, for “branching futures” or simply “chaos”, so if we use that as a verb and apply an appropriate direction marker, we get sapuru ko kelika ya, “chaos-ify forward into the Deck”, or simply “shuffle into the Deck”. Voilà!
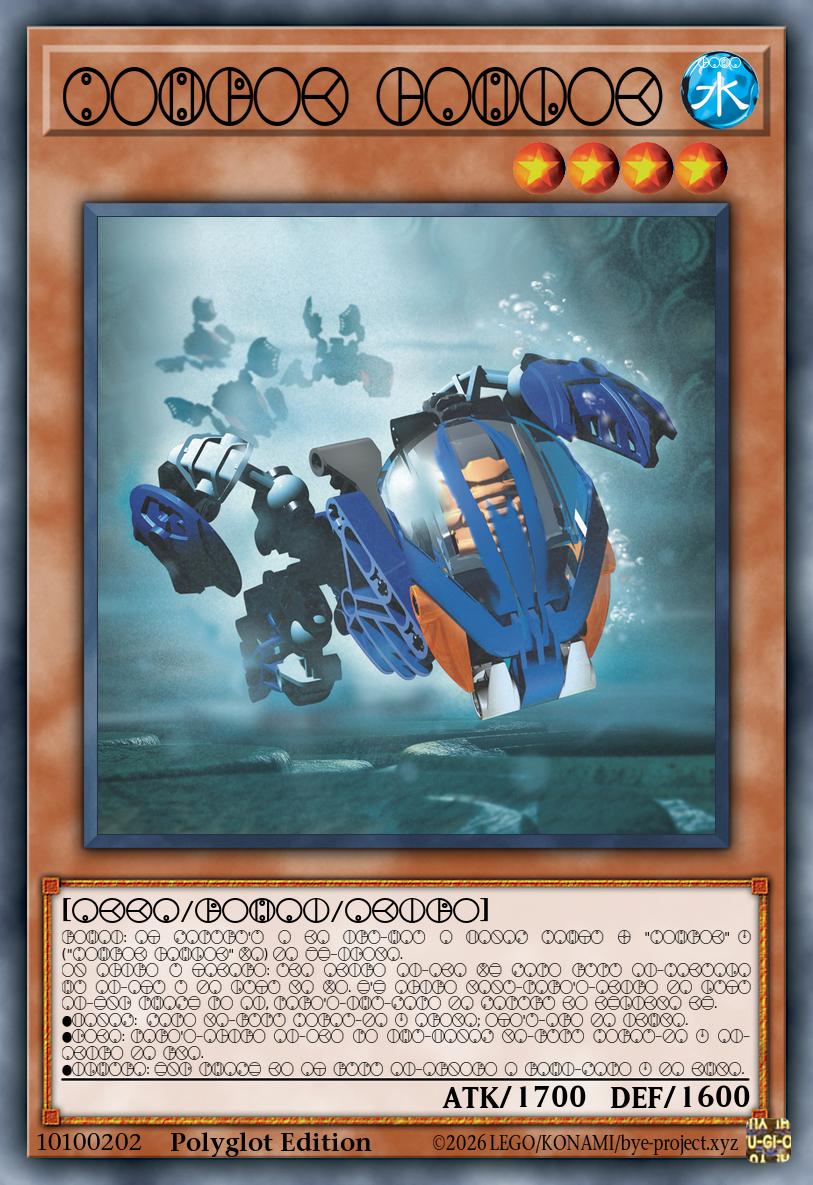
Bohrok Gahlok
Flip Effect MonsterLevel 4 | WATER Machine | ATK 1700 / DEF 1600ROHAI: At sapuru’u a ka iru-hau a manas bahtu 4 “Bohrok” 1 (“Bohrok Gahlok” va) za fe-idoya.
On agiro u takaro: Uka akiro ai-aka ve sapo rupu ai-bakuala hu ai-atu u za lutu ya vo. E’e agiro yanu-paro’o-akiro za lutu ai-End Phase po ai, paro’o-ihu-sapo za sapuru ko kelikya ke.
●Manas: Sapo ya-rupu borau-za 1 aroya; oto’u-aro za ikhya.
●Doka: Paro’o-agiro ai-oko po ihu-manas ya-rupu borau-za 1 ai-akiro za rya.
●Ilhura: End Phase ko at rupu ai-arnoro a rahi-sapo 1 za khya.
The Gahlok, much like every Bohrok going forward, has the same Flip Effect that we can now immediately skip over to get to the other part. In this case, it’s a modular effect, so there’s a lot to translate.
The first hurdle is the disambiguation itself, which tells you to activate (lutu ya) a certain effect (akiro). The way I figured makes most sense to describe what decides that effect is with a complex modifier on the word “effect”, specifically one derived from the sentence ve sapo rupu ai-bakuala hu ai-atu u akiro ta ai (lit. “the effect extends from the type of the card on top of the opponent’s GY”, with the “extends from” marker ve_u being flexed into a metaphorical sense of “follows from”). That means the (here explicitly marked) subject akiro ta gets pulled forward and swapped for the placeholder aka, the equative sentence predicate ai attaches to it as a prefix, and the whole thing goes right after the akiro we seek to modify. And thus, “you can activate the effect that extends from the type of card on top of the opponent’s GY”. Close enough.
Before we get to the actual effects you can choose from, a slightly different self-shuffling cost that only applies in the End Phase of the turn sneaks its way in. We’ve covered the “shuffle” part, but translating “the turn you activated this effect” is another headache. I ended up fuzzing it a bit into “the turn related to this effect having been activated”, which should be agiro yanu-paro’o-akiro za lutu. A rare use of the past tense nu in these, here becoming a prefix together with the ya designating the verb. Also, in keeping with previous translations, the macro structure of the clause is slightly reworded from “During” to “If it is the End Phase […]”, by wrapping the whole thing in the sentence-level conditional e’e_ke.
Finally, the modes for Manas/Doka/Ilhura (Monster/Spell/Trap) are luckily quite simple. The first is just another targeted destruction (though now with an imperative aroya), the second combines the known mechanics of negation and “until the end of this turn” (paro’o-agoiro ai-oko po, lit. “during the future of this turn”), and the third banishes from a place “until” or “forward to” the End Phase (End Phase ko). A literal random card is involved here, so it’s hard to argue against following the dictionary and writing rahi-sapo in this case. Just don’t go banishing “Rahi” cards with this!
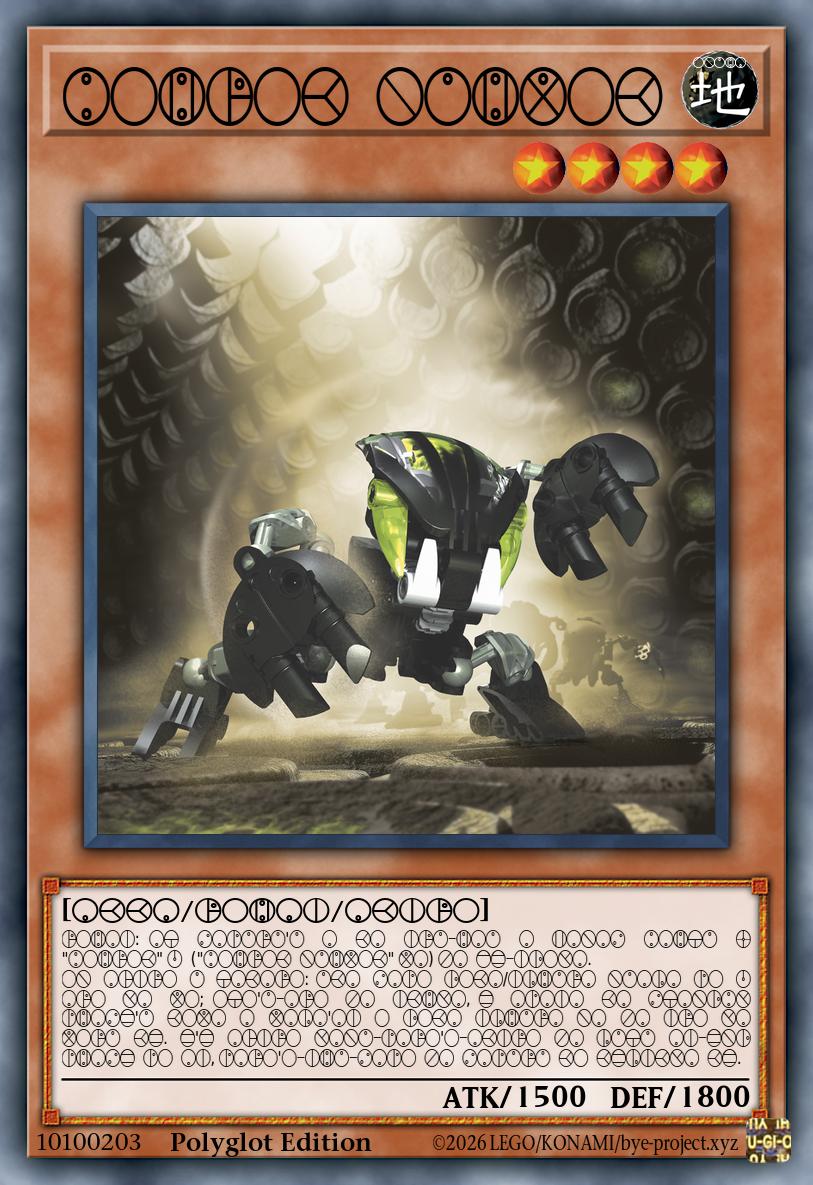
Bohrok Nuhvok
Flip Effect MonsterLevel 4 | EARTH Machine | ATK 1500 / DEF 1800ROHAI: At sapuru’u a ka iru-hau a manas bahtu 4 “Bohrok” 1 (“Bohrok Nuhvok” va) za fe-idoya.
On agiro u takaro: Uka sapo doka/ilhura nuala po 1 aro ya vo; oto’u-aro za ikhya, e apaia ka Standby Phase’u kova a vala’ai o doka ilhura na za iro ya voru ke. E’e agiro yanu-paro’o-akiro za lutu ai-End Phase po ai, paro’o-ihu-sapo za sapuru ko kelikya ke.
Three Bohrok in, we can now recycle both the Flip Effect and the delayed shuffling clause, leaving only a targeted removal effect. With a second half that’s a bit more difficult.
For the connective “and if you do”, we have a nice phrasing e apaia […] ke, meaning “if successful, […]”. Then, we need to block a “Spell & Trap Zone” until “your next Standby Phase”. The former becomes vala’ai o doka ilhura na, combining the established game terms with a basic o_na conjunction instead of the foreign “&”. The latter is Standby Phase’u kova, “your imminent Standby Phase” – there isn’t a literal “next” (except one meaning of the location marker ko, but I believe that needs another reference point relative to which something is the next element), so this seems to convey the meaning best. This is also another occurrence of the notoriously annoying “until”, now transformed to the direction marker ka_a. With iro (“work, “perform function”) as the verb, we achieve a literal meaning of “toward your imminent Standby Phase, its Spell & Trap Zone cannot function”.
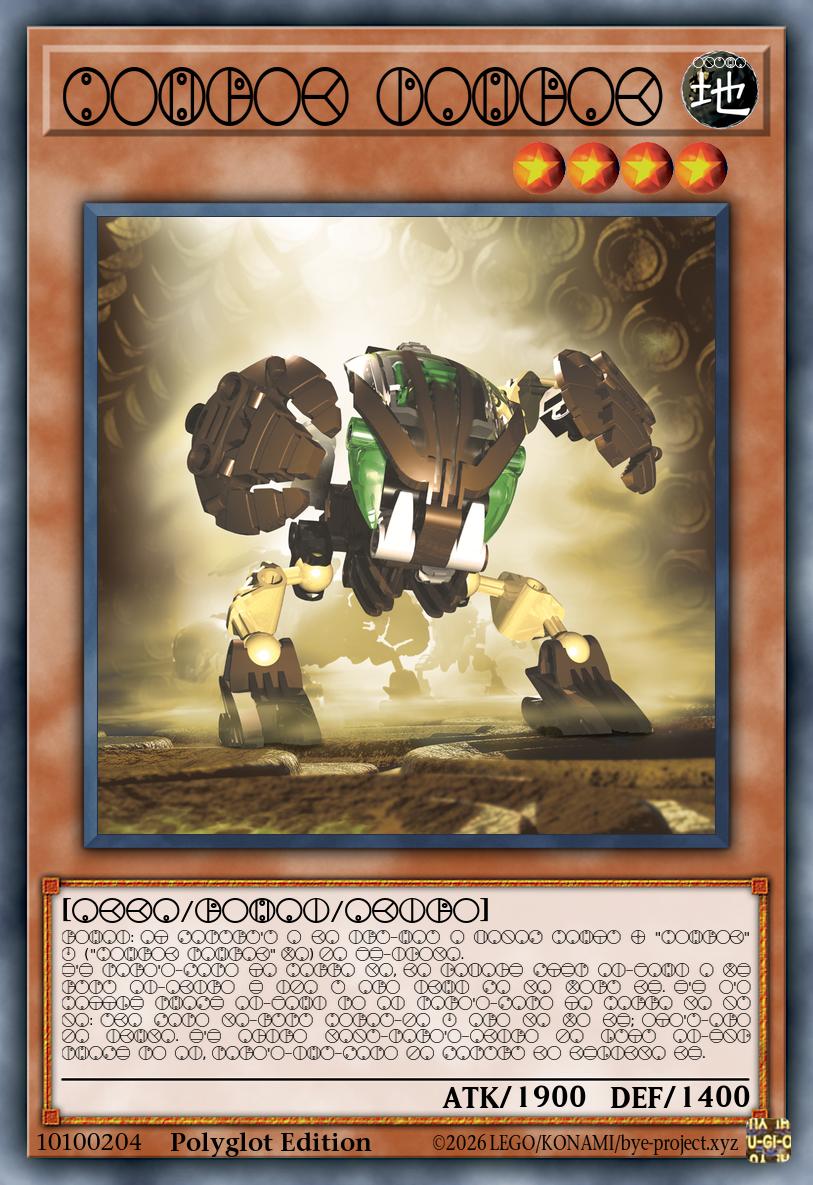
Bohrok Pahrak
Flip Effect MonsterLevel 4 | EARTH Machine | ATK 1900 / DEF 1400ROHAI: At sapuru’u a ka iru-hau a manas bahtu 4 “Bohrok” 1 (“Bohrok Pahrak” va) za fe-idoya.
E’e paro’o-sapo ta barra ya, ka Damage Step ai-fahi a ve rupu ai-akiro e iza u aro ikhi sa ya voru ke. E’e o’o Battle Phase ai-fahi po ai paro’o-sapo ta barra ya nu na: Uka sapo ya-rupu borau-za 1 aro ya vo ke; oto’u-aro za ikhya. E’e agiro yanu-paro’o-akiro za lutu ai-End Phase po ai, paro’o-ihu-sapo za sapuru ko kelikya ke.
The Pahrak is again a bit special in that it has a continuous protection effect to supplement its battle-based removal. This is a conditional where the left side is simply “this card battles” (paro’o-sapo ta barra ya) and the right side makes some creative use of location markers: “toward the end of the Damage Step” (ka Damage Step ai-fahi a), “extending from the opponent’s effects” (ve rupu ai-akiro e), it cannot “be targeted or destroyed” (u aro ikhi sa ya).
Then the removal immediately makes use of ai-fahi for “end of” again, nested in the interesting configuration of a conditional whose left side is a conjunction (e’e o’o A B na C ke) – “if it is the end of the Battle Phase and this card battled”. And then it’s just another targeted destruction.
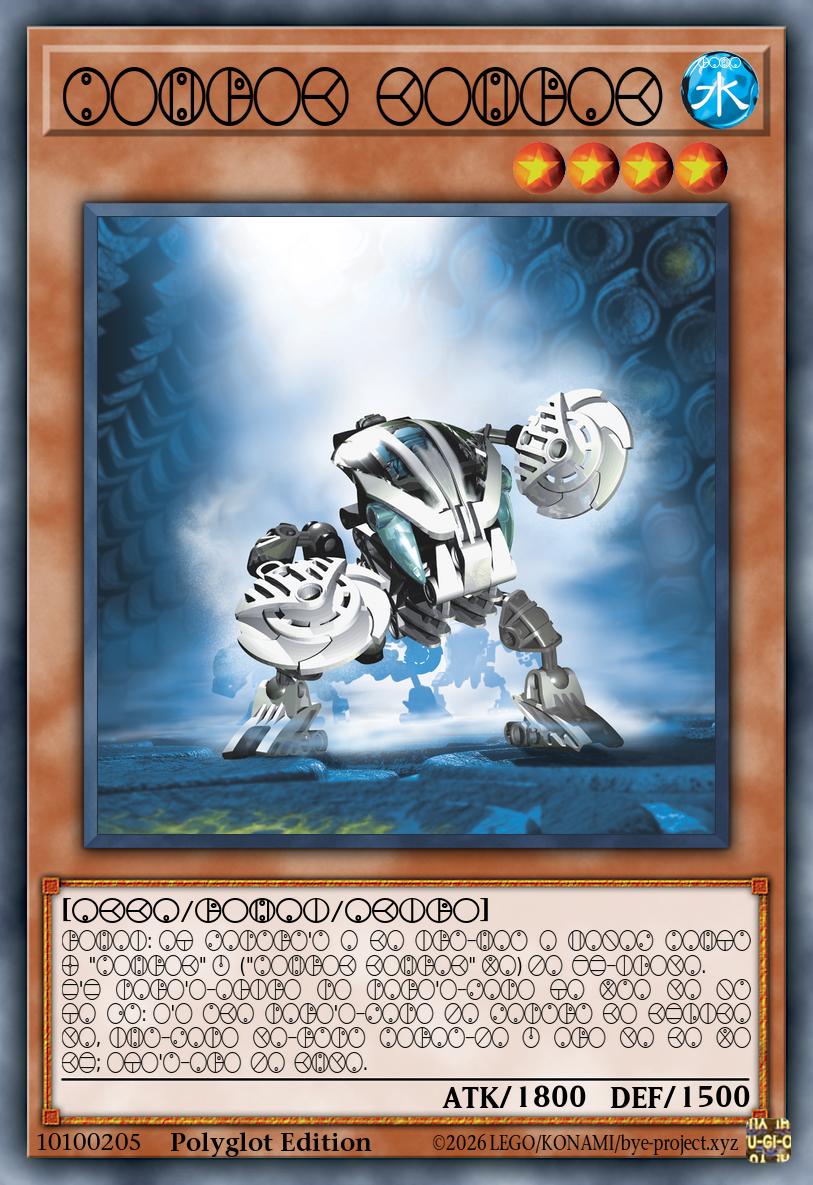
Bohrok Kohrak
Flip Effect MonsterLevel 4 | WATER Machine | ATK 1800 / DEF 1500ROHAI: At sapuru’u a ka iru-hau a manas bahtu 4 “Bohrok” 1 (“Bohrok Kohrak” va) za fe-idoya.
E’e paro’o-agiro po paro’o-sapo ta vua ya nu ta cu: O’o uka paro’o-sapo za sapuru ko kelika ya, ihu-sapo ya-rupu borau-za 1 aro ya ka vo ke; oto’u-aro za khya.
Okay, I promise it gets simpler from here on. The only real novelty is the condition “If this card did not declare an attack this turn”, which introduces vua, the proper word for “attack”, and attaches a bunch of suffixes to give us vua ya nu ta cu, “did not begin to attack”.
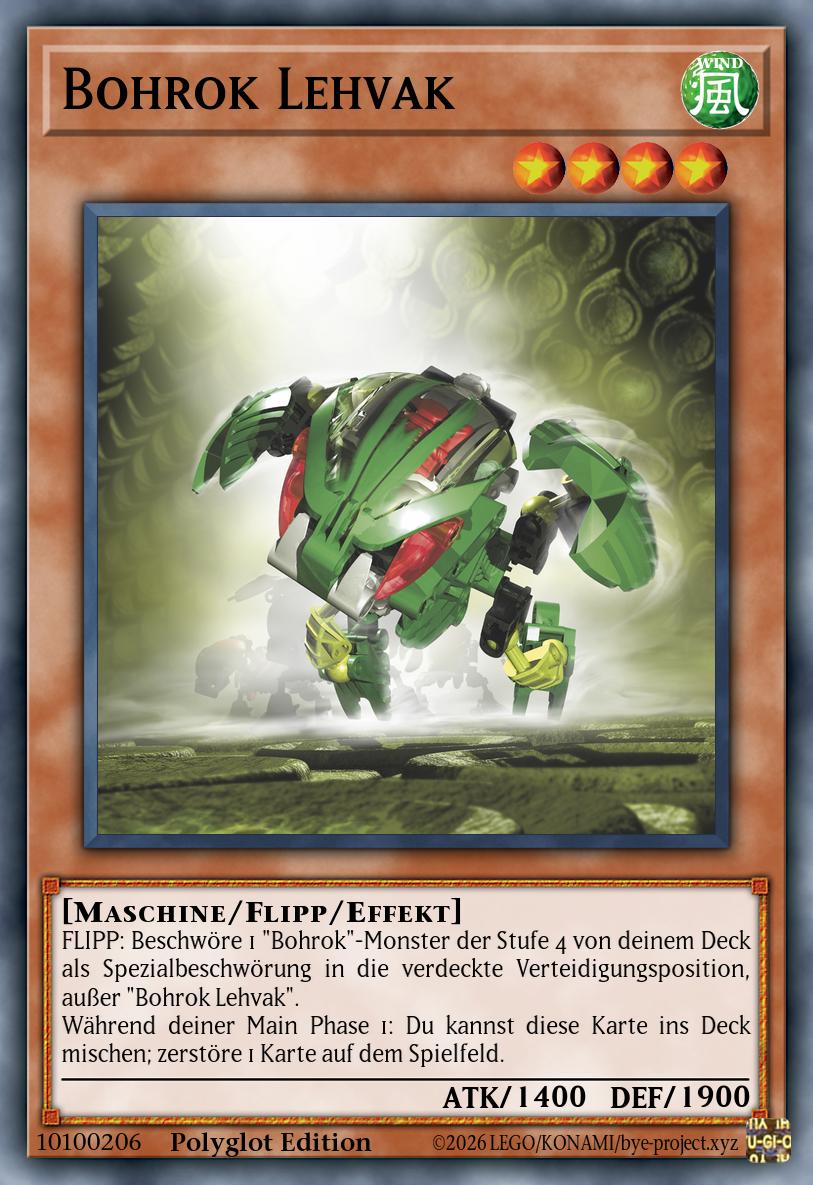
Bohrok Lehvak
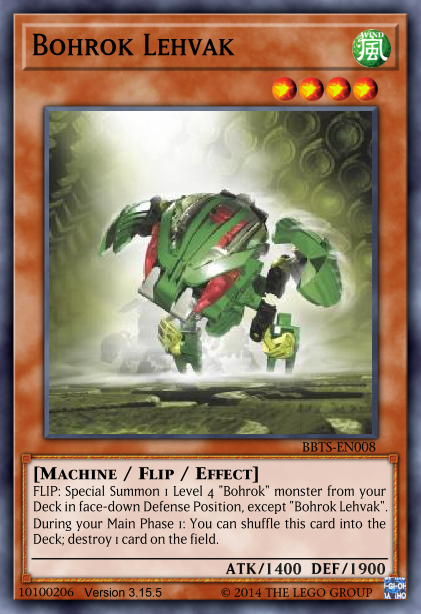
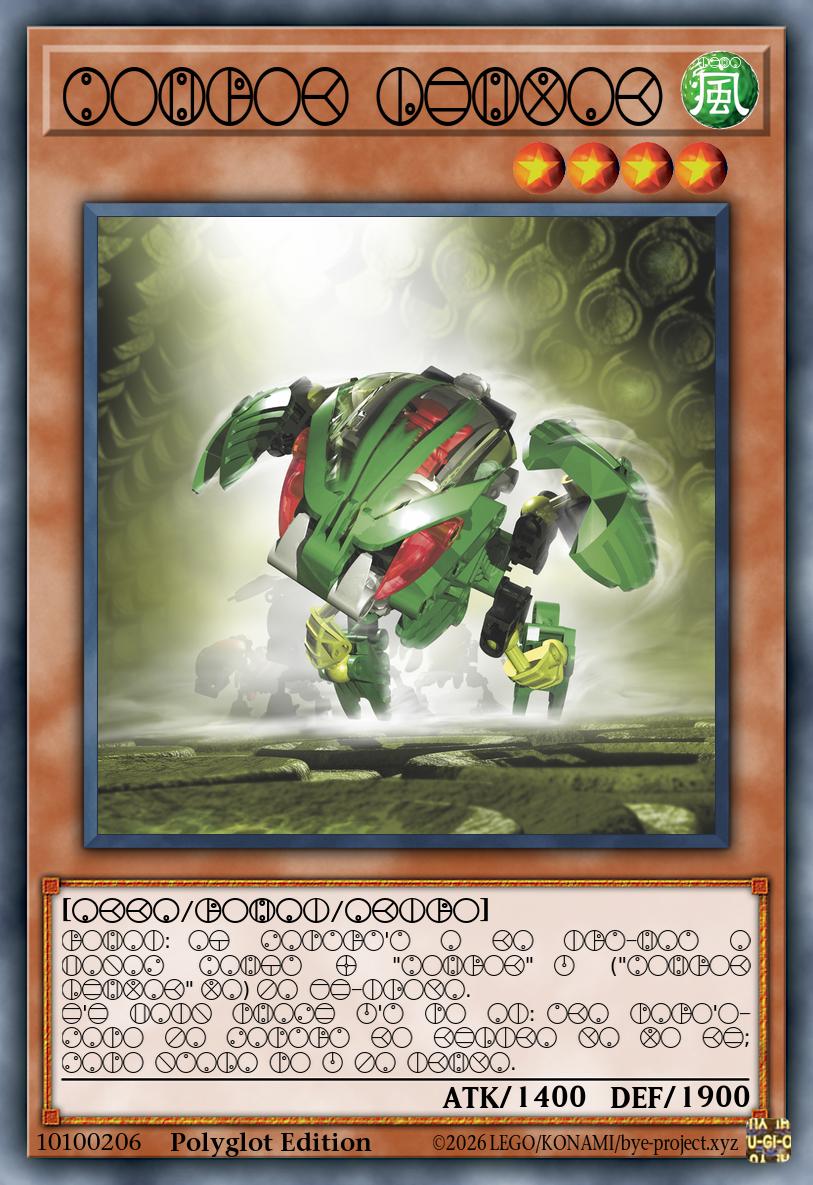
Flip Effect MonsterLevel 4 | WIND Machine | ATK 1400 / DEF 1900ROHAI: At sapuru’u a ka iru-hau a manas bahtu 4 “Bohrok” 1 (“Bohrok Lehvak” va) za fe-idoya.
E’e Main Phase 1’u po ai: Uka paro’o-sapo za sapuru ko kelika ya vo ke; sapo nuala po 1 za ikhya.
And the last one has barely anything new to cover, with an activation condition of “If it is during your Main Phase 1”, a standard shuffle cost, and a non-targeting destruction of a card on the field.
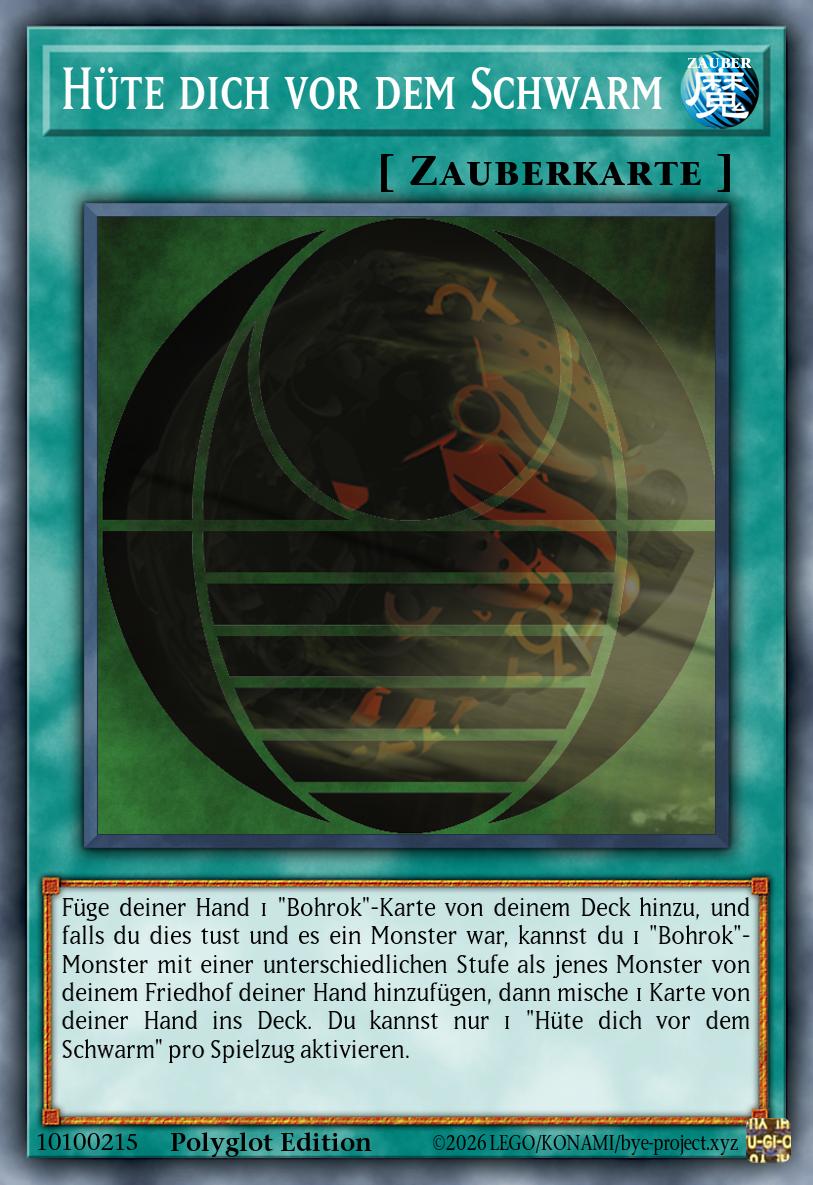
Actually there’s one more, because I really wanted to translate the name:
Vah Rhapaya
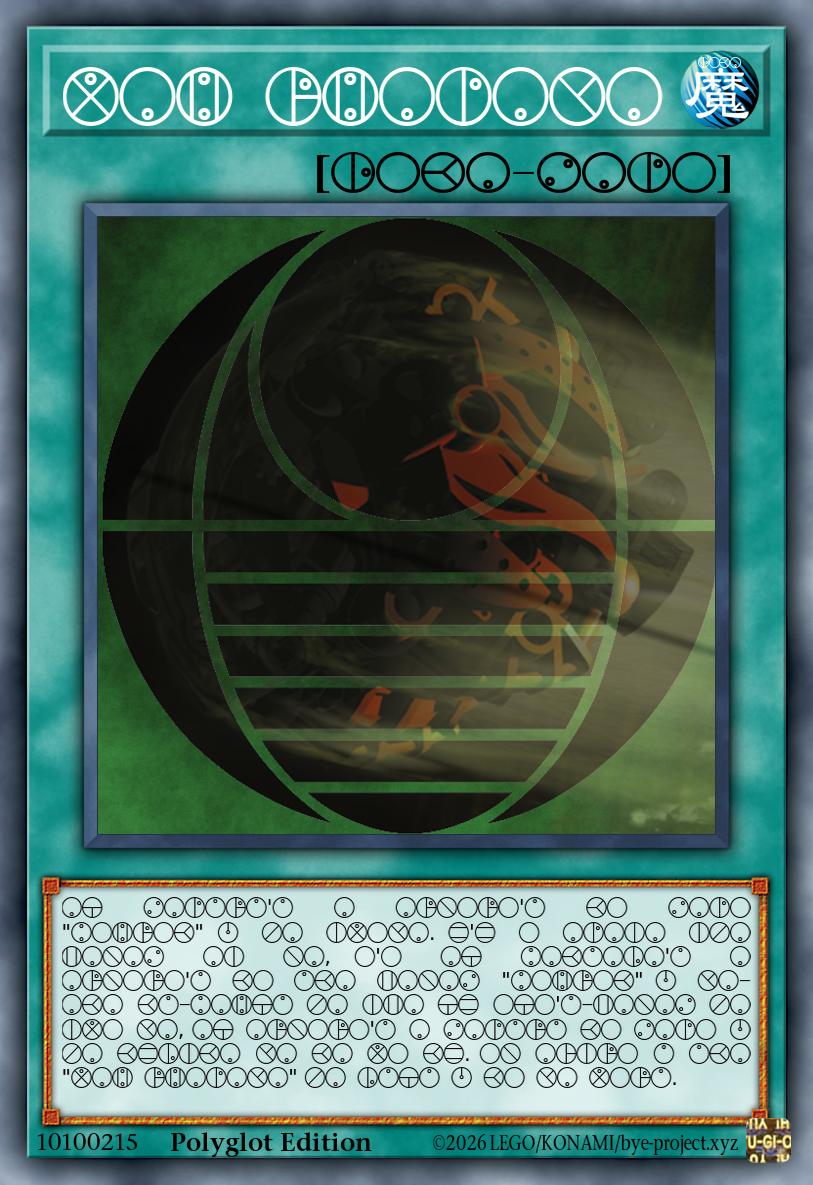
SpellAt sapuru’u a arnoro’u ko sapo “Bohrok” 1 za ivoya. E’e o apaia iza manas ai na, o’o at bakuala’u a arnoro’u ko uka manas “Bohrok” 1 ya-aka ku-bahtu za ima te oto’u-manas za ivo ya, at arnoro’u a sapuru ko sapo 1 za kelika ya ka vo ke. On agiro u uka “Vah Rhapaya” za lutu 1 ko ya voru.
“Vah Rhapaya”, AKA “Beware the Swarm”. Standard search spell, but its little bonus clause that would be used to grab matching pairs of Bohrok and Bohrok Va involves some heavier nesting of structural markers.
- E’e A, B ke = “If A, then B”
- A = o apaia iza manas ai na = “success, and it is a monster” (so on the left side of the conditional, it’s essentially “if you do, and it is a monster”)
- B = o’o C, D ka vo = “possibility of (C, then D, in sequence)”; the order of ka and vo is relevant here to indicate your options are either doing “C then D” or nothing at all.
- C = at bakuala’u a arnoro’u ko uka manas “Bohrok” 1 ya-aka ku-bahtu za ima te oto’u manas za ivo ya = “you move 1 “Bohrok” monster that has a different Level relative to that monster from your GY to your hand” … luckily Nokama from last time already had a (admittedly kind of convoluted) wording figured out for the “different from” restriction
- D = at arnoro’u a sapuru ko sapo 1 za kelika ya = “shuffle 1 card from your hand into the Deck”
Now you know, and always remember: vah rhapaya!
Overall Conclusion
If there’s one thing to take away from all this, it might just be that when you don’t hear anything from me for a while, it’s probably because I’m doing something very stupid and can no longer be stopped or reasoned with.
Speaking of which, where did I put that Rahi Overlord rulebook…

