
If looking at all the card game stuff usually posted here makes you think “man I wish this had more than just cards”, then boy have you come to the right article. In this one we’re covering a full board game that, yes, involves cards, but also a physical board, colorful little marbles, movable game pieces, and a headache-inducing amount of math.
Rahi Overlord is an idea that was sparked during the in-depth Rahi study I’ve been doing for the past year or so. In this game, players take the role of two or more Makuta engaging in what one might call a “Rahi-off”: A showdown where they aim to have Rahi of their creation become dominant in the ecosystem of a certain area.
Now I will say in advance there’s not all that much depth to this yet – I’m obviously less immersed in the board game space than in the card game one, and also ran out of time before I could really start doing the research I’d need to do this properly. But I believe there are still some interesting things to show off, and maybe I’ll come back to build on them one day.
Game Elements
The Board
The field on which the game is played represents the setting of the Makuta’s showdown, perhaps some part of the Southern Continent or a remote island. In any case, it is divided up into multiple individual Zones, each of which has the following properties.
- Biome: Dictates which Rahi will thrive in this Zone, as well as what resources players can obtain from it. A wide variety of Biomes is possible, but they all belong to one of the three categories Land, Sea, or Mixed.
- Capacity: A fixed number of slots that can be filled with different Rahi species. Different population levels within each slot are represented by printed markers that also provide information on population growth.
- Point of Interest (PoI): Randomly distributed across the Zones at the start of the game. Different PoIs (Makuta Lab, Protodermis Pool, Matoran Village, …) have different effects that may positively or negatively affect Rahi and players.
A player is said to control a Zone if the total population of their Rahi within that Zone is strictly greater than every other player’s. In all other cases, the Zone is considered unassigned.
The Points of Interest, represented by something like small tokens at the center of the respective Zone, start the game face-down (with the exception of the Makuta Labs, of which there is one per player) and are flipped face-up once a player takes control of the Zone. It remains that way even if control of the Zone changes or it becomes unassigned later.
Resources
In a game of Rahi-making, the relevant resources are obviously going to be the ones used to make Rahi: Viruses and Liquid Protodermis. I imagine the latter would generally be a static reserve that is not meaningfully depleted with use, so it is only subtly represented as a limit on how many Rahi you can create in a round – a limit that may increase while holding Protodermis Pool PoIs.
That leaves Viruses as the main resource you gather and spend over the course of the game. Physically, they’d be represented by little orbs or cubes or whatever-hedrons in different colors. Mechanically, their main purpose is being mixed and matched into different recipes of Rahi creation, so a color is really the only property they need. Each Rahi lists a combination of Virus colors required to create it, and players periodically gain Viruses whose colors are determined by factors like their controlled Biomes, their Rahi, and a bit of randomness to keep things fresh.
Rahi
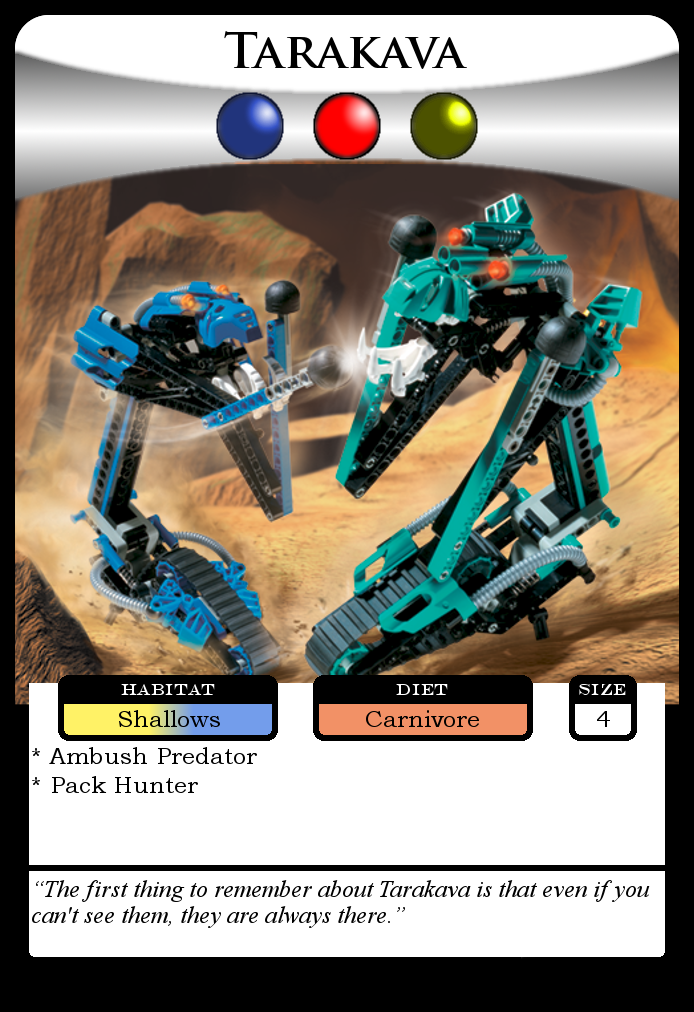
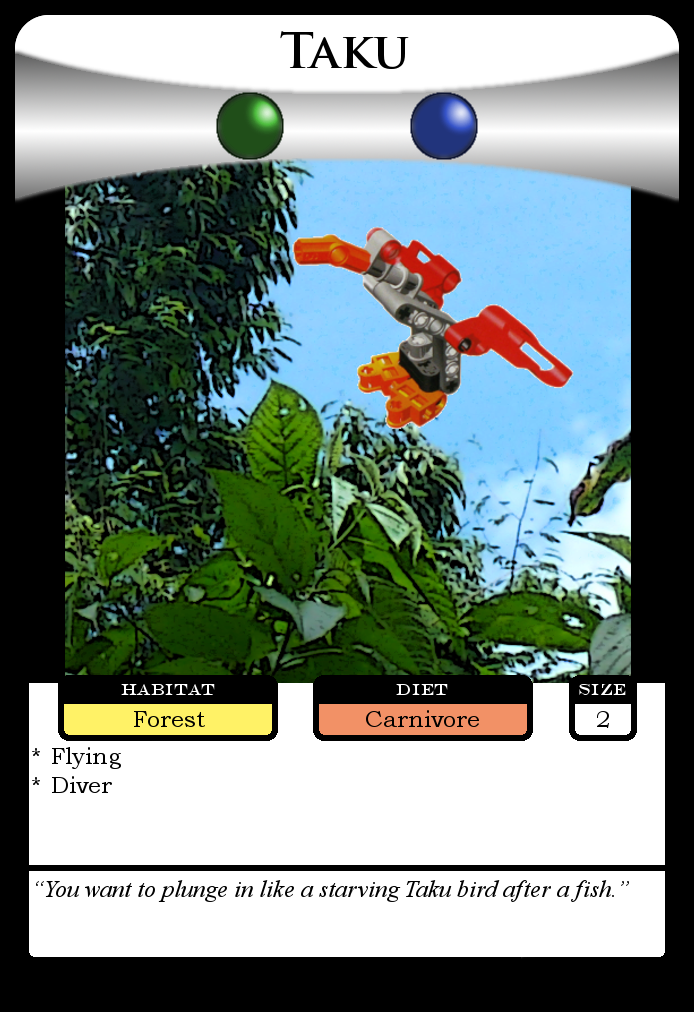
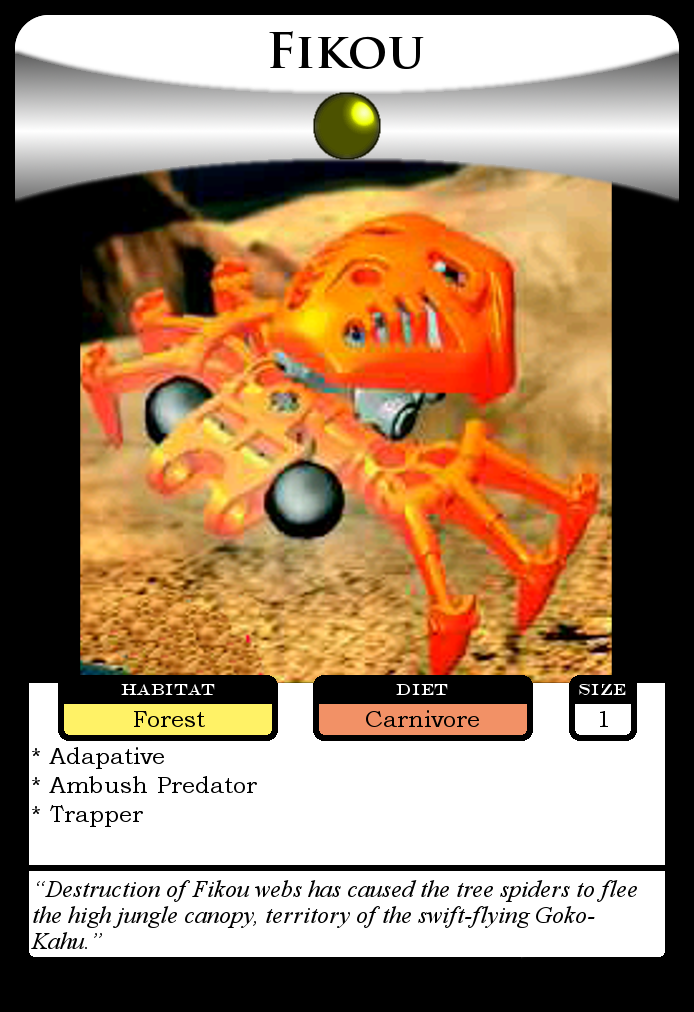
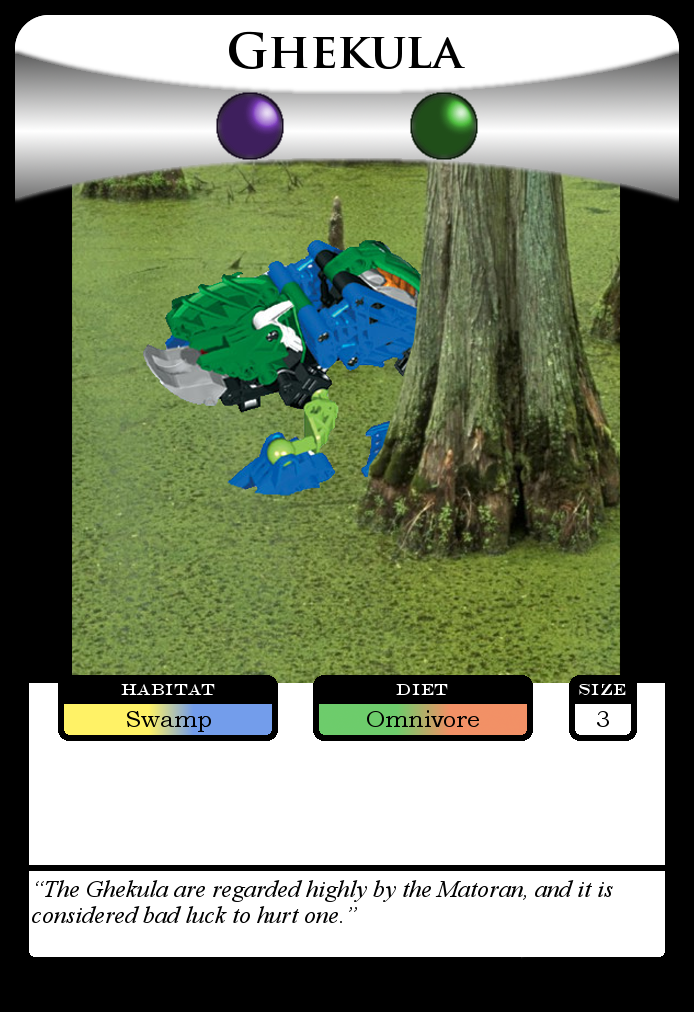
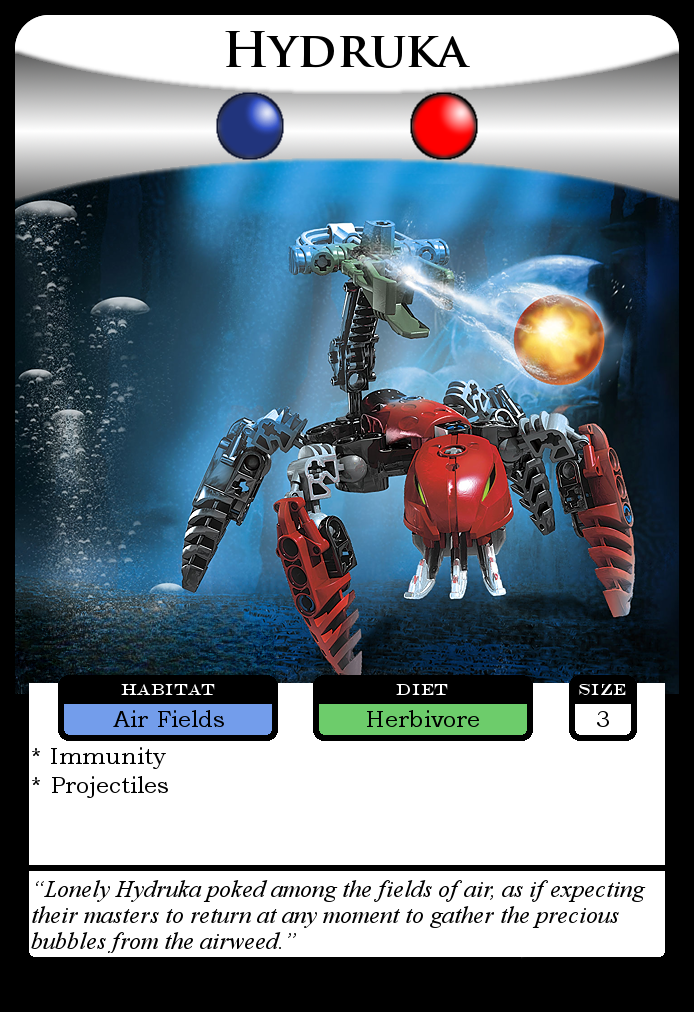
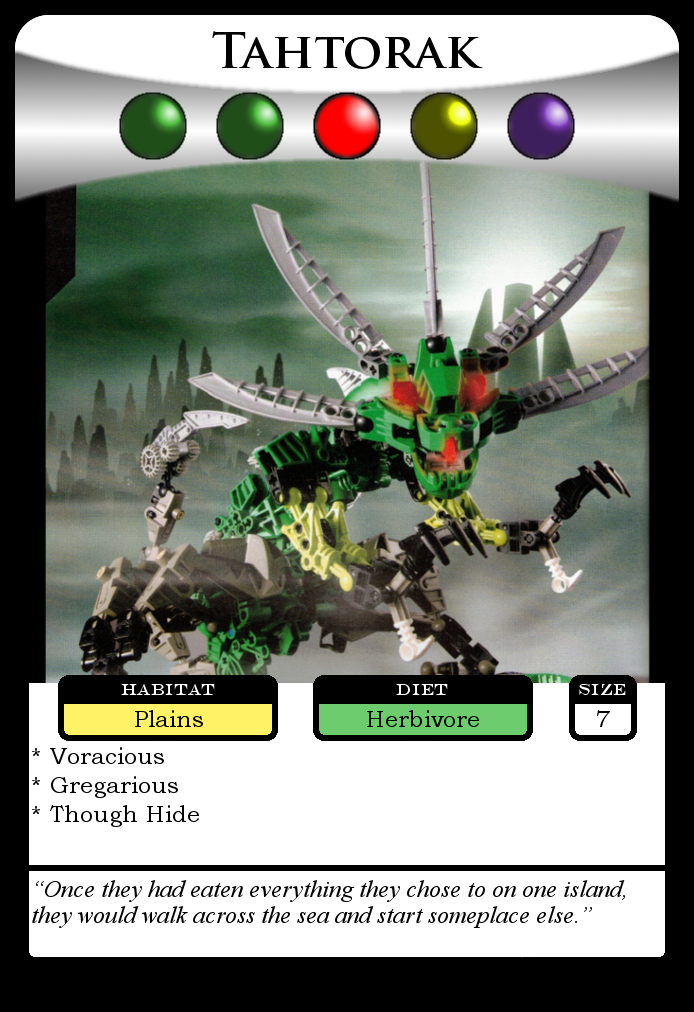
Now here lies the main focus and complexity of the game. A Rahi, or rather a Rahi species, is represented by a card that lists several pieces of information.
- Recipe: The combination of Virus colors needed to create this Rahi.
- Habitat: The Biome in which the Rahi lives. The mechanics of this follow four simple rules:
- Rahi whose Habitat is a Land Biome cannot be played into a Sea Biome.
- Rahi whose Habitat is a Sea Biome cannot be played into a Land Biome.
- Rahi whose Habitat is a Mixed Biome can only be played into Mixed Biomes – they need both Land and Water to survive, basically.
- Being in a Biome that exactly matches the Habitat, not just its category, grants some additional bonus.
- Diet: Provides the baseline of how the Rahi’s population in a Zone develops over the rounds. Herbivores experience a fixed amount of growth depending only on their location and population level, Carnivores grow by “stealing” population from other Rahi in their Zone, and Omnivores can mix these two sources, but gain less from each alone than the pure Diet types.
- Size: A number that mainly plays into carnivorous population growth – wouldn’t make sense to have giant beasts be the prey of tiny critters, after all.
- Traits: An assortment of standard keywords that describe in more detail how a Rahi lives, feeds, and grows. Stuff like Flying, Poison, Ambush Predator, and so on would go here. I’d like to keep this to a level of complexity where you just need a reference page in the rulebook to figure it all out.
The Rahi card can basically be considered the blueprint of the species and always remains with the player. The actual physical Rahi populations only come into being once the blueprint is realized by investing Viruses according to its Recipe, and are separately represented by a little plastic stand (colored depending on the player) in which you place a token identifying the Rahi species.

Such an assembled playing piece is then placed into a free slot on the chosen zone, in the lowest so-called population level. Round by round, the combination of Biome matchups, feeding, and traits is used to calculate a population change in each species, and the piece moves up and down the levels on the board accordingly. If a population hits zero, it’s considered extinct and removed from the Zone entirely.
Now the details of all this involve, ugh, numbers, and so haven’t been worked out at all. I do get the impression it may just end up ludicrously complicated no matter how we slice it, but hey, nothing wrong with a game that appeals only to Ecologists and Mathematicians.
Sample Rahi cards:
Makuta
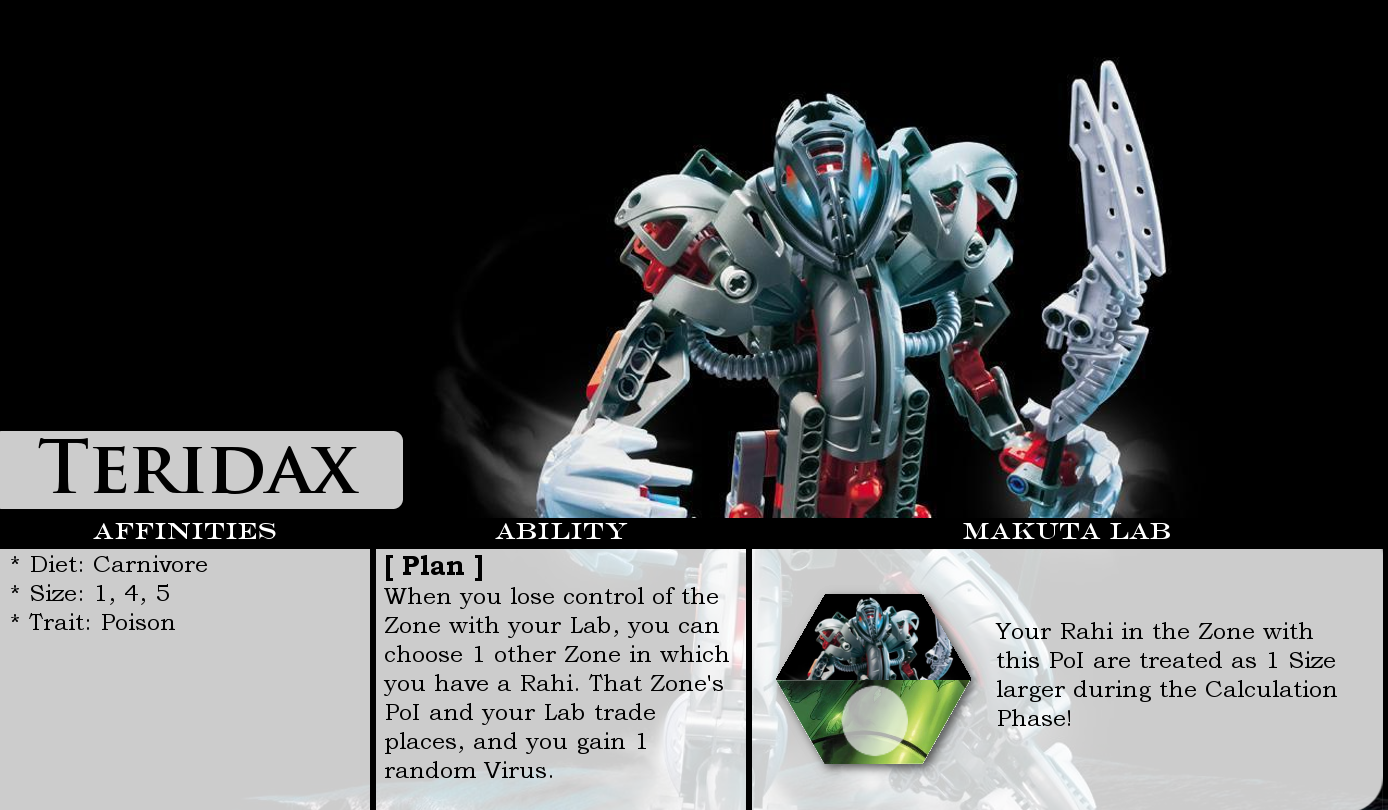
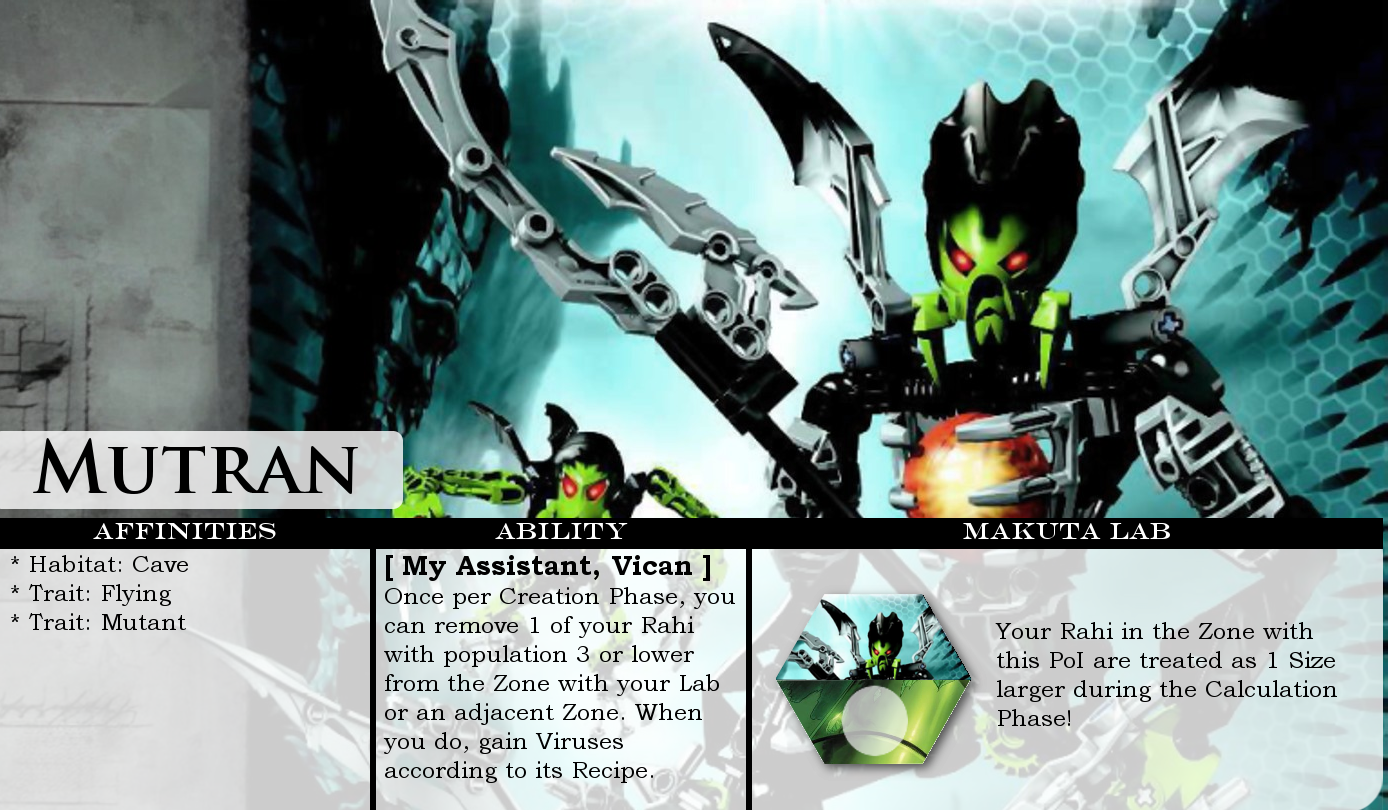
Finally, each player takes the role of a different Makuta, also represented in the form of a card. In this case, though, there are only two key properties to consider.
- Affinities: Some combination of Biomes, Diets, Size ranges, and/or trait keywords. When creating a Rahi featuring any of those listed, the Makuta is allowed to substitute one Virus listed on the Recipe with one of any other color.
- Ability: A unique effect that the Makuta can apply when certain conditions are fulfilled. Unlike the fixed ability keywords of Rahi, this can be just about anything and is described as text on the card.
Each Makuta also comes with a unique Makuta Lab PoI, which is placed face-up in a Zone by that Makuta’s player at the start of the game and gives only that player a certain bonus to any population calculations happening in that Zone.
Sample Makuta cards:
How to Play
Or, well, as much of an outline of it as I’ve figured out at this point. It’s not exactly an instruction manual.
Setup
Each player selects a Makuta and takes the respective card, as well as the PoI token for that Makuta’s Lab. Place the board on the table, and have each player (in turn order) pick a Zone where they put their Lab, along with a plastic stand in their chosen color (so you can easily tell who has which). It might even make sense to have the Zones be individual board segments that you connect together, so the greater number of Labs with more players can be accounted for using a greater number of Zones.
In any case, once the Labs are placed, add random face-down PoI tokens to the remaining Zones. Shuffle the Rahi cards and form a deck that is also placed on the table. Admittedly, with almost 200 Rahi species, this could end up physically difficult if you’re playing with the full set, but maybe it makes sense to have multiple decks anyway – to ensure more demanding Recipes only appear late in the game, for example.
Finally, each player gets a starting stock of Viruses – something like one of each color, I guess.
Research Phase
This is where blueprints are acquired from the shared deck, one way or another. A lot of fun options like drafting and trading come to mind here, but for this loose description let’s just keep it simple and do the following: Players take turns picking up 3 cards from the top of the deck. They choose one to take, one to place back on the top, and one to place on the bottom. Once every player has done so and thus taken a card, the research phase is complete.
Creation Phase
Players again take turns to create Rahi from a blueprint they have, using Viruses as per the Recipe. They select one of the Zones where they have either their Lab or a population of Rahi, and place a piece (plastic stand + cardboard token) representing the new population into the lowest population level of an empty slot in that Zone. A player may also pass, either voluntarily or for lack of Viruses matching their blueprints.
The creation phase ends once all players have exhausted their maximum creation count – one by default – or passed.
Calculation Phase
This is where you all put your heads together, grab pen and paper, and figure out the population change for every Rahi in every Zone. Most likely some kind of helper sheet should be provided for this purpose.
After all calculations are done and the positions of the Rahi pieces have been updated to reflect the new populations, the calculation phase ends.
Migration Phase
Optionally, players now have the opportunity to split off part of the population of any Rahi species past a certain threshold into an adjacent Zone, putting together and placing a new Rahi piece in the process. This is crucial because it’s how you spread your reach and ultimately approach victory, but since it requires a fair amount of population gain first, activity in the migration phase only really starts a couple of rounds into the game.
Additionally, it could be useful to also have the option to entirely migrate a species, taking its whole population (no matter its size) and shifting it over to an adjacent Zone. This could be used to escape predators, for example. However, we don’t want Rahi zipping all over the map in an endless migration phase, so if we have this mechanic, it should only be once per player and round.
It’s worth nothing that, as it currently stands, this is the only part of the game where a player can actually gain control of an unassigned Zone. Do remember to flip up the appropriate PoI when that happens – its effects will begin applying immediately!
Once no further movements are possible or all players have passed, the migration phase ends.
Extraction Phase
Players obtain fresh Viruses, their colors distributed as per the latest board state. The details are left as an exercise to the reader, but I imagine you could assign colors to Biomes and then distribute Viruses based on the players’ controlled zones, or something with Rahi properties, or have them blindly pick out of a mixed bag. Maybe some combination of those.
Once everyone is stocked up and ready, return to the Research Phase for the next round.
Now you might say it doesn’t look like I have any idea when this game would end, and you would be totally correct. Let’s just say that at some point, perhaps simply after X rounds, the terrible cycle above will have to be broken, and the player who controls the most Zones at that point is crowned the victor of the Rahi-off – the Rahi Overlord, if you will.